Learning Groups
A Learning Group is to create independent teams that enable Admins to deliver targeted learning.
Example: If a training program is planned at the manager-level users across different groups, then Admin can create a Learning Group, add these managers to the group, and assign specific courses and training materials. This approach helps to manage periodic training for managers, ensuring that the training materials are relevant only to them and not to other employees.
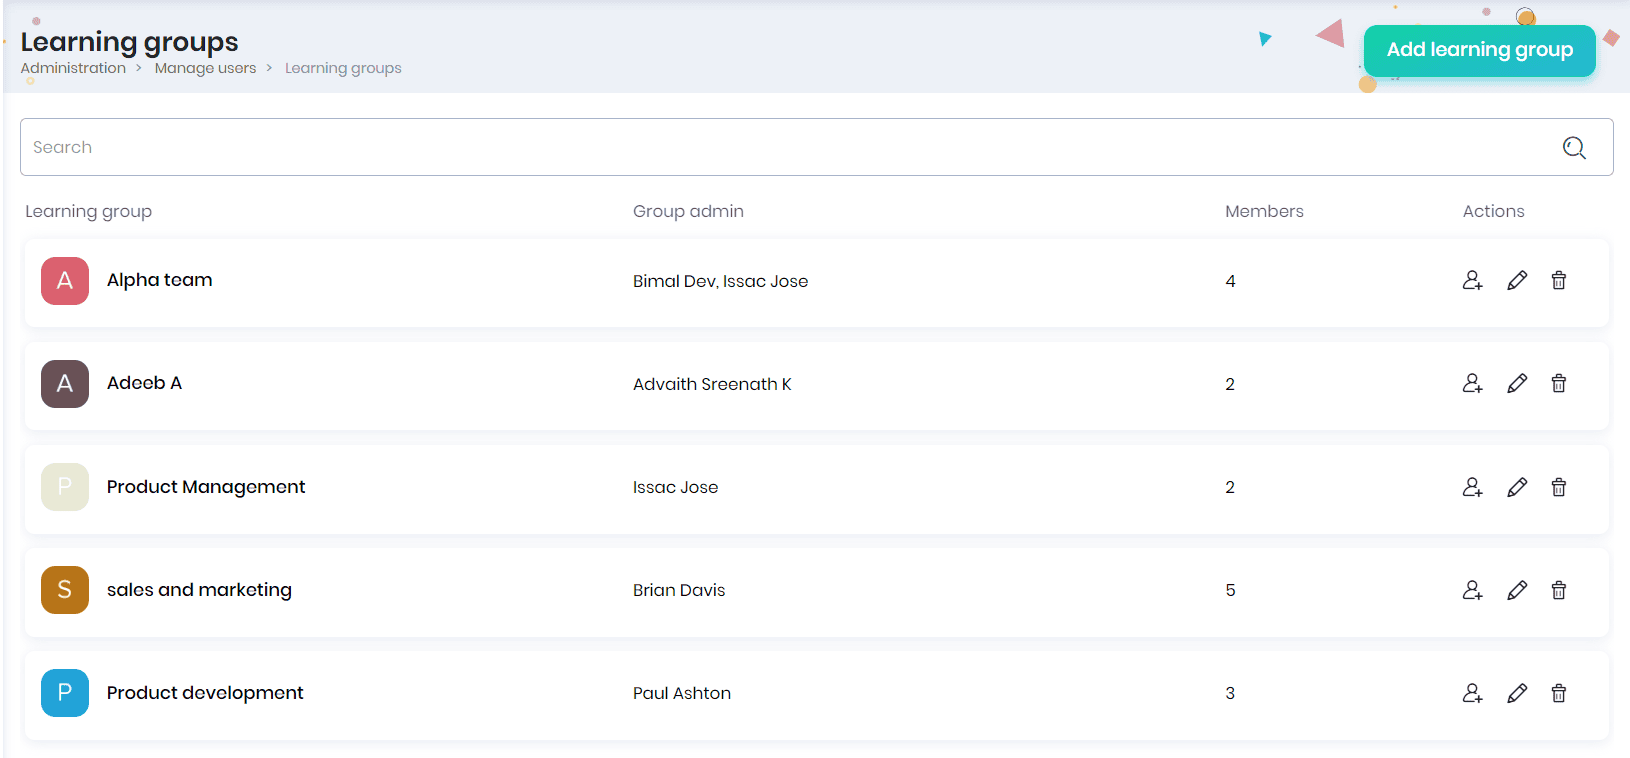
Adding a Learning Group
- Click on the Add Learning Group button to create a new learning group.
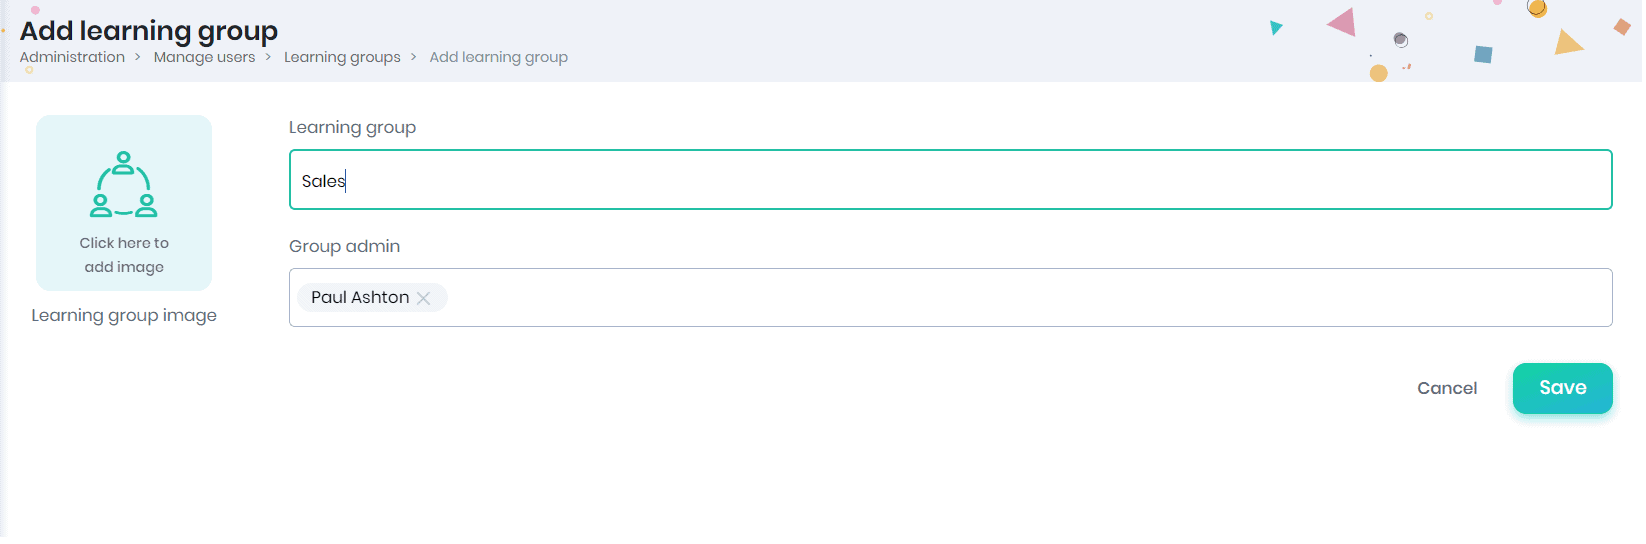
- Enter the learning group name, learning group admin, image of the learning group and click on the Save button.
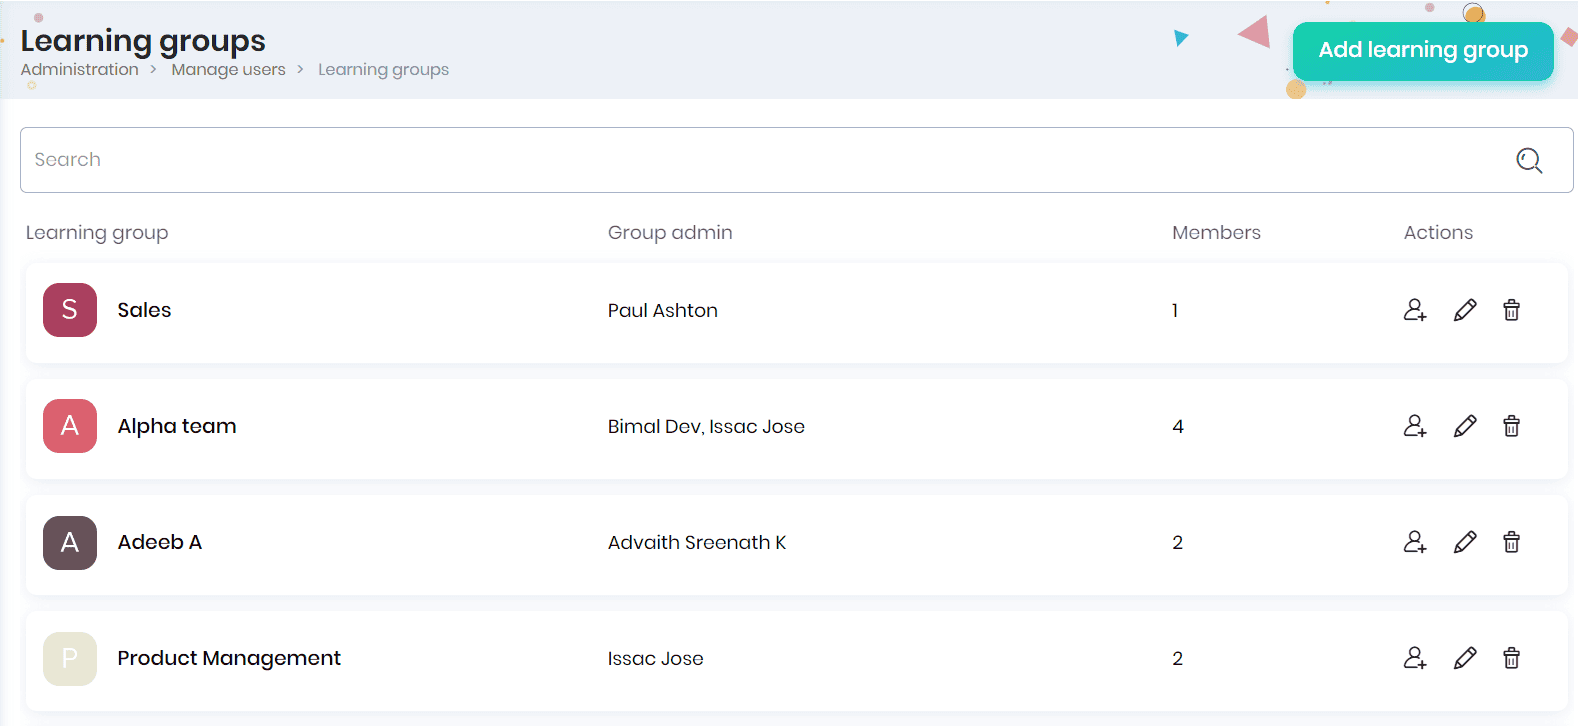
- The learning groups created will be listed in the Learning groups page.
- You can view the learning group details such as name, learning group head, number of members in the learning group, and actions.
- You can search the learning groups with their name using the Search option.
- Click on the learning group name to view the members, course enrollments and learning path enrollments.
Adding members to the learning group
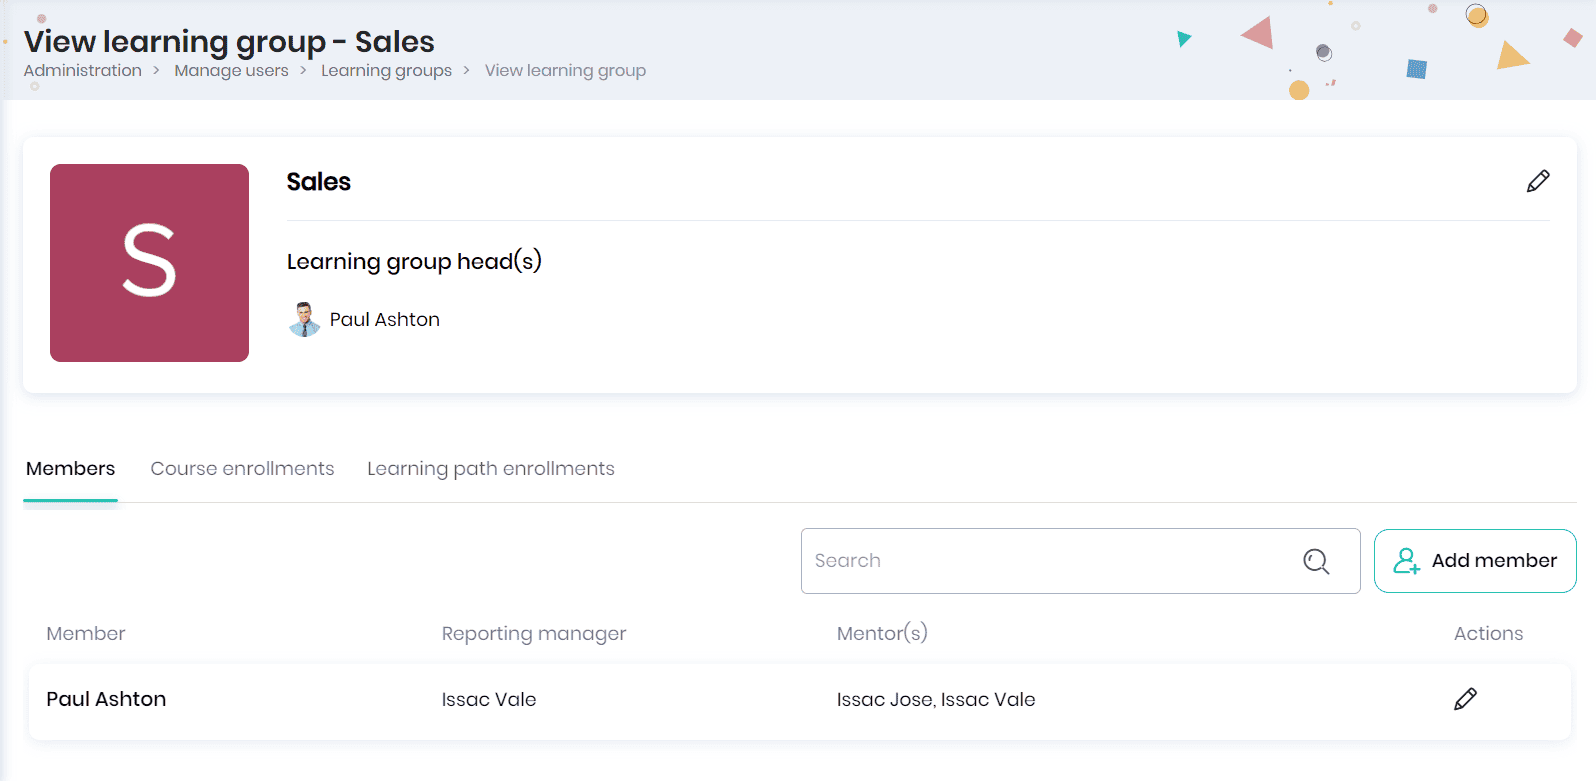
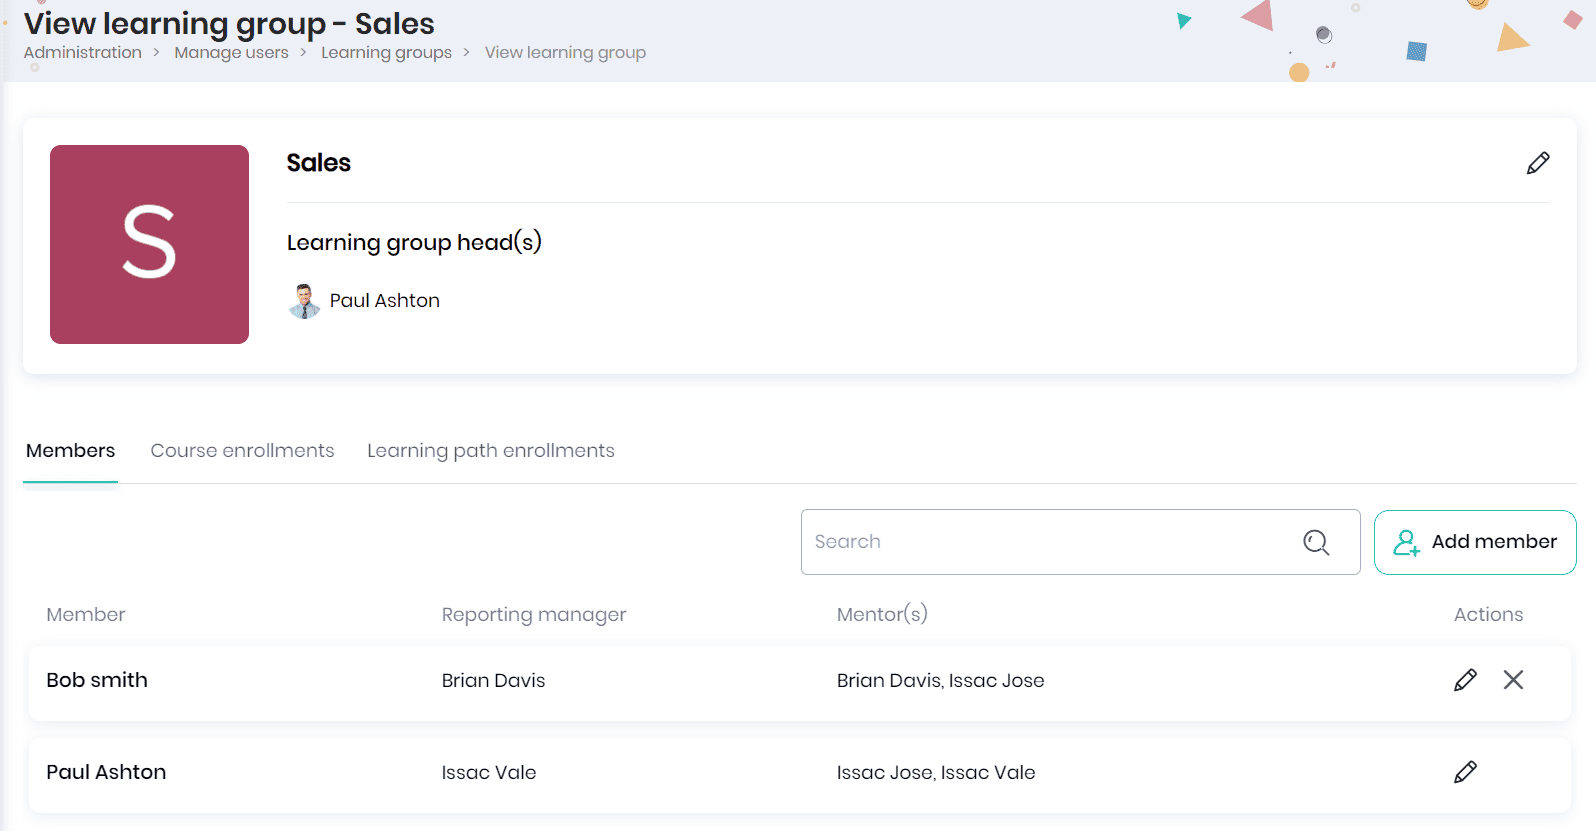
- In the Members tab, you can add members to the learning group. You can view the member name, reporting manager, mentors and actions that can be performed.
Note: You may add the members from the groups and subgroups you manage.
- Click on the Add member button to add new members to the learning group. Select the users and click on the Add to learning group button.
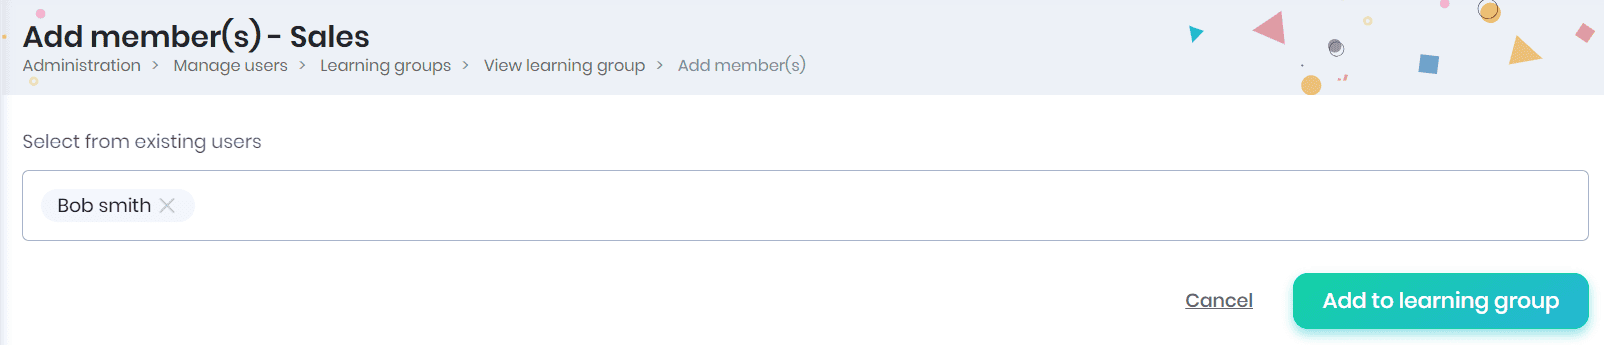
- The members added will be displayed in the ‘Members’ tab.
Bulk Import of members to the learning groups
You can quickly add multiple members to a Learning Group at once by importing a CSV file containing their email addresses.
Note: Ensure that all members listed in your CSV file already have registered accounts in the application.
- Click on the Learning Group
- Click on the Members tab and the Import Members button
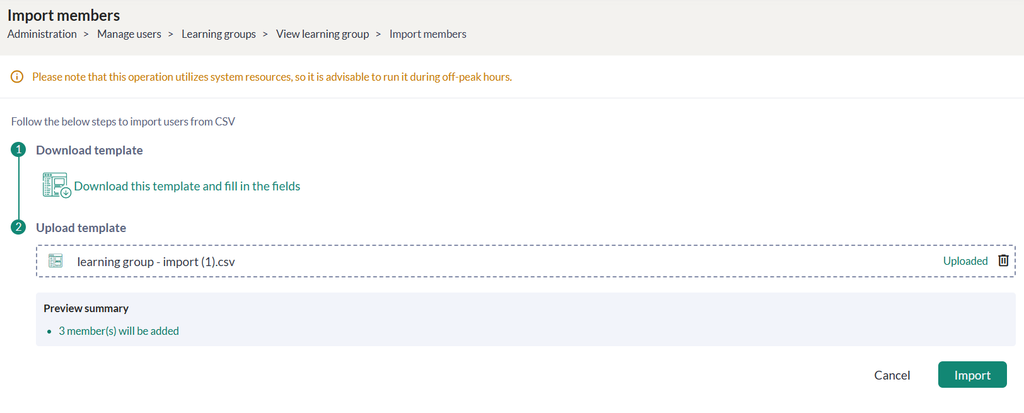
- In the Import Members page, download a sample template
- Fill in the Serial number and email id of the registered user
- Upload it back into the system to start the import process.
After importing the file, the system will validate it and display the number of members to be added, the number to be modified, and any errors found. This information will be shown to the admin, who will have the option to download the error report and fix any errors before re-importing the file.
The bulk import is processed as a background job, it may take some time to complete. Once completed, an email report will be sent to the admin with the status of the bulk import action.
Choose Yes In the ‘Send activation email to new users upon account creation’ field, Click on the Import button.
Editing learning group
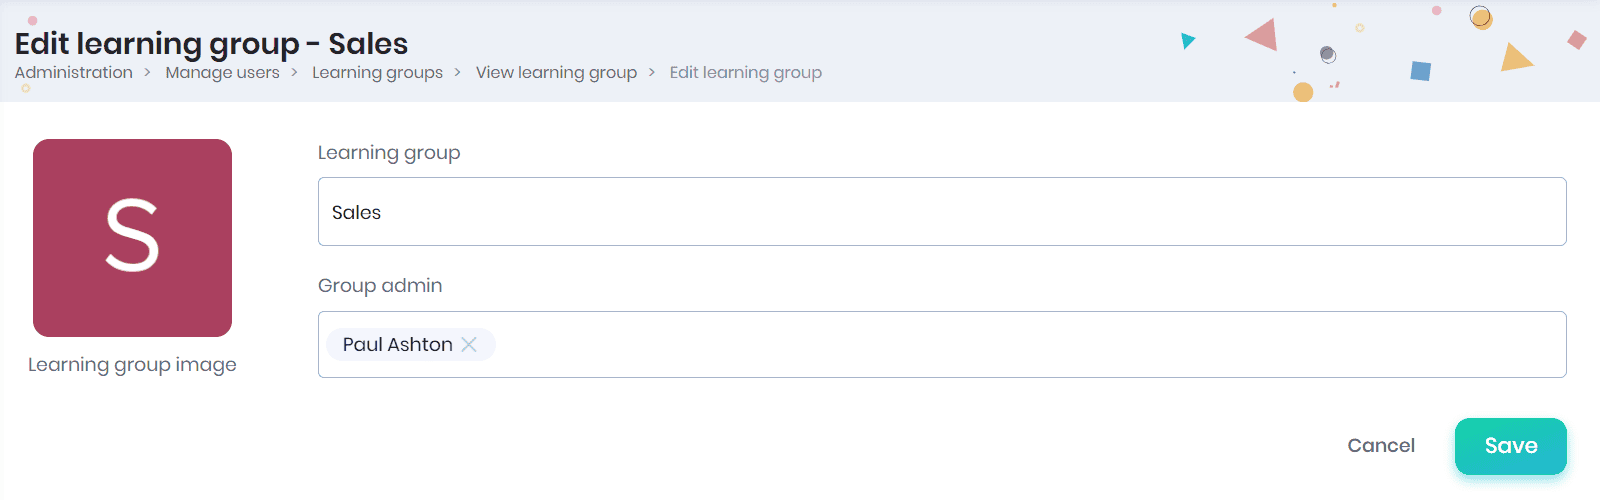
- Click on the Edit icon to edit the learning group details. You can edit the learning group name, learning group admin, learning group image and click on the Save button.
Editing member profile details
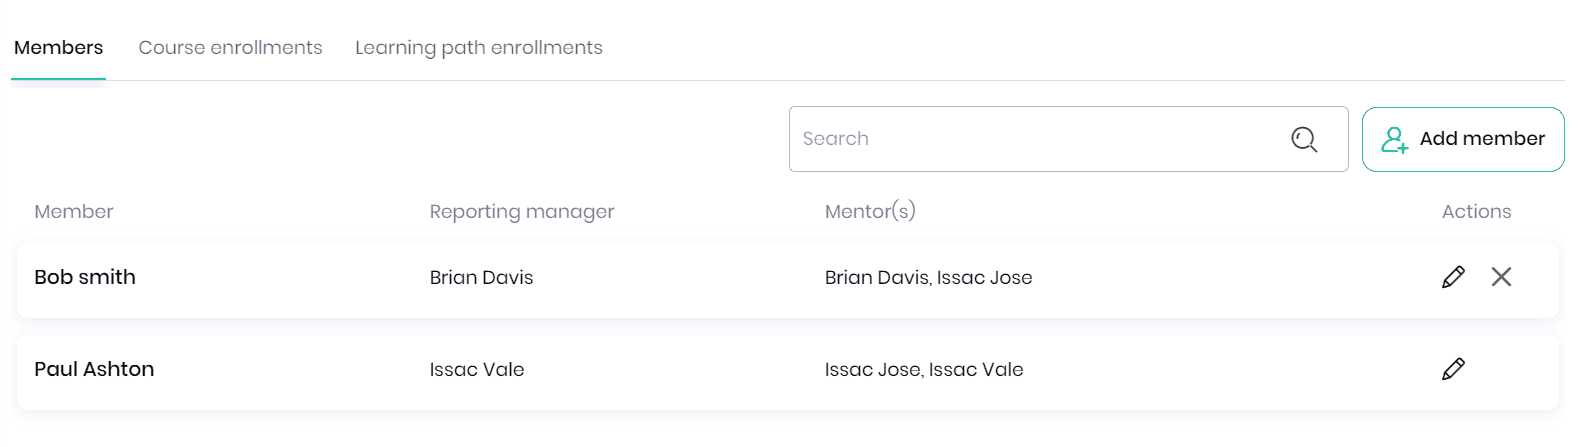
- You can click on the Edit icon to edit the member profile details. Click on the member to view the profile. Click on the Remove icon to remove the member from the learning group.
Assigning courses to the learning group
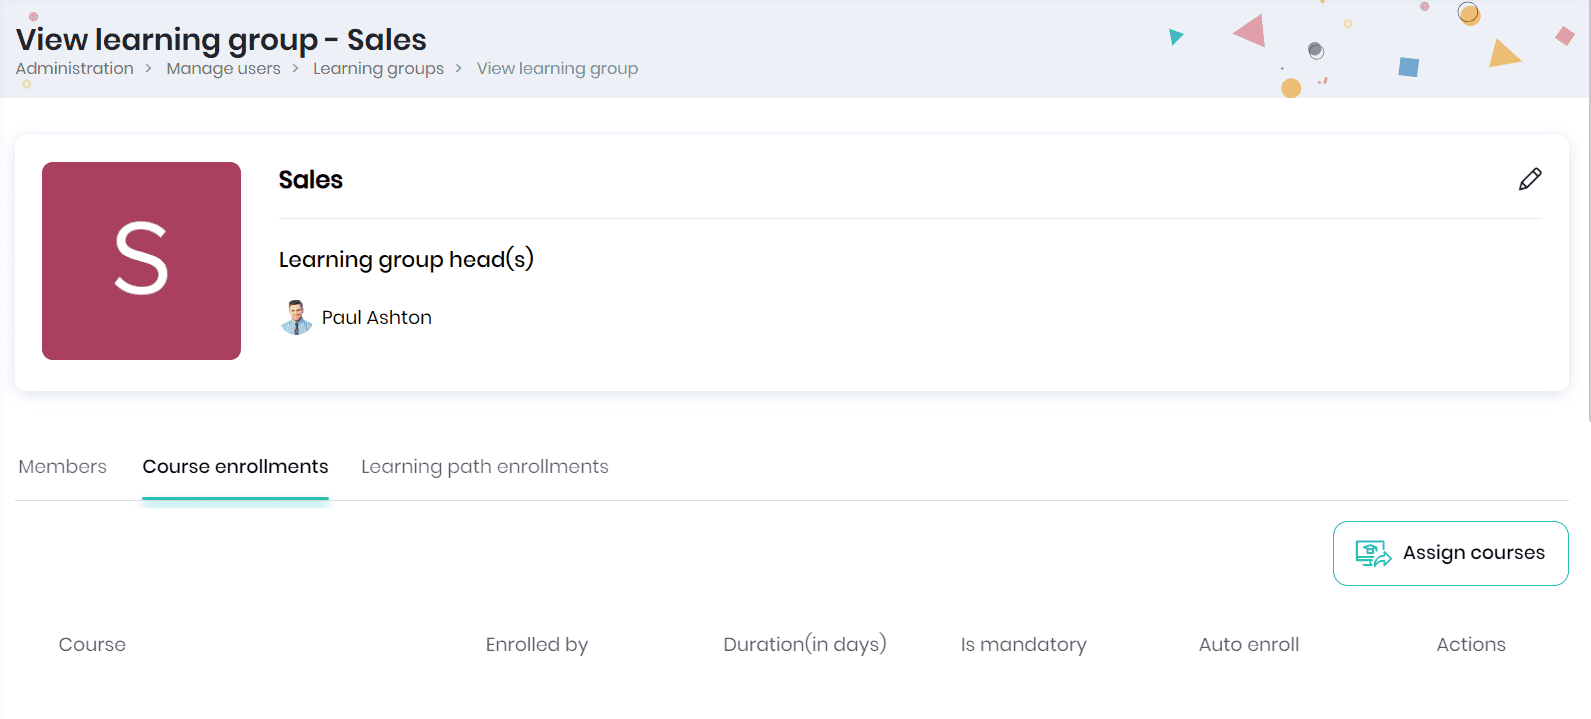
- Click on the Course Enrollments tab to view the courses assigned to the learning group.
- Click on the Assign courses button to assign courses to the learning group.
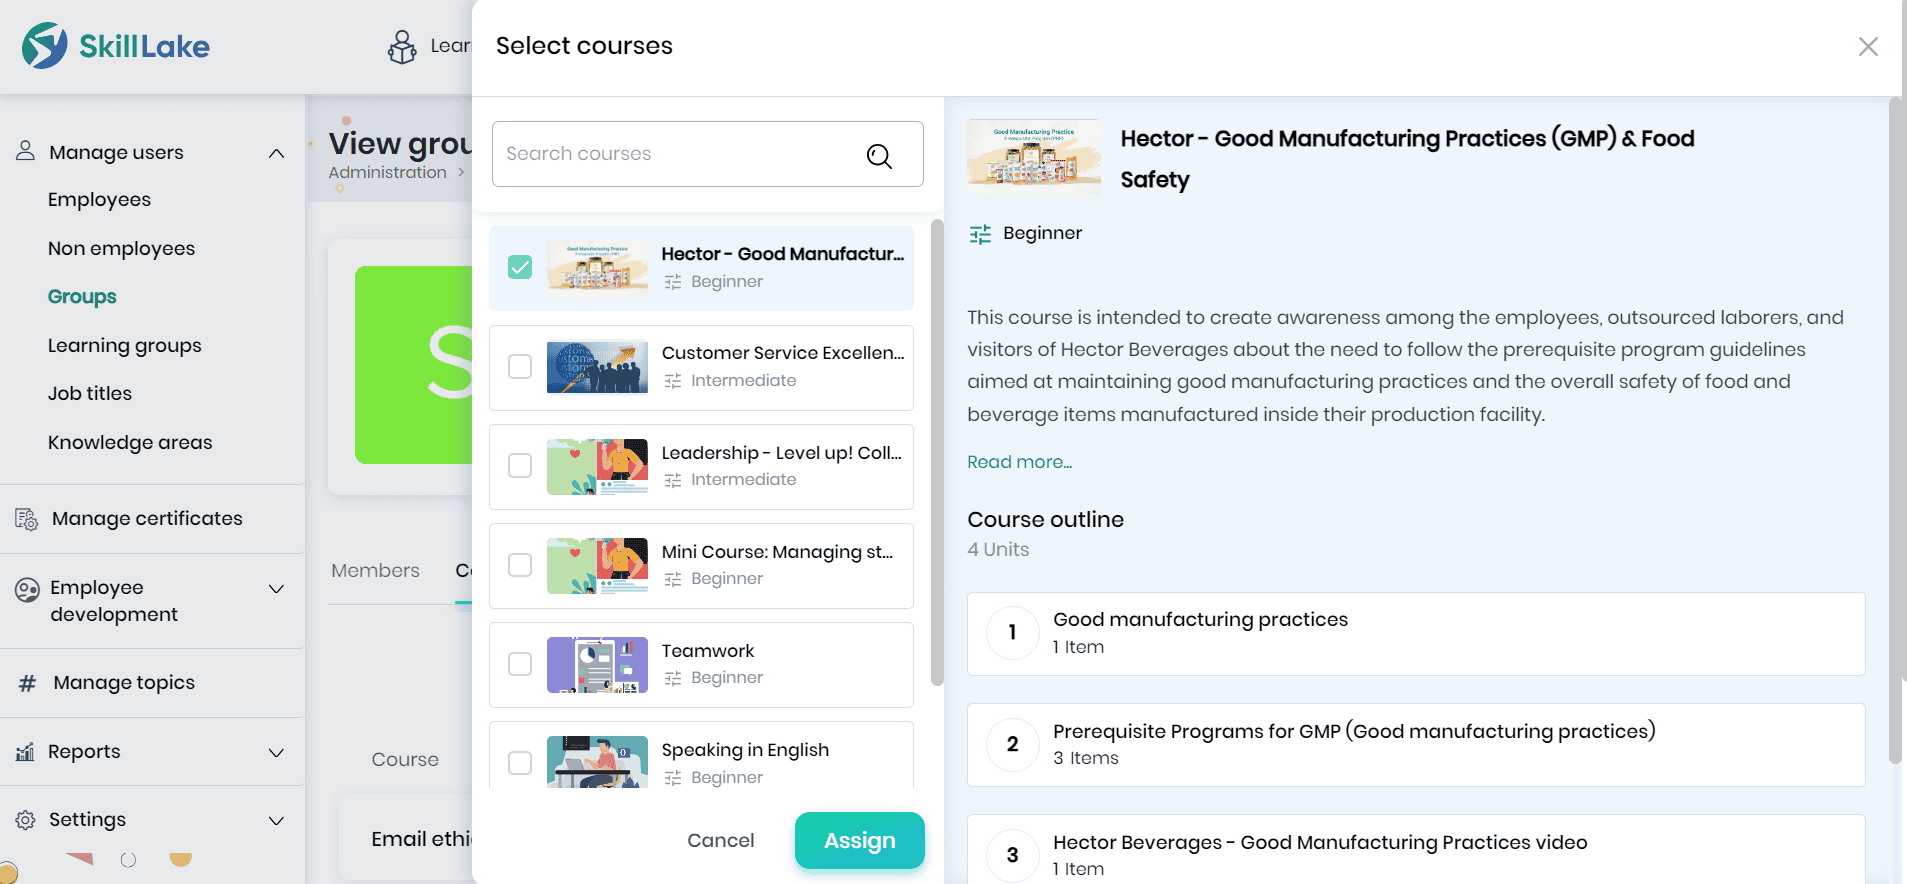
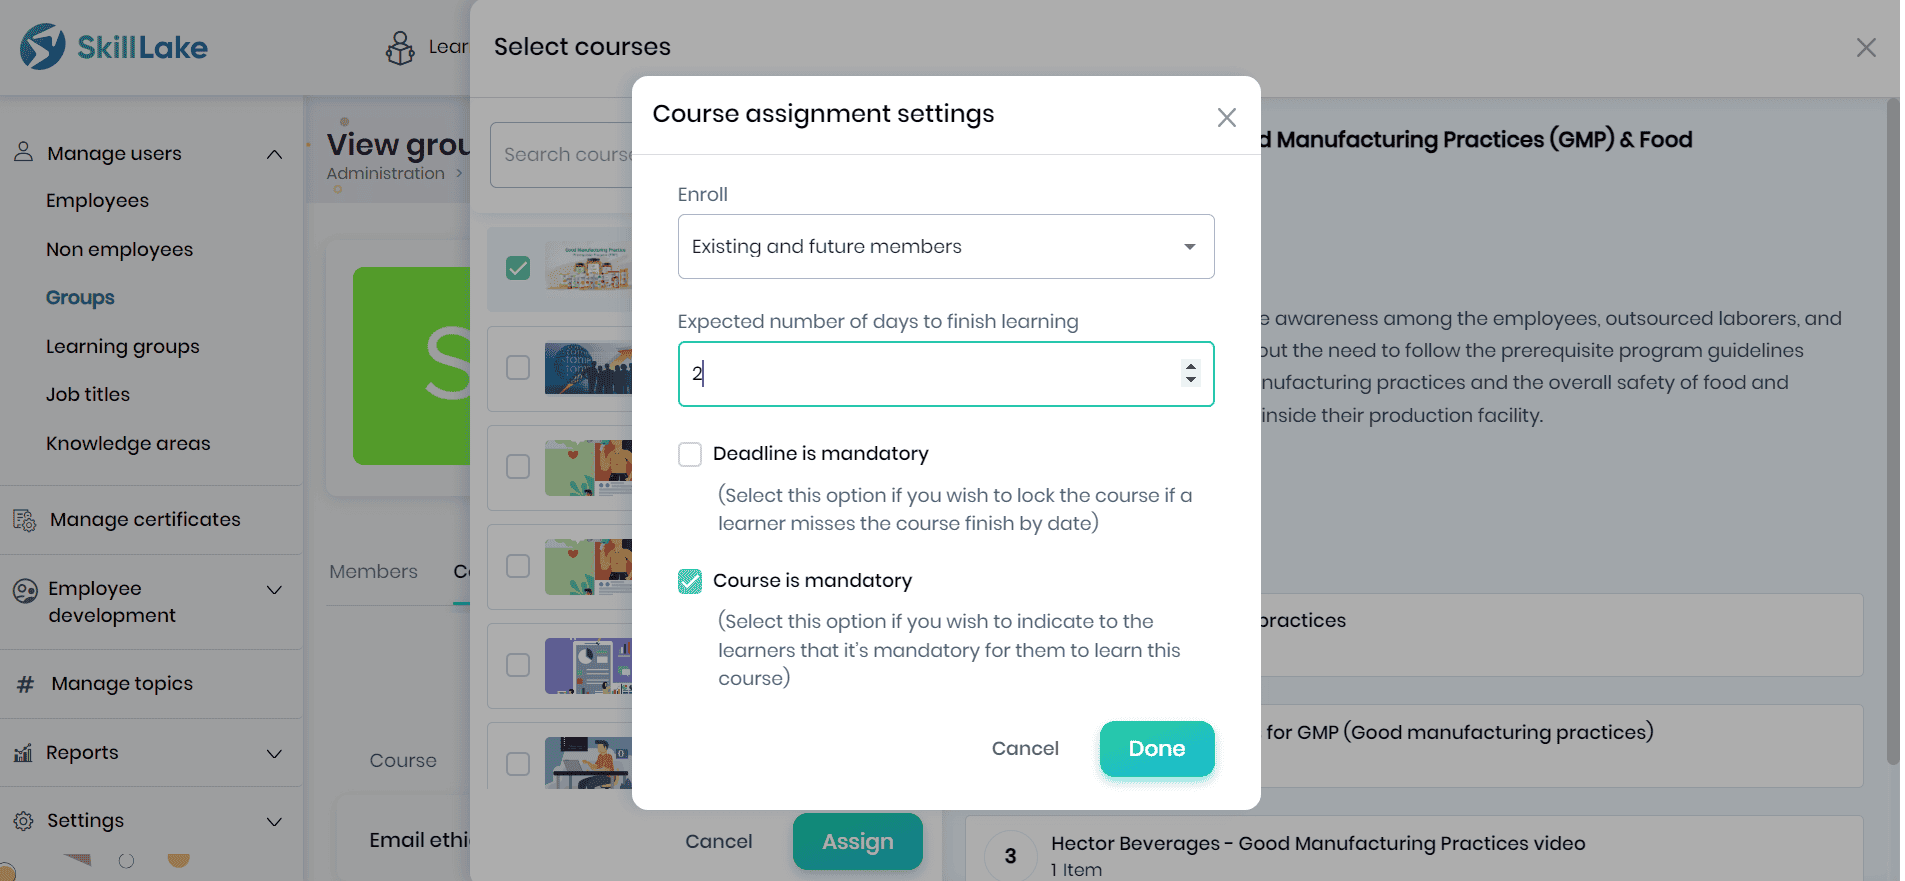
- After selecting the required courses, click on the Assign button to assign the selected course to the learning group. The Course assignment settings pop-up appears where you can configure the course assignment settings for the courses assigned to the group.
Assigning learning path
Click on the Learning path enrollments tab to assign a new learning path to this learning group.