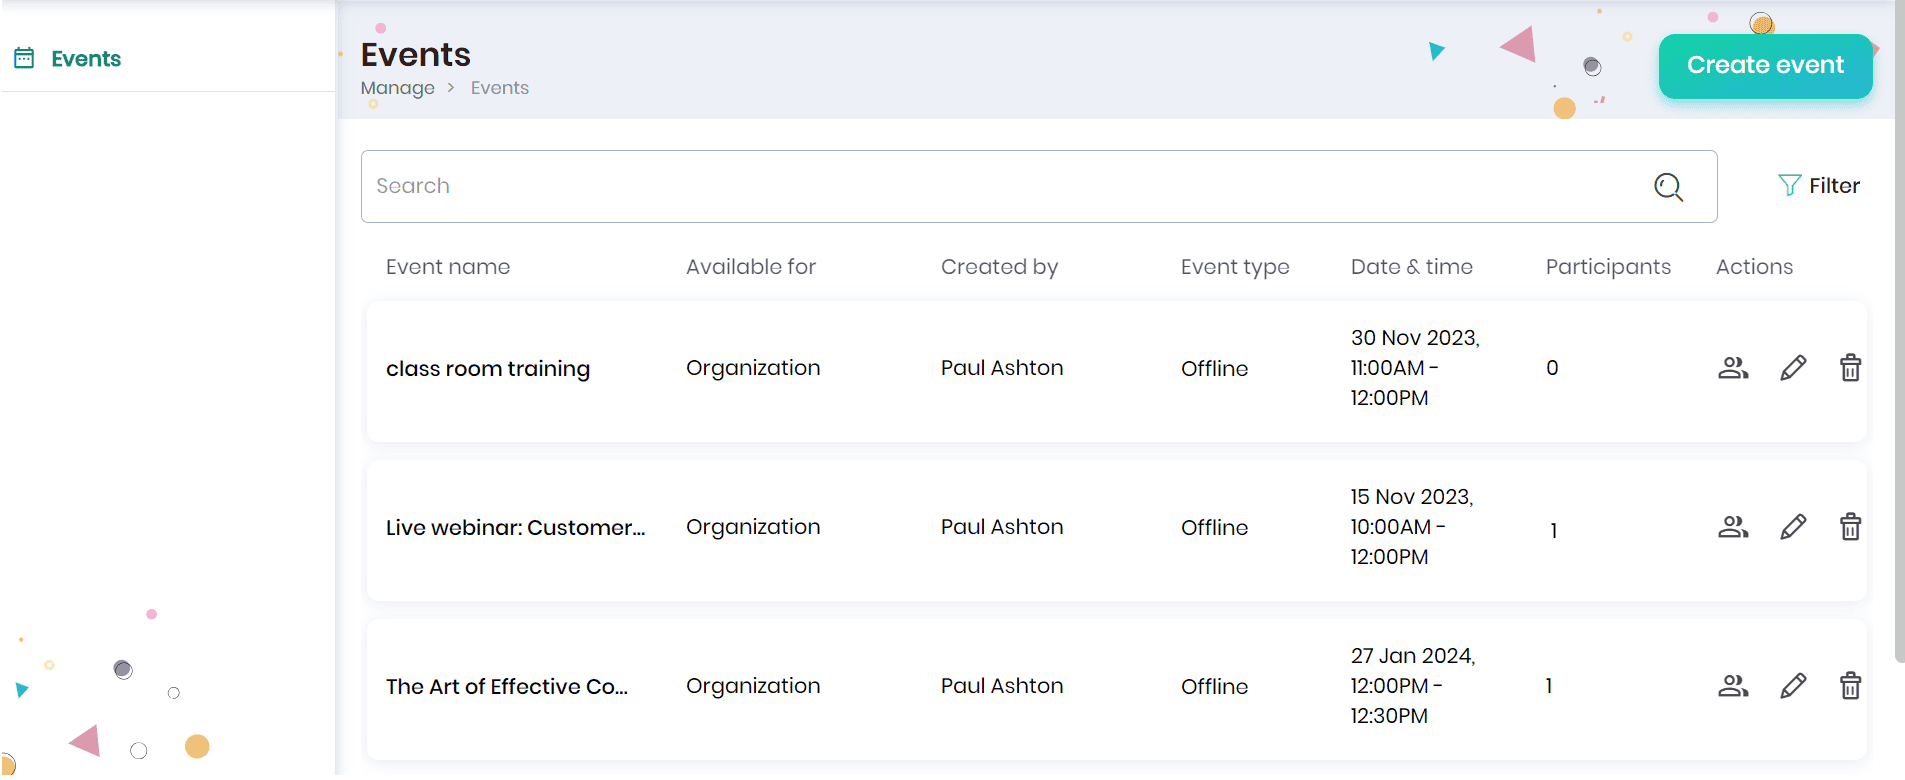
Creating Events
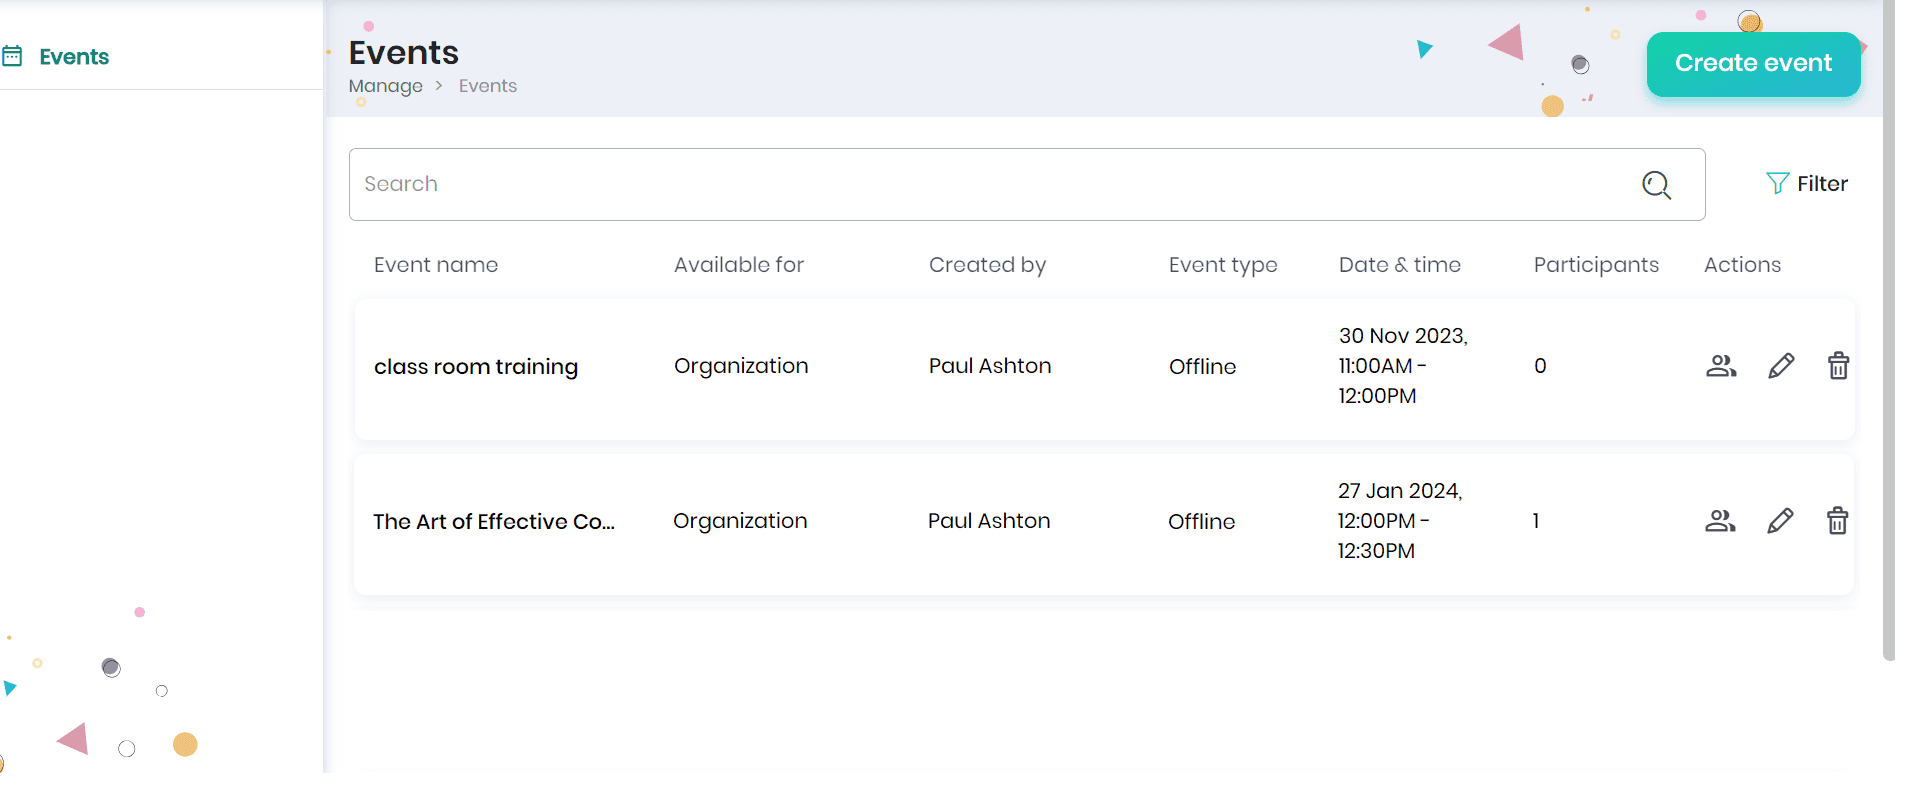
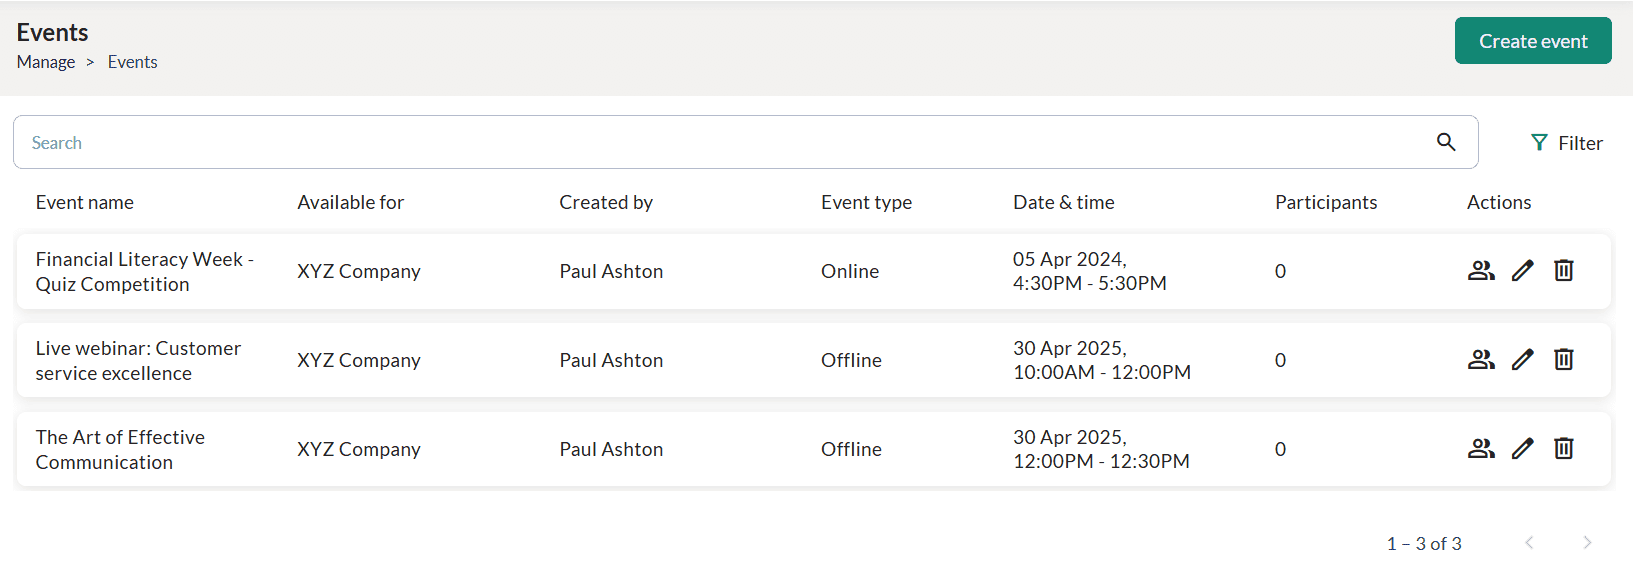
The Content Manager/Administrators (users with Administrative privileges) can create events for the upcoming trainings/sessions. Click the Manage tab and the Events option to view the events created. You can view the event name, available for, created by, event type, date and time of the upcoming event, number of participants registered for the events, and various actions that can be performed on this event. Searching for an event from the list of events displayed is also possible.
Note: Enable the ‘Reminder email before an event’ option from Administration > Settings > Notification Settings so that the event participants will receive an email notification before an event takes place.
Creating an Event
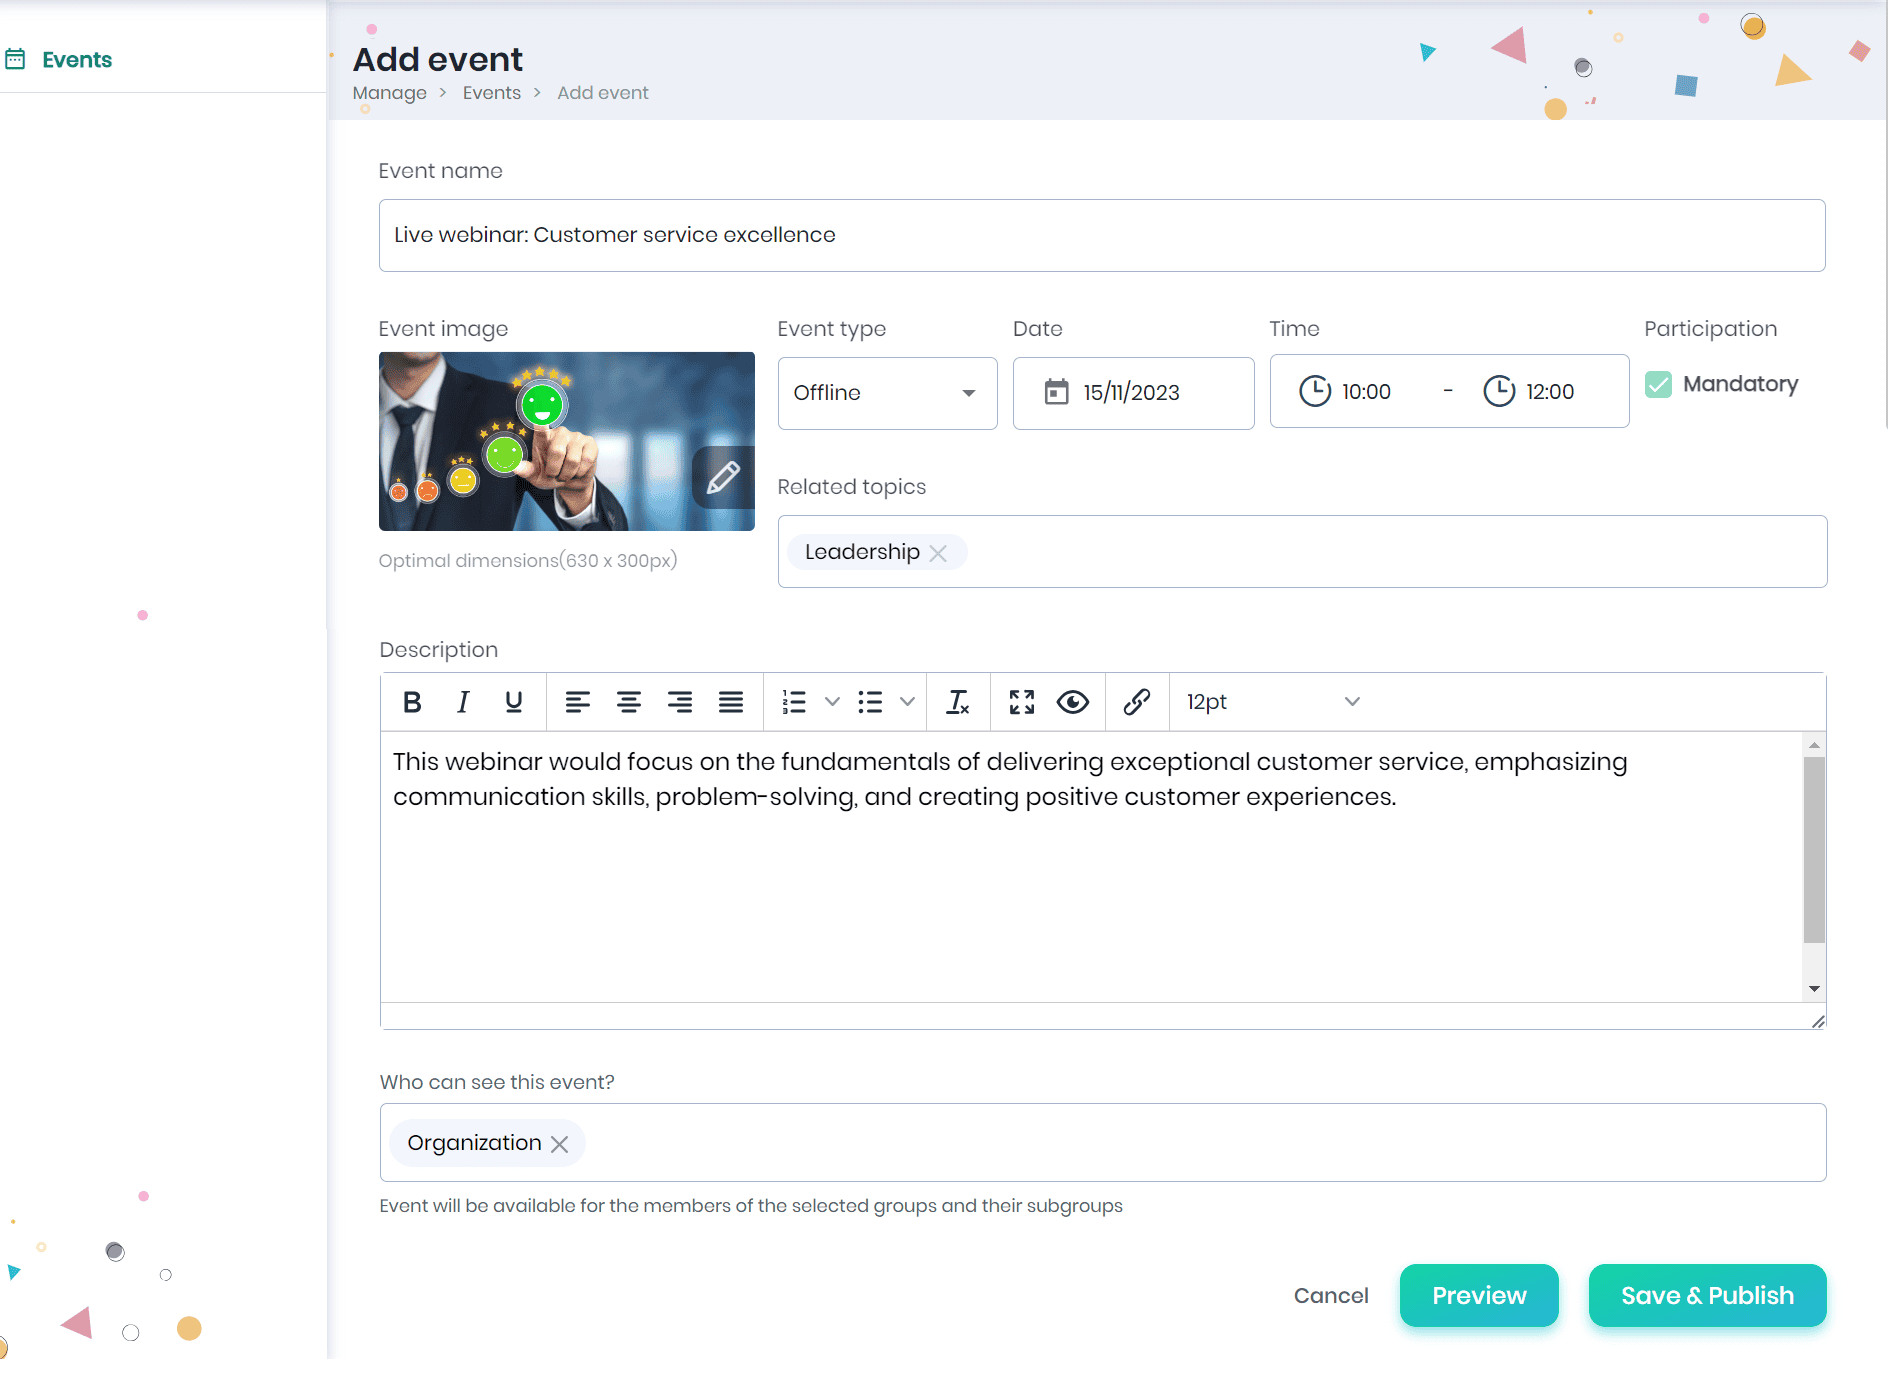
- Click on the Create Event button to create a new event.
- In the ‘Add event’ page, enter the event name, event image, event type, date and time, tags related to the event, and event description.
- Check if participation is mandatory for the event.
- Select the group/learning group/sub-group who can access the event.
- Click the Save & Publish button to save and publish the event on the Events page.
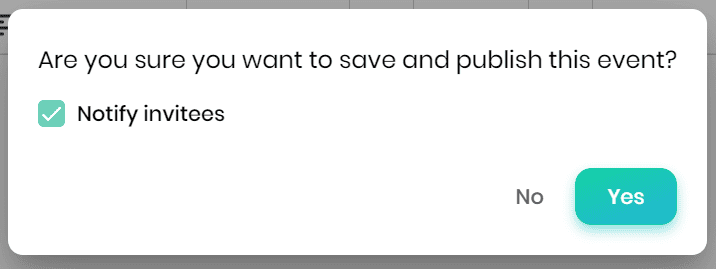
Note: Event invitations will be sent to everyone (in the group/sub-group who has access) at the moment. As the event manager (person who is creating the event) saves and publishes it, he/ she can select whether to notify everyone or not. If it is checked, everyone will get the invite.
- A confirmation message appears based on which you can notify the invitees.
- The events created will be displayed on the Events page.
Preview the event
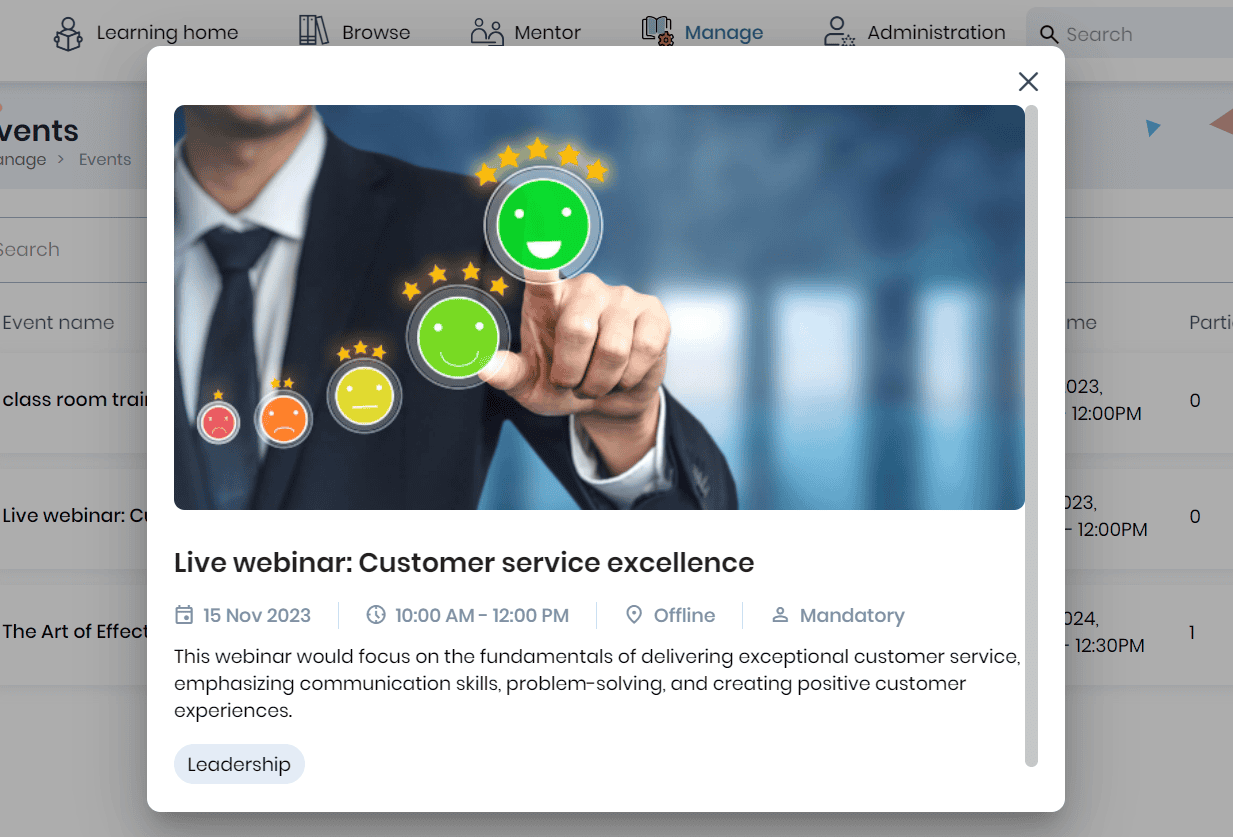
- Click on the event name to preview the event.
View and Add the event participants
Administrators or mentors can view and manage participants for an event directly from the event listing.
View Participants
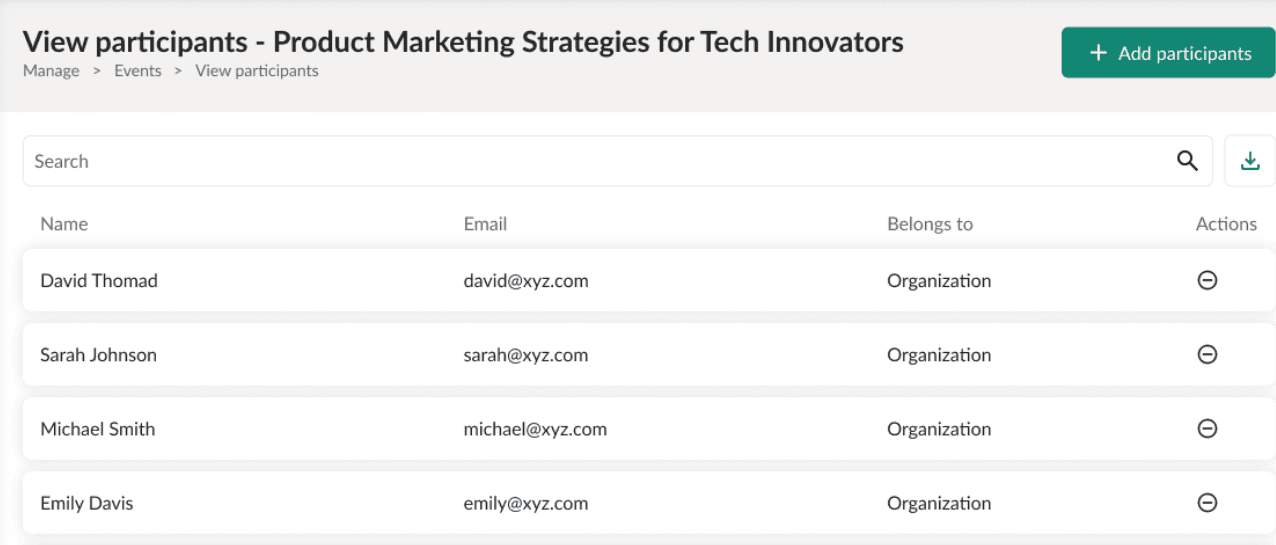
To view the list of registered participants:
- Click on the View Participants icon against the respective event to see the list of participants registered.
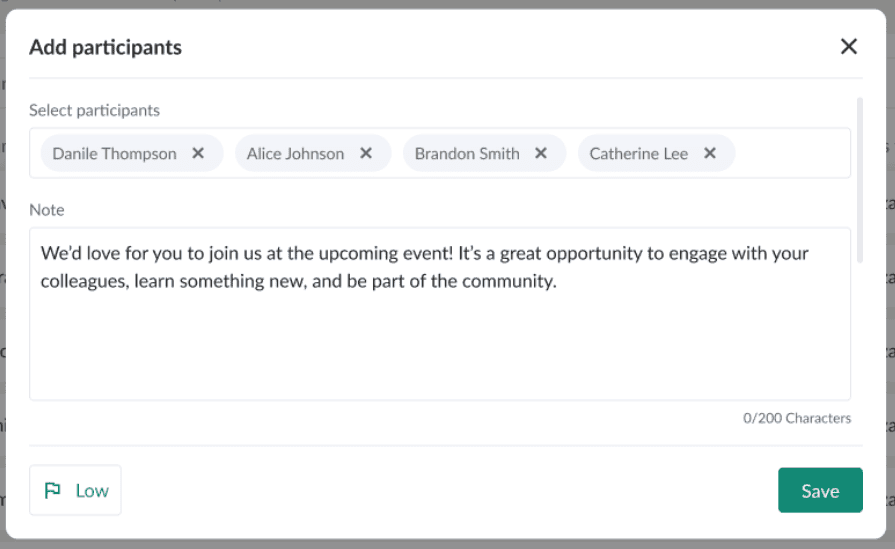
Add Participants
To add participants to the event:
- Click the Add participants button.
- In the Add participants pop-up:
- Select the participants you want to add to this event. Only the members of the group you manage have access to the event will be available for selection.
- Enter a note, if required
- Set the priority
- Click Save button
- The added participants will be displayed in the View Participants page.
Note:
- Learners will receive an email notification after being added and will be automatically registered for the event.
- The event will appear in the learner’s To-do list.
- To remove a participant from the event, click the Unregister icon.
- To download the participant list, click the Download icon to export it as a CSV file.
Editing the event
- Click the Edit button against the respective event to edit the details. On editing and saving the event, in the prompt, choose the ‘Notify participants’ option to send an email notification to the event participants. A card will also appear in the Feed to inform you that the event has been modified.
- You can edit the event name, event image, event type, date and time, tags related to the event, event description and tick/untick the participation is mandatory.
- Select the group/learning group/sub-group who can access the event.
- Click on the Save & Publish button to save the changes made and publish the event on the Events page.

Deleting the event
- Click on the Delete icon against the respective event to delete that event.
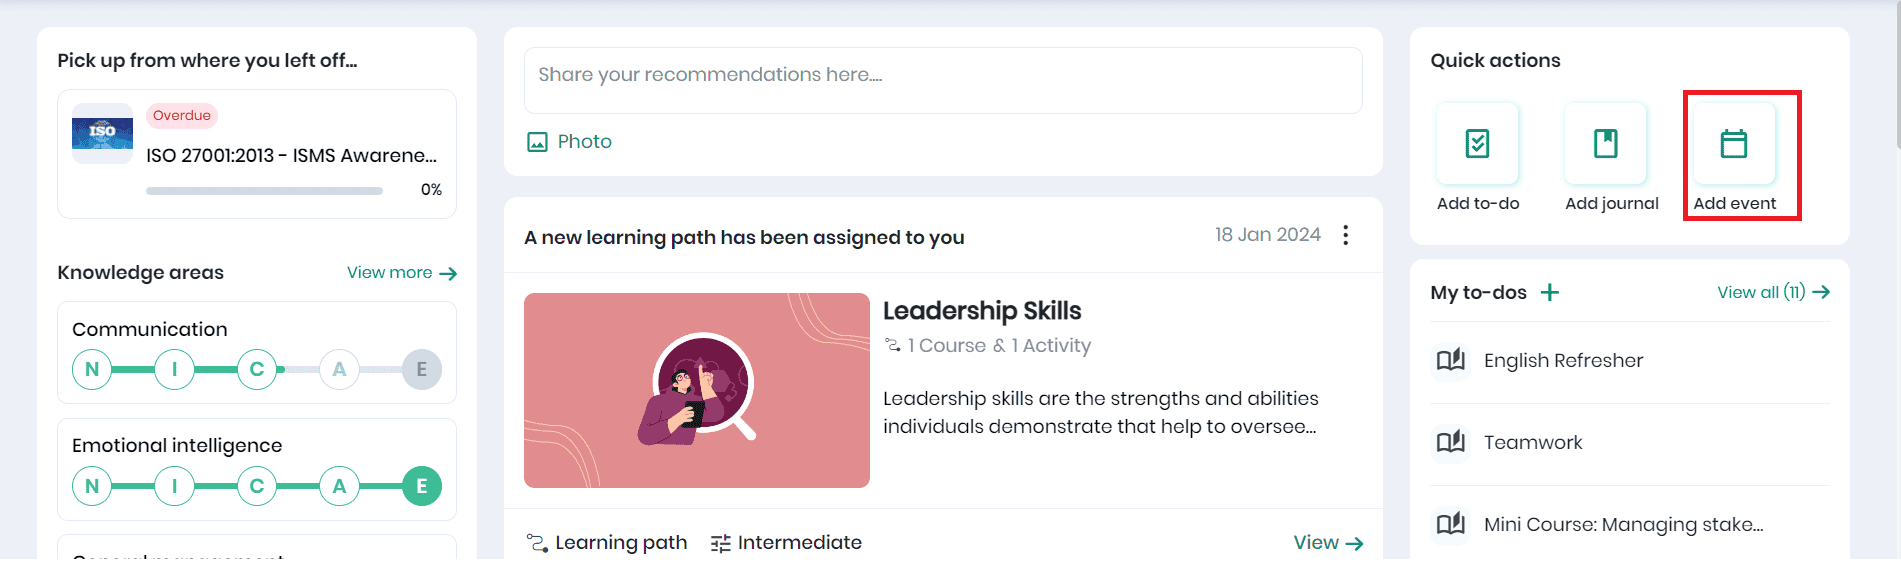
Adding events from the Quick Actions menu
Admins or users with create event permission can add events quickly from the Quick Actions menu on the Learning Home page.