Creating Batches
The Course Administrators can create multiple batches for the Instructor-led courses based on their requirements. Course Administrators can make required changes to course materials and define prerequisites for instructor-led courses.
Creating a Batch
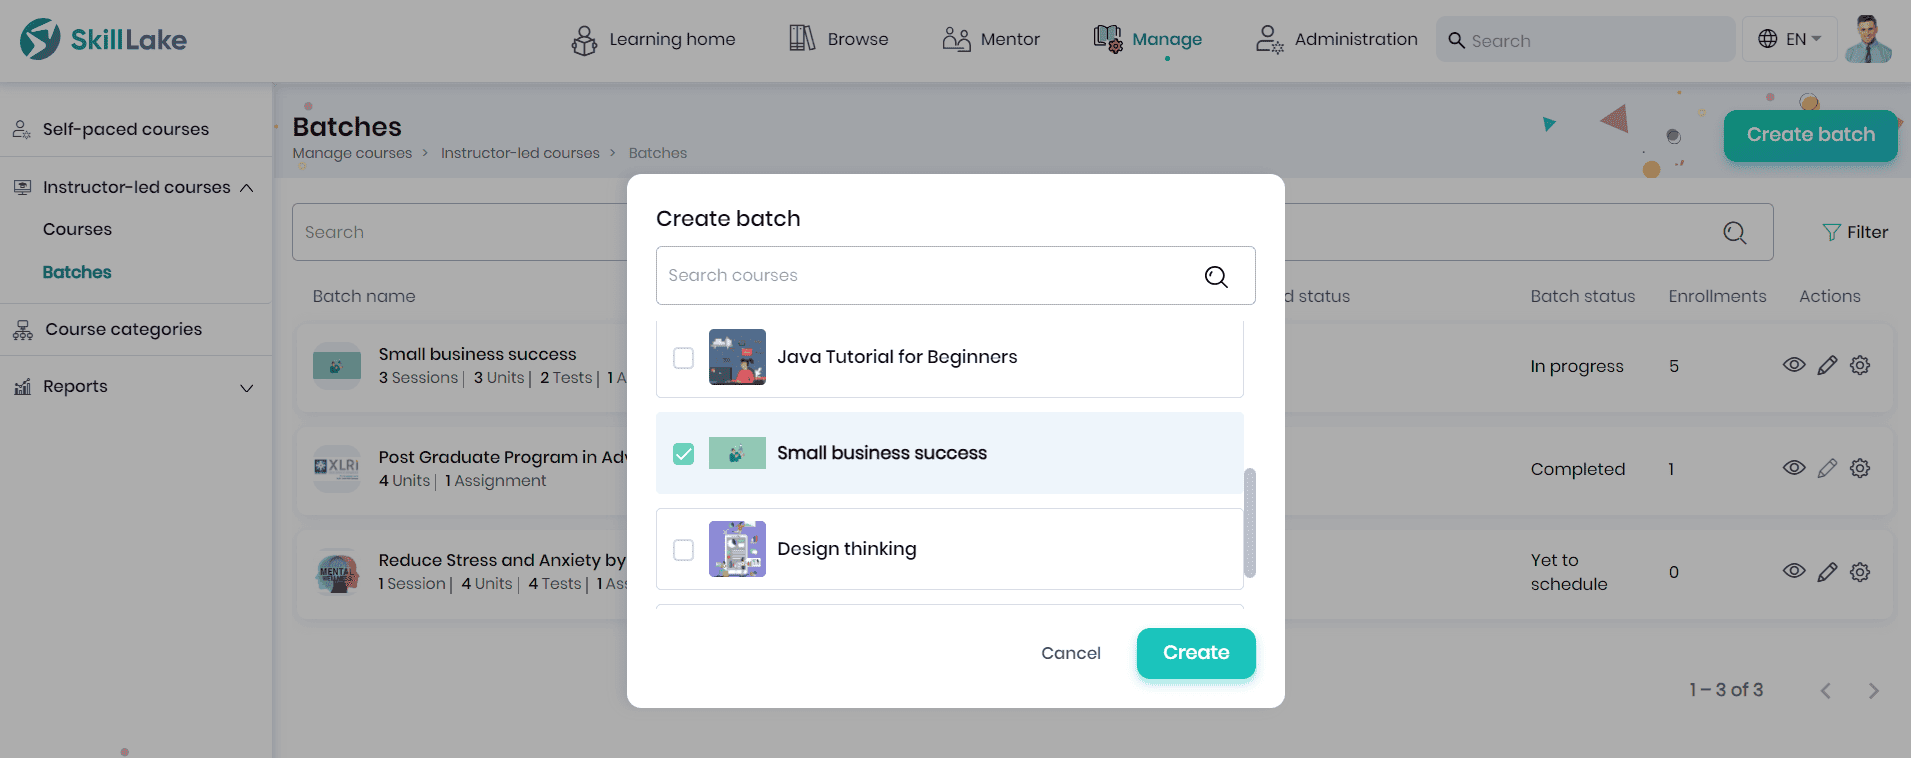
- Click on Manage > Instructor-led courses > Batches and Create batch button.
- In the pop-up, tick the course and click the Create button to create a batch for the selected course.
- You will be navigated to the Edit batch – course name page.
Course Information
In this section, you may enter the batch details such as start date, end date, venue, participant limit, instructors, and program admins of the batch.
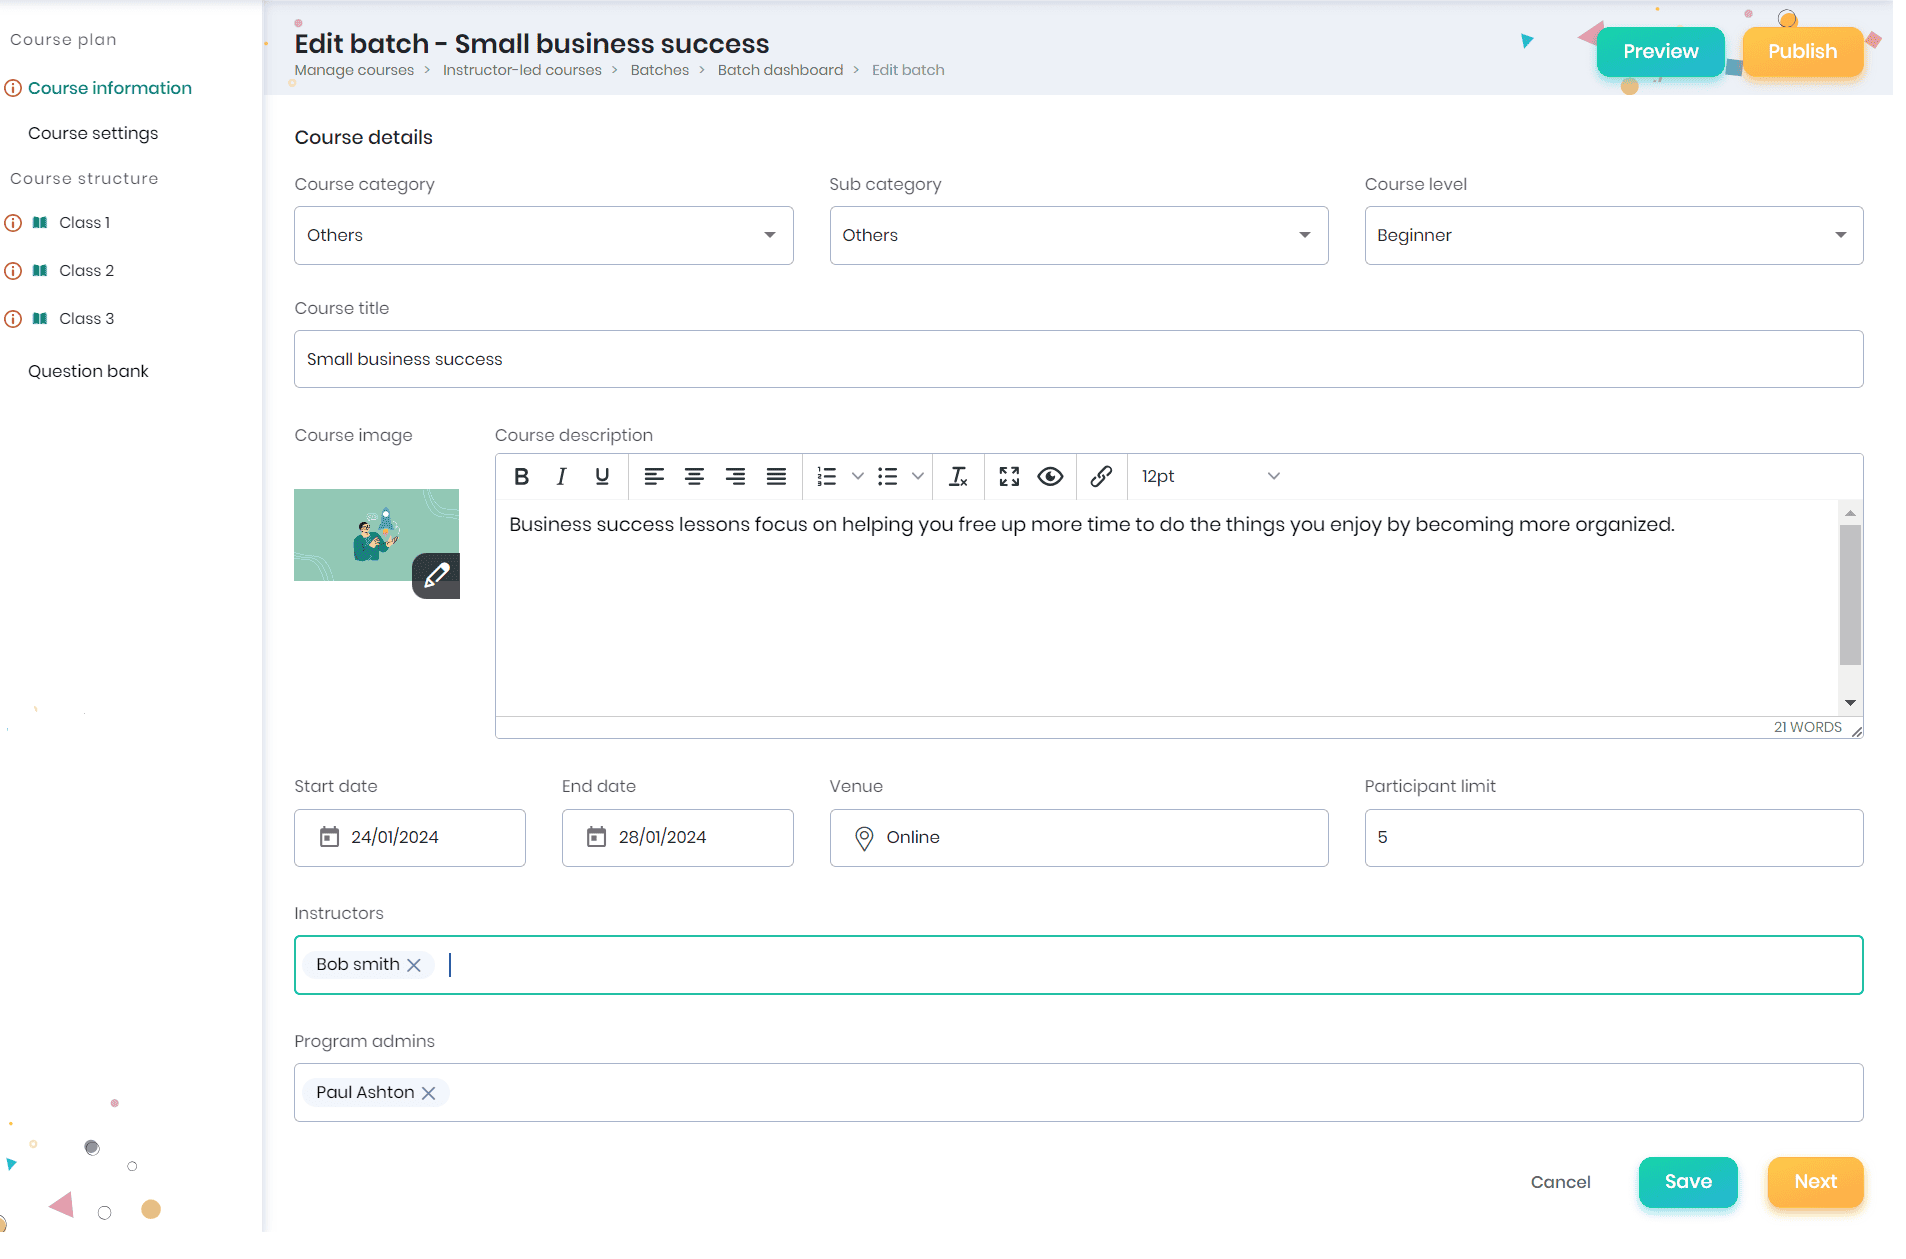
- In the ‘Edit batch – course name’ page, the course category, sub-category, level, course title, and course description will be pre-populated from the selected course. You can edit these details if required.
- You may enter the batch details such as start date, end date, venue, participant limit, instructors, and program admins of the batch.
- Click on the Cancel button to cancel the course information.
- Click on the Save button to save the course information.
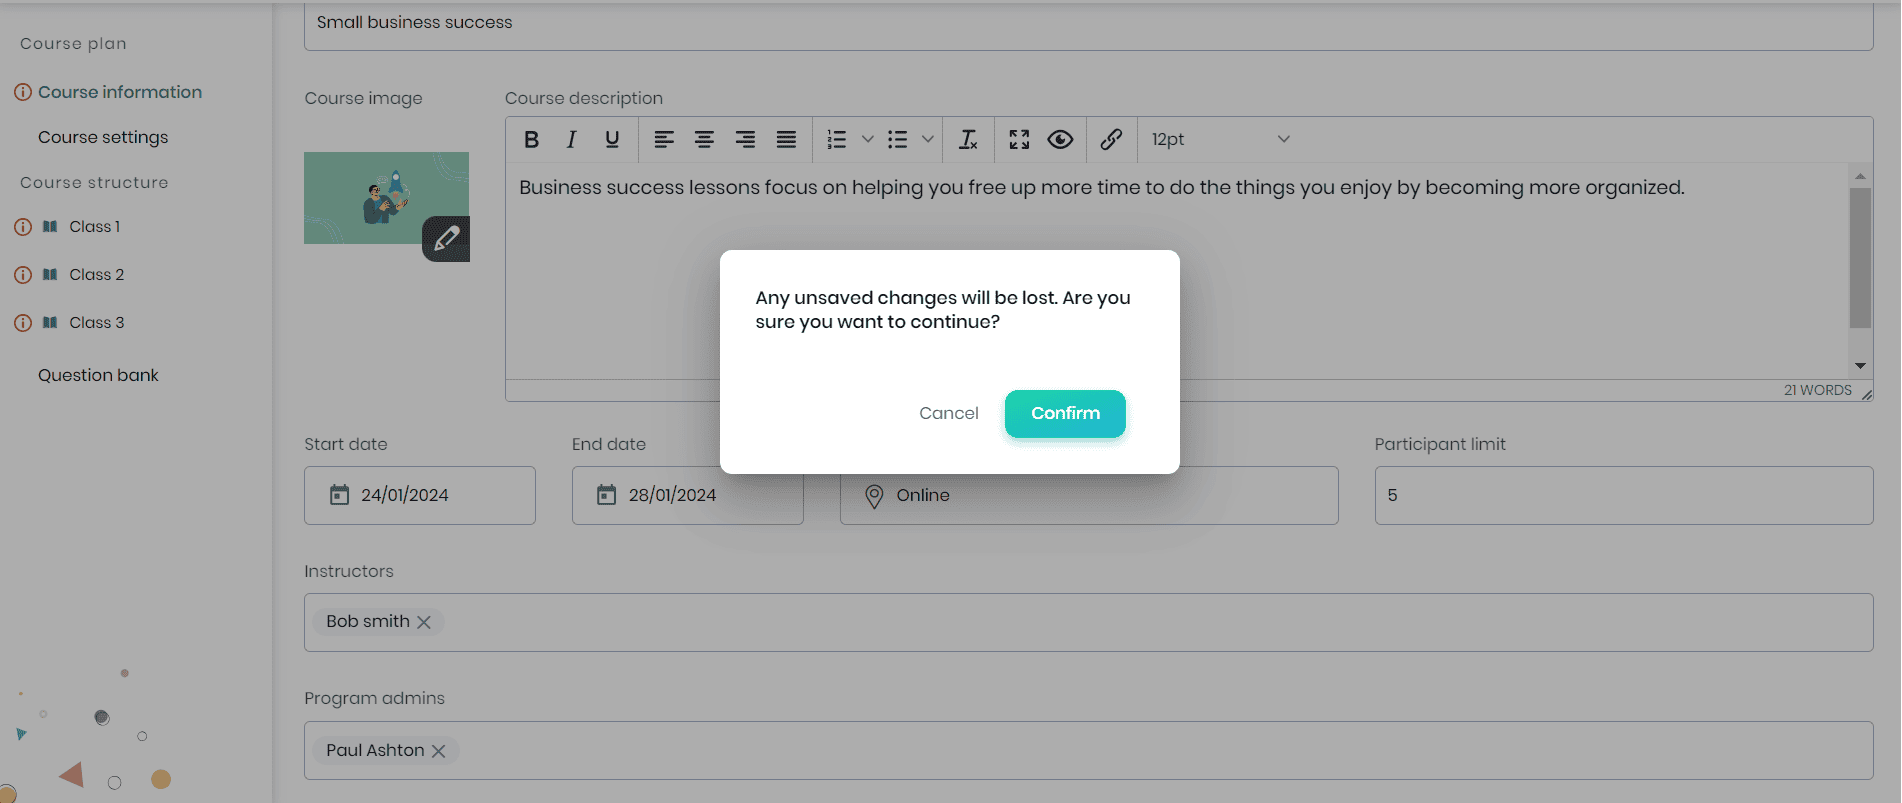
- Click on the Next button. A confirmation message will appear. Click on the Confirm button to proceed to the Course Settings page.
Note: A notification email will be sent to the user:
- When they are assigned as the instructor to a course.
- When they are removed from the course.
Course Settings
This section helps you configure the people who can view this batch, add prerequisites, and include certificates.
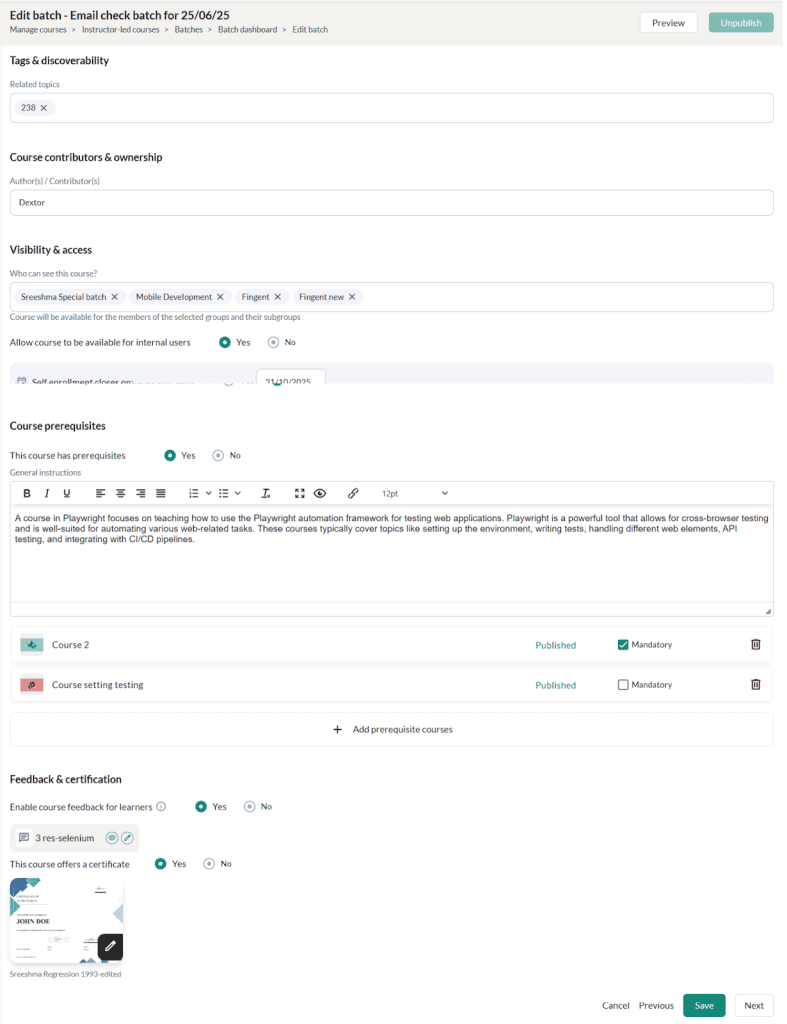
- The related topics and authors will be pre-populated from the course and can be changed if needed.
- Select the group/learning group/sub group to which this batch will be available.
- Choose the Yes option adjacent to the ‘Allow course to be available for internal users’ option and select the date on which self enrollment is closed. If this option is checked, then the course will be available in Browse > Instructor-led courses.
Share the course to external users
- Choose the ‘Yes’ option to allow the course to be published outside Skill Lake. A URL will be generated and can be shared with the external users of Skill Lake. Click on the Save button to save the changes made.
- The prerequisites will be pre-populated from the course from which the batch is created. You can edit, if required.
- To add a prerequisite for the course, choose Yes in the ‘This course has prerequisites’ option.
- The ‘General Instructions’ section will be enabled if you have chosen the ‘Yes’ option.
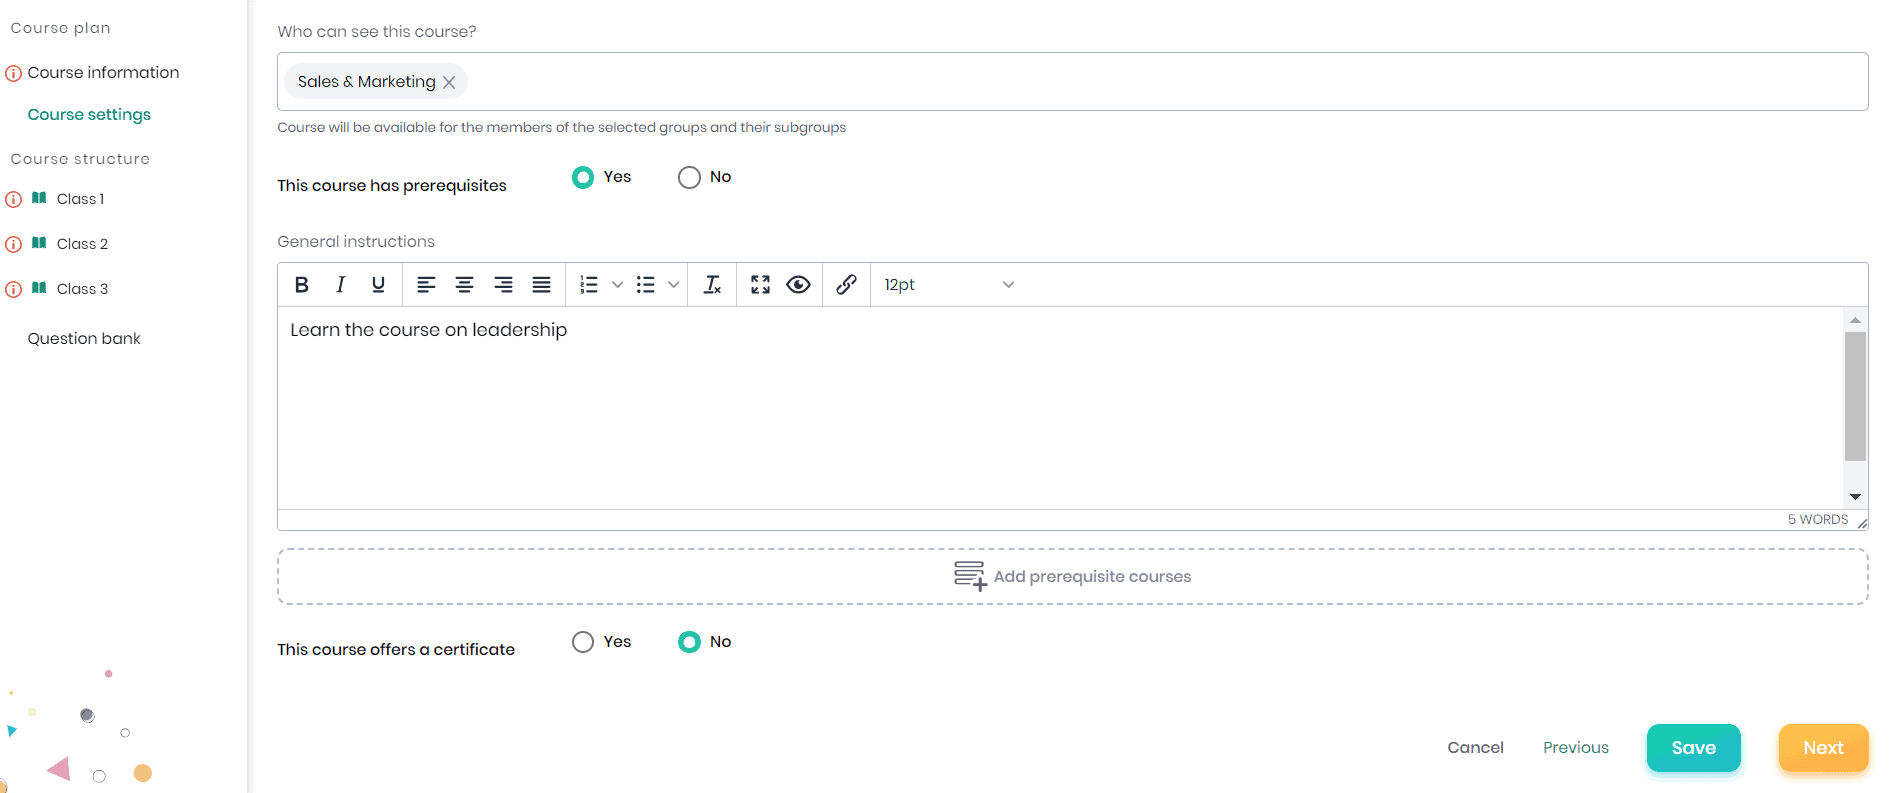
- Click on the Add prerequisite courses button to select the course the learner has to learn as a prerequisite before learning this course.
- Once you have selected the prerequisites course, click on the Add button.
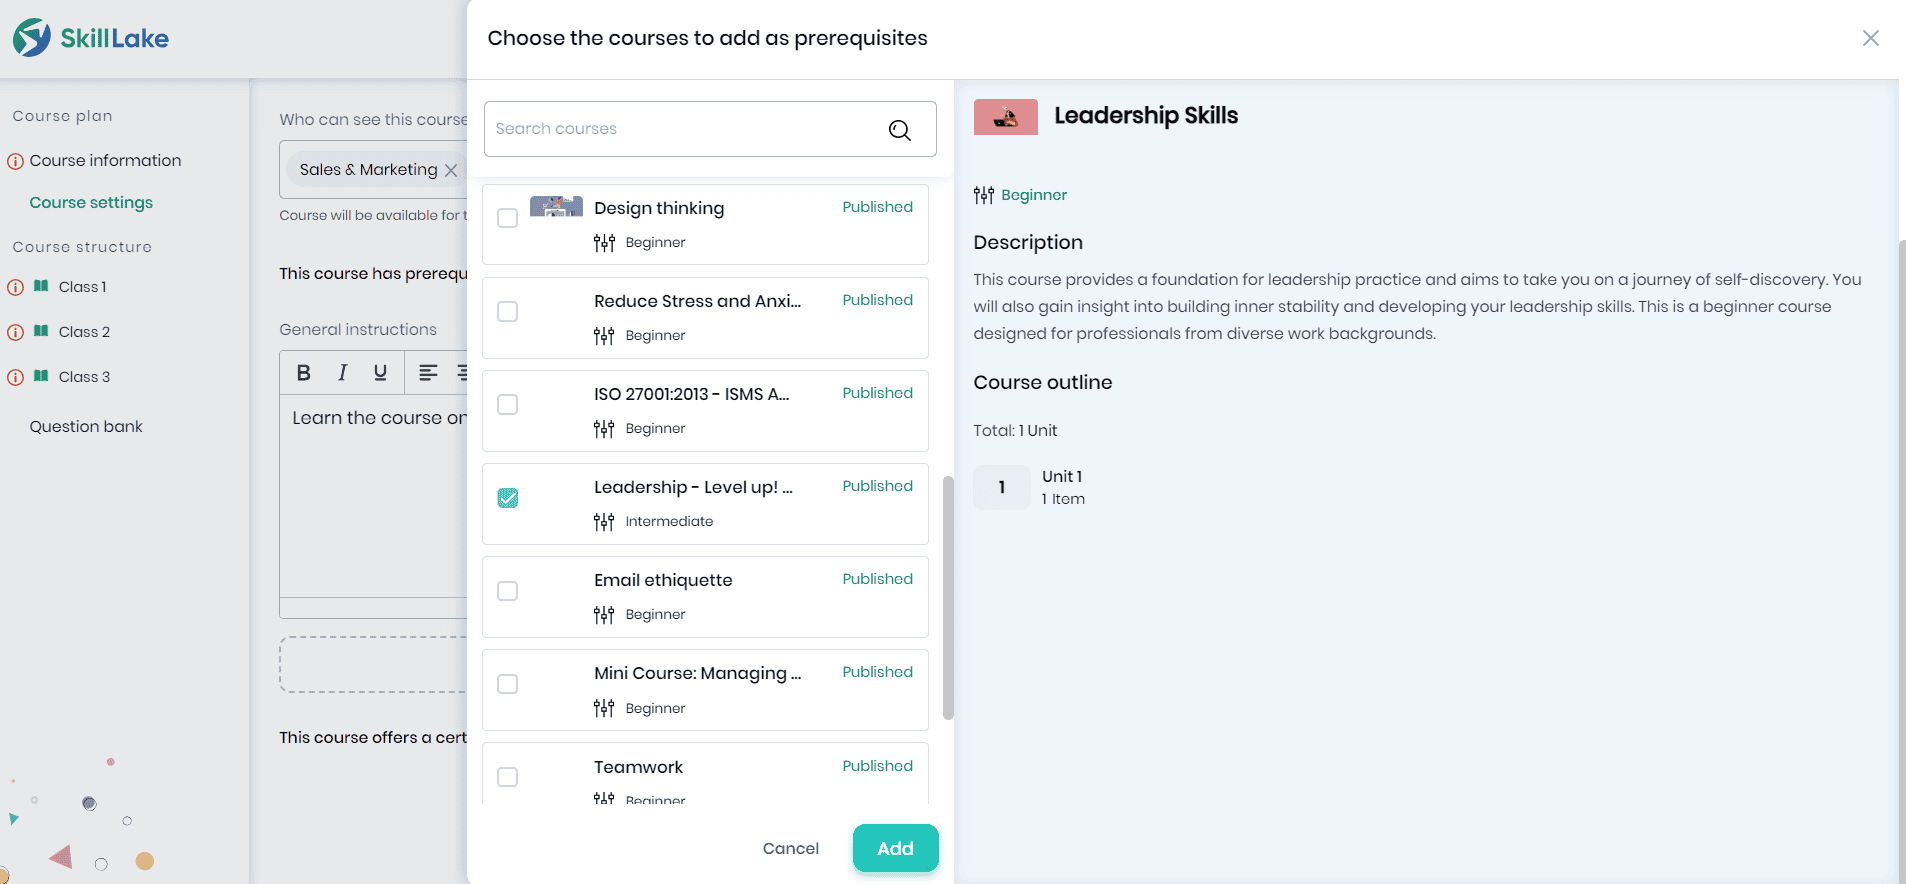
- On adding the prerequisite course, you can mark it as mandatory.
Enable course feedback for learners
- Choose the Yes option adjacent to the ‘Enable course feedback for learners’ option and select the feedback form from the ‘Select feedback form’ panel bar. To view the feedback form click on the View icon and click Edit icon to change the feedback form.
Include Certificate to a batch
- The certificate configured for the course will be pre-populated. You can edit, if required.
- Choose the Yes option adjacent to ‘This course offers a certificate’.
- The learner will be issued a certificate for successfully completing the course.
- Click on the icon below to select the course certificate template from the available templates. Refer to the article Managing Certificates.
Click on the Cancel button to cancel the course settings.
Click on the Previous button. A confirmation message appears, where you may click on the Confirm button to go to the Course Information section.
Click on the Save button to save the course settings.
Click the Next button to navigate to the next screen to create the course units.
Course structure
The course units from which the batch is being created will be pre populated. You can add/delete the units of the course.
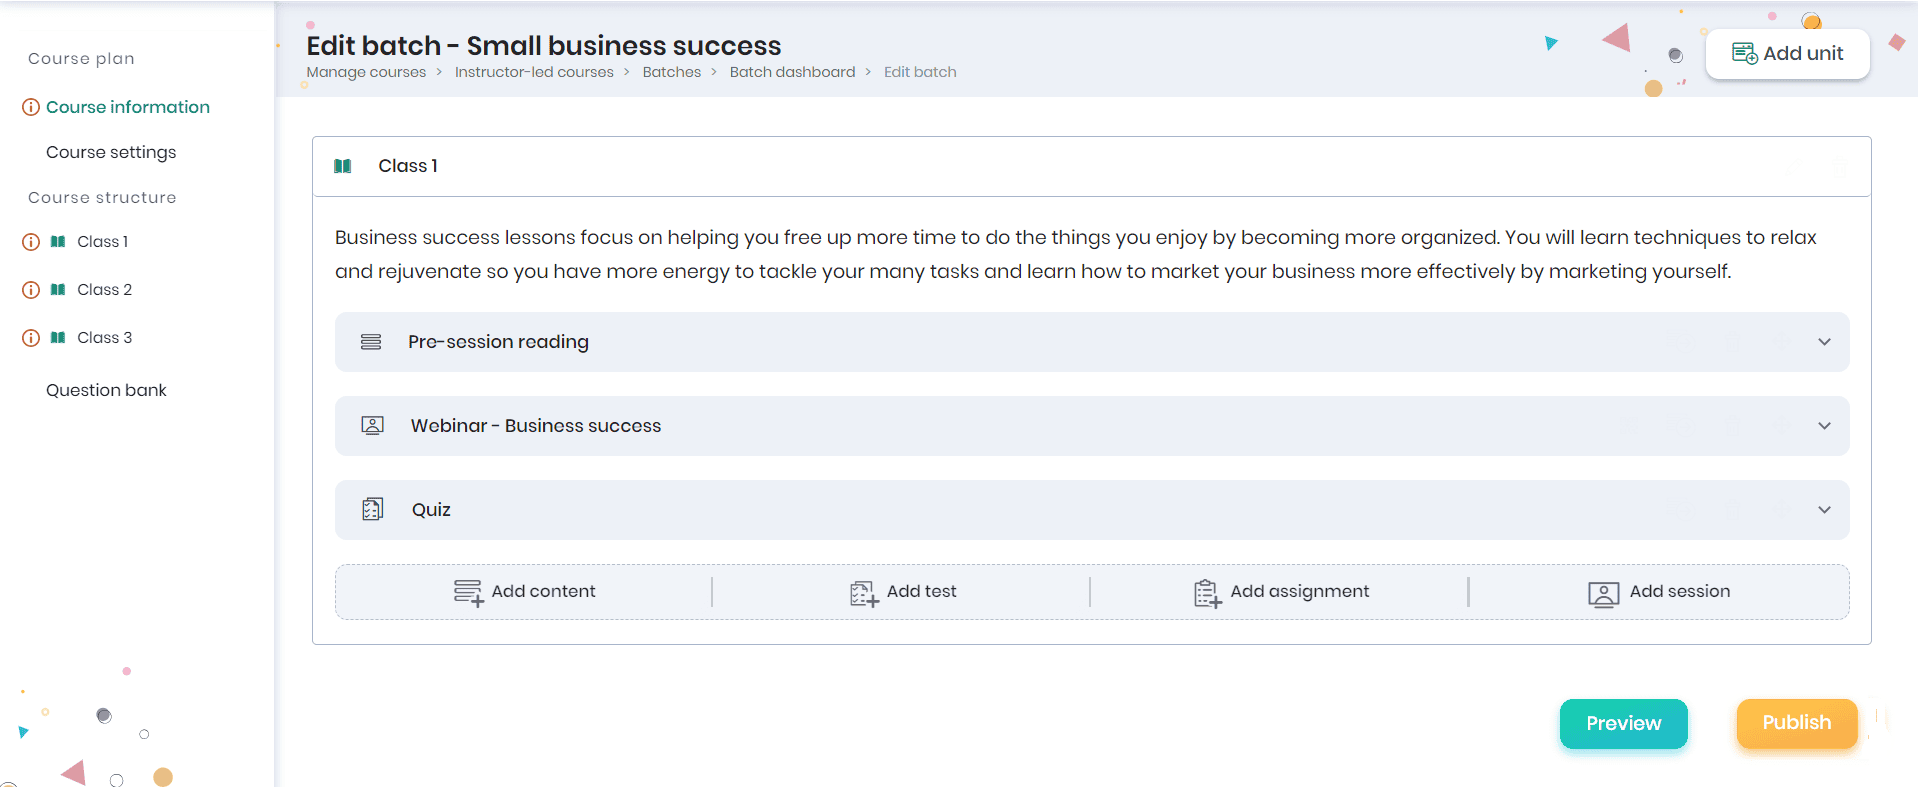
- The content, tests, assignments, and sessions will be prepopulated.
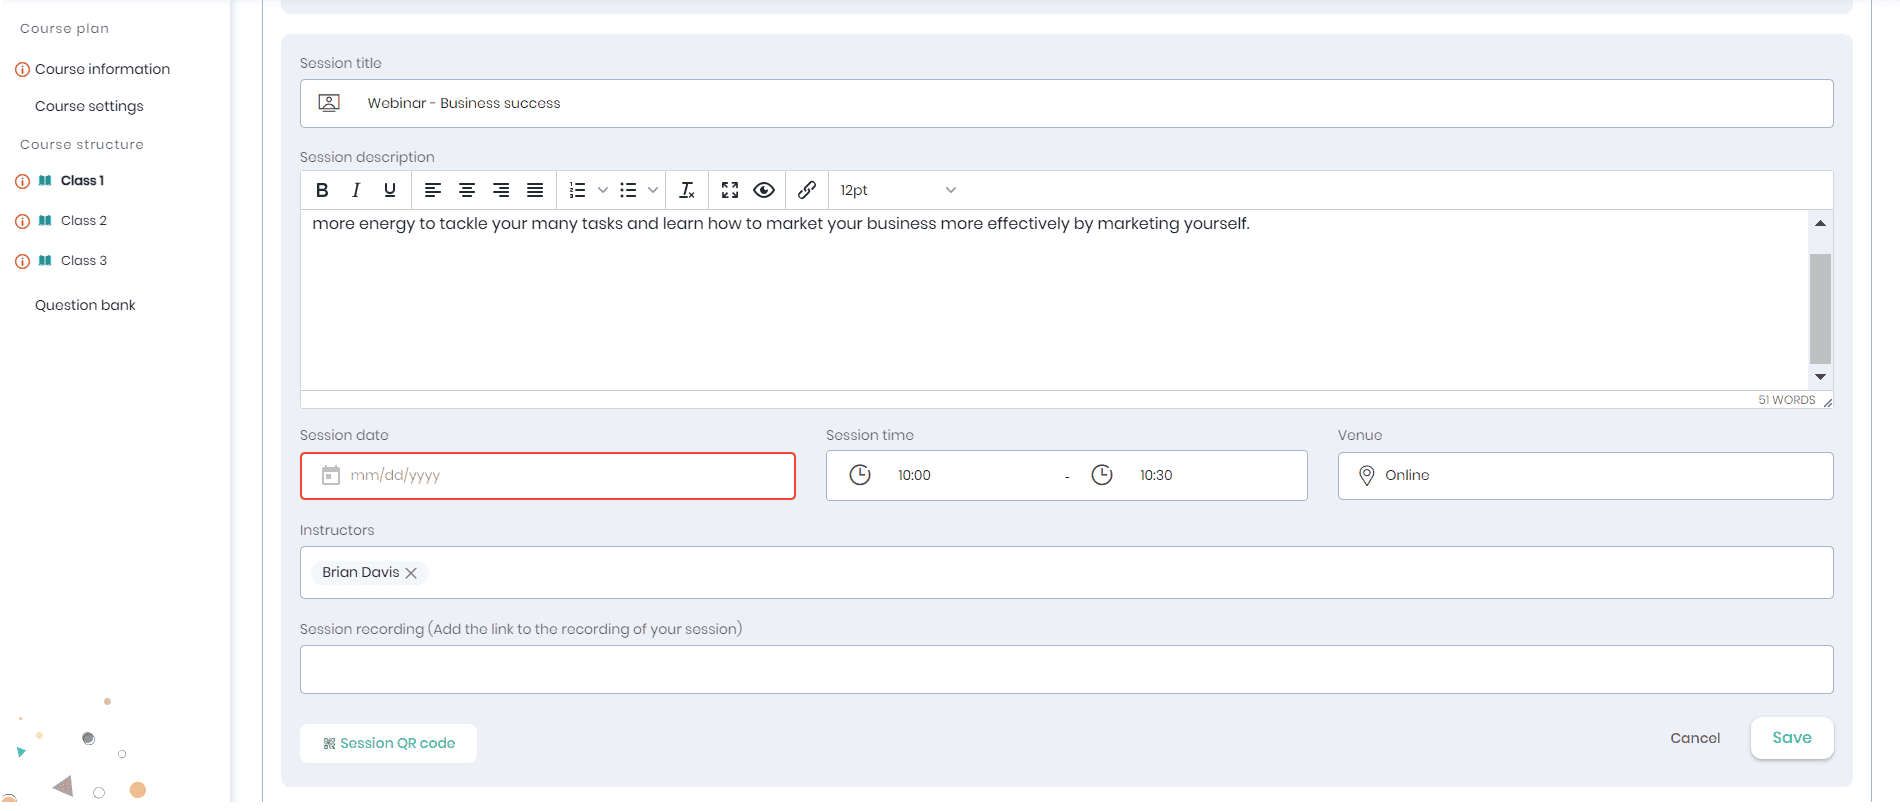
- You may enter the session date, time, venue, instructors and session recording URL.
Previewing the batch
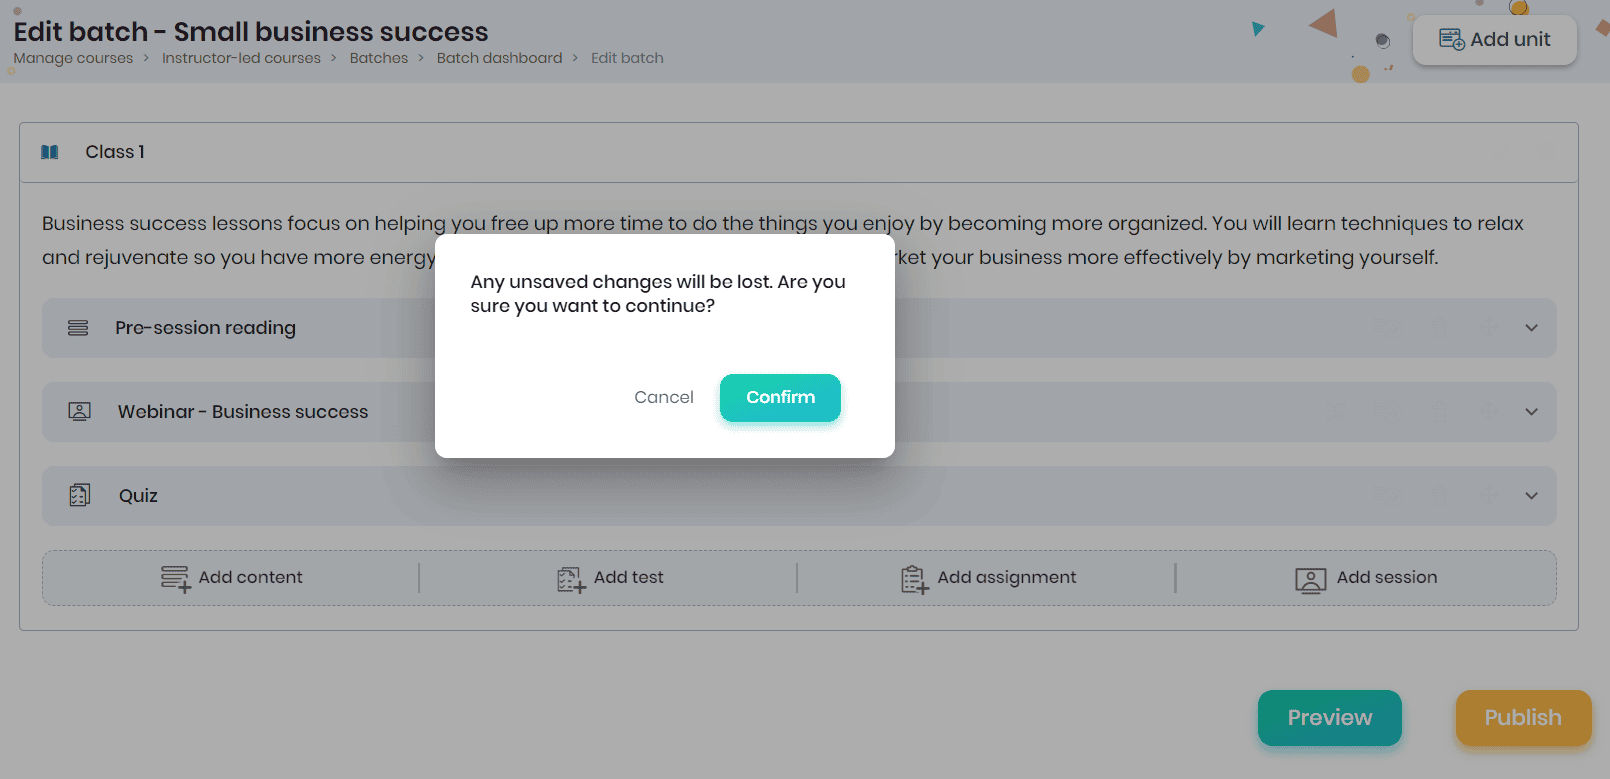
To preview the batch, click on the Preview button. Click on the Confirm button in the confirmation message.
Publishing the batch
If the batch is ready, then you may click on the Publish button, so that it will be available for the learners to consume. A confirmation message appears, where you may click on the Publish button.
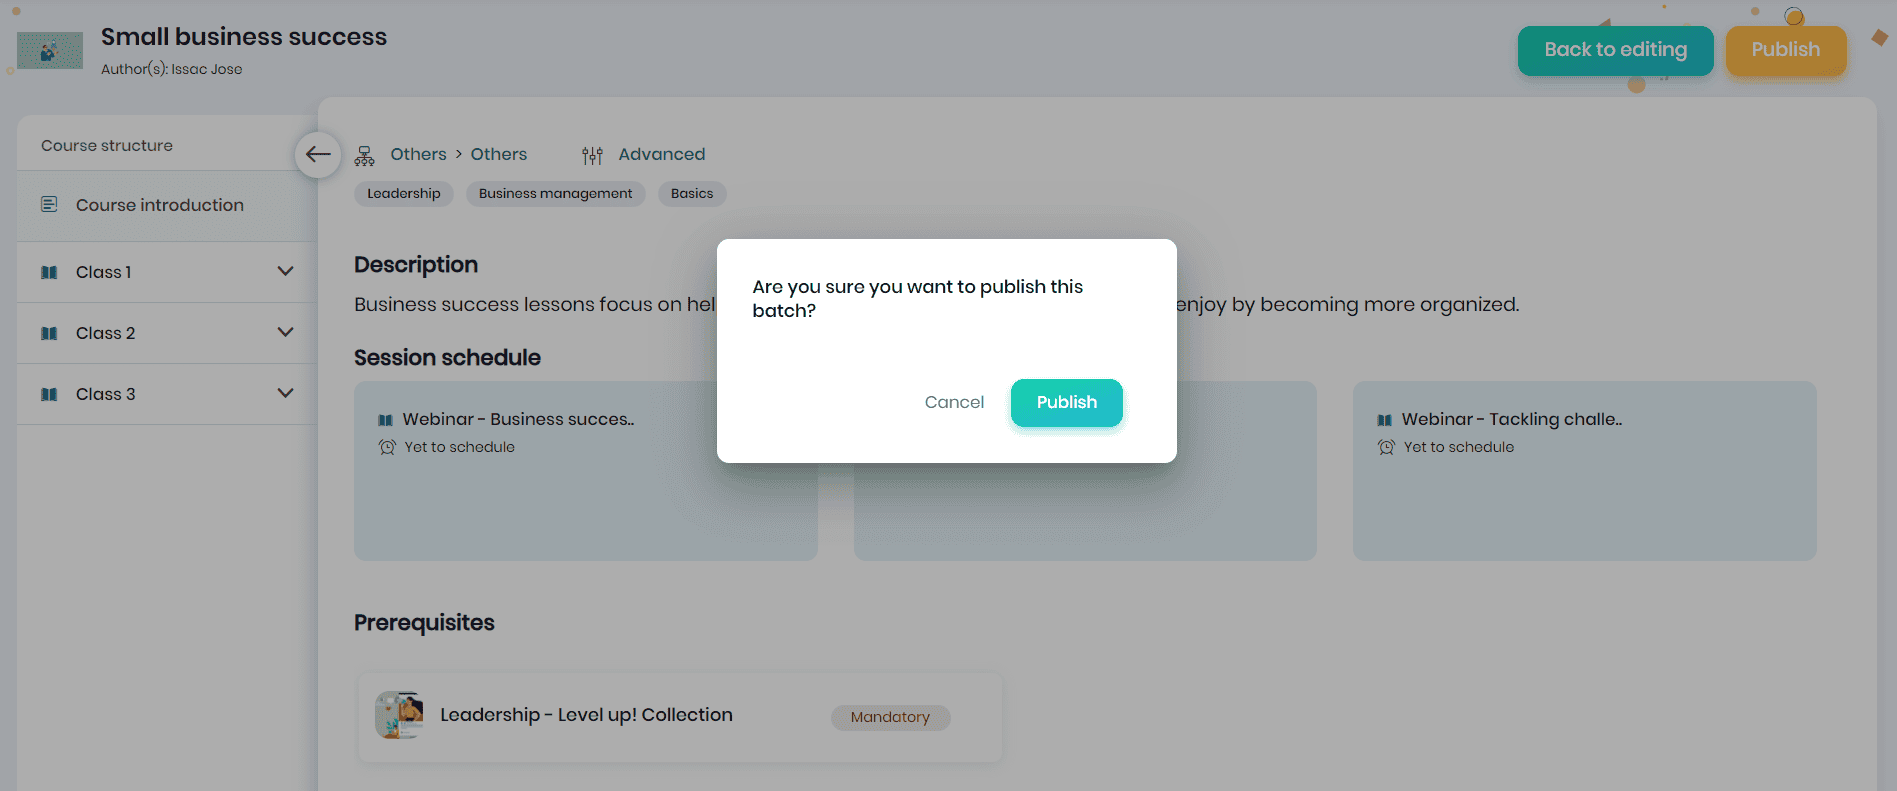
- The batch published will be displayed in the Batches tab.

Managing Batches
The Batch page displays the batch name, available for, schedule, published status, batch status, number of enrollments to the batch, and various actions performed. Refer to the Administering Batches for more details.
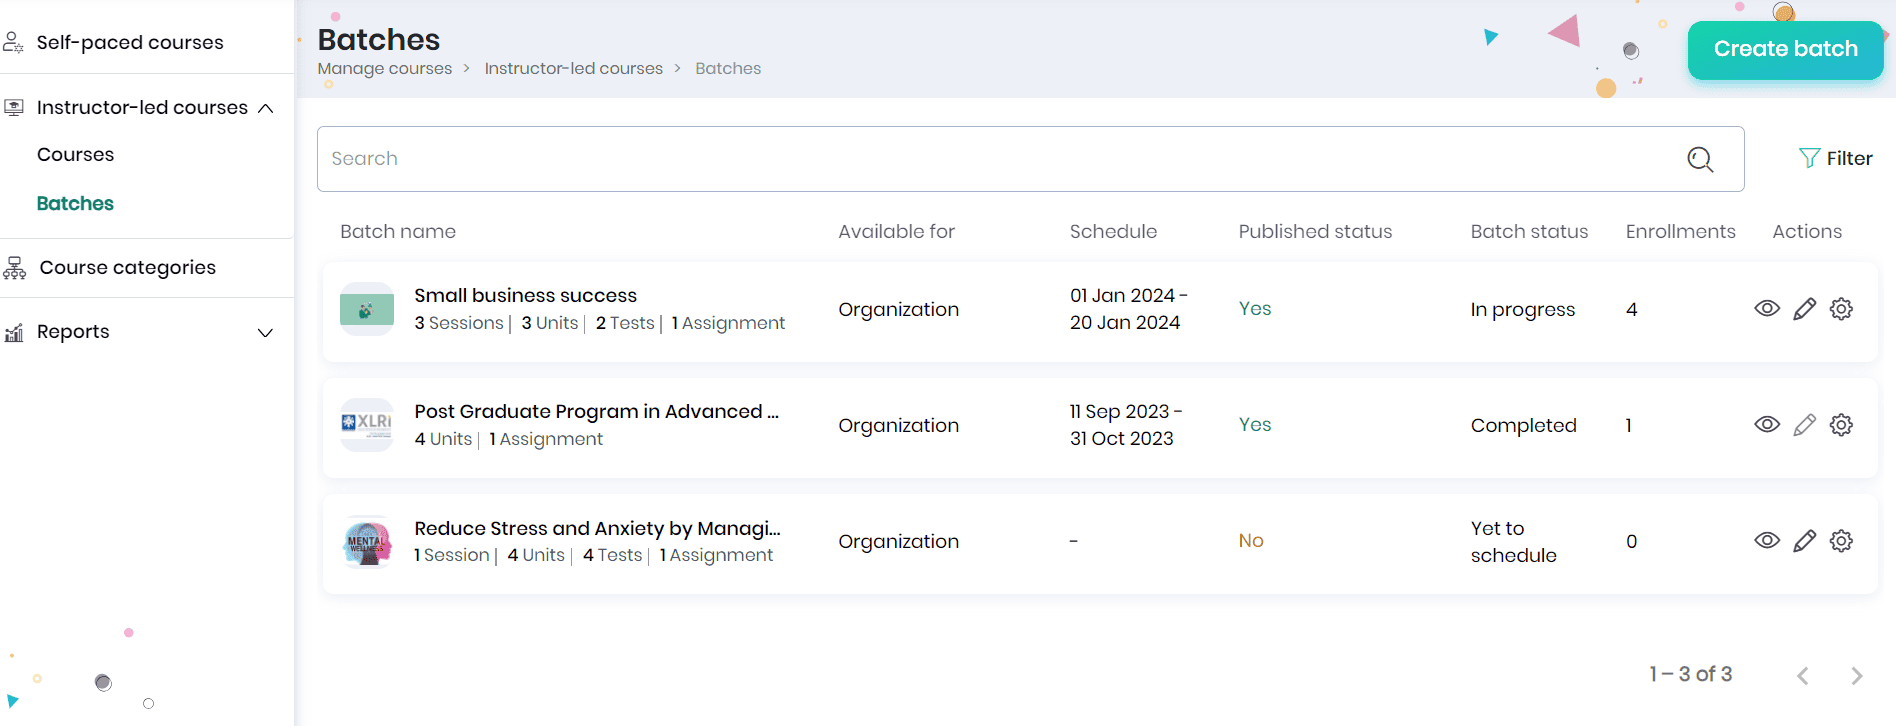
- Click on the Preview icon to get a preview of the batch.
- To edit the batch details, click on the Edit icon.
- Click on the Settings icon and click
- ‘Enrollments’ option to enroll learners to this batch.
- ‘Unpublish’ option to unpublish this batch.
- ‘Duplicate’ to make a duplicate copy of this batch.
- ‘Mark as complete’ option to complete the batch.
- ‘Delete’ option to delete this batch.
Note: All the above actions can be performed if the user has the required roles and permissions.