Managing Users
In Skill Lake, Administrators (users with Administrative privileges) can add and edit the employees, non-employees, groups, learning groups, and job titles for the organization. You can also define the knowledge areas in which the learners need to be skilled to excel in their job role. Click on the Administration tab and select the Manage Users section on the left side of the page. In the independent installations of Skill Lake, Administrators will have permission to add new users to the system.
Note: For the Skill Lake installations integrated through InfinCE, the users created through InfinCE will be displayed in the Employees and Non employees page.
Employees
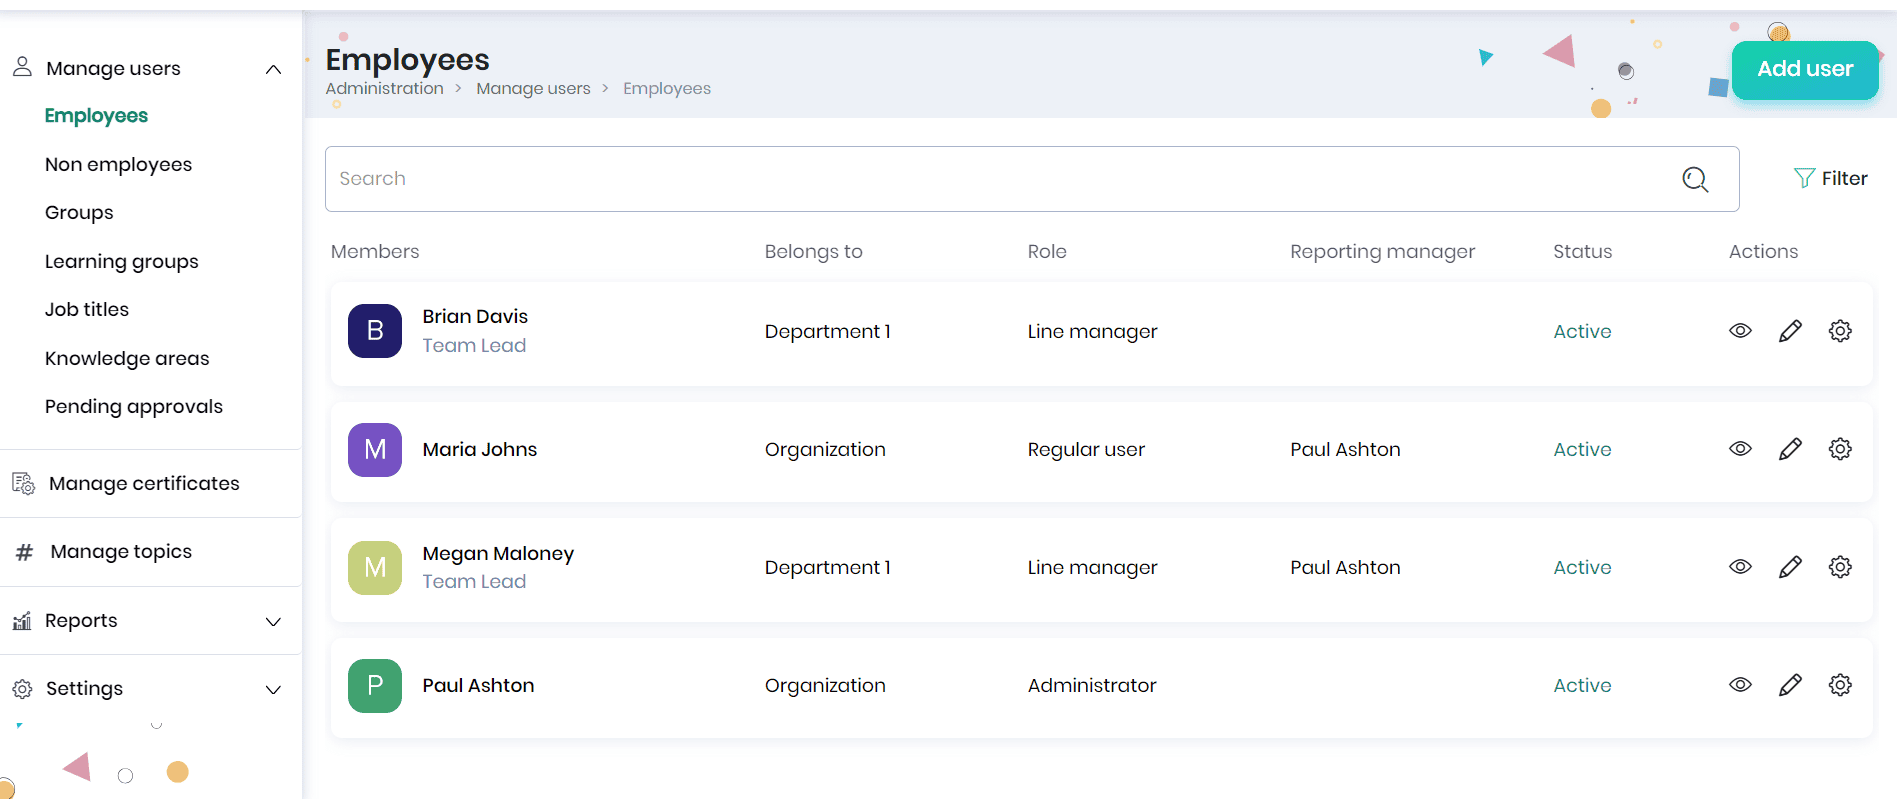
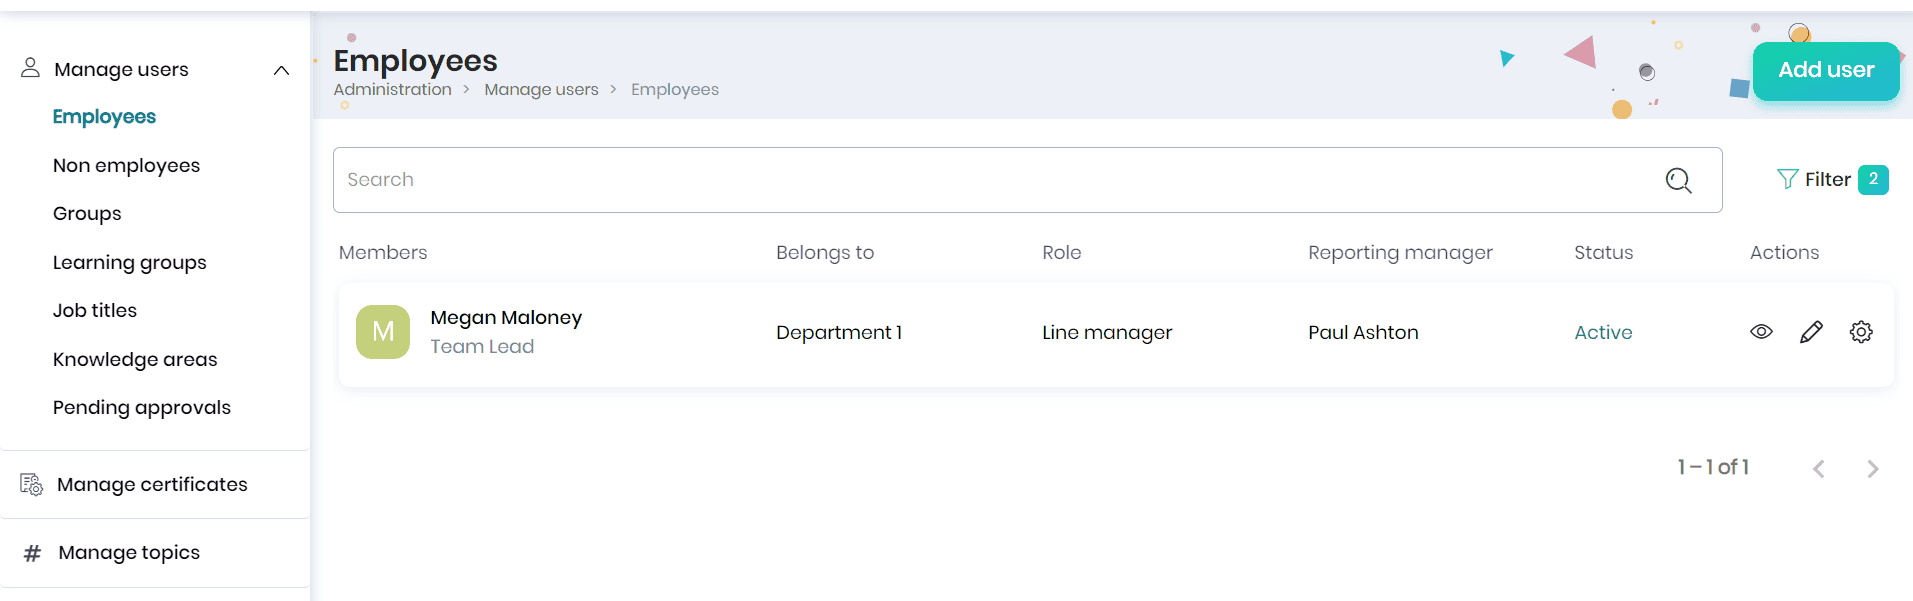
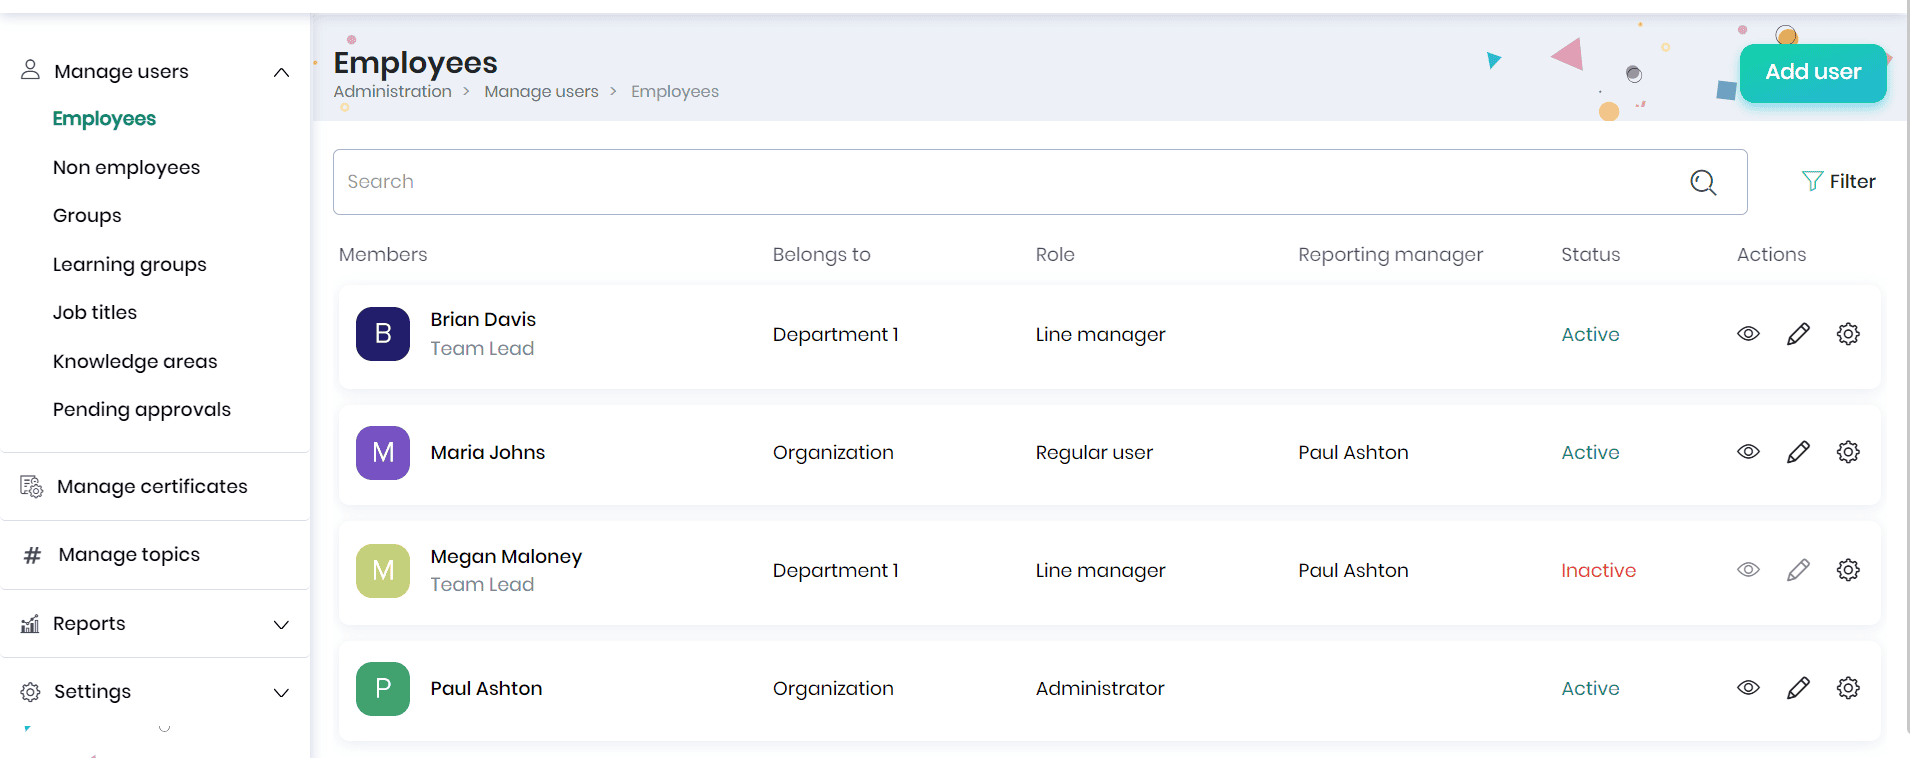
Organization users are the individuals within an organization who interact with the Application to facilitate or participate in learning activities. Click on the Employees option to view the list of users of Skill Lake.

Adding an employee
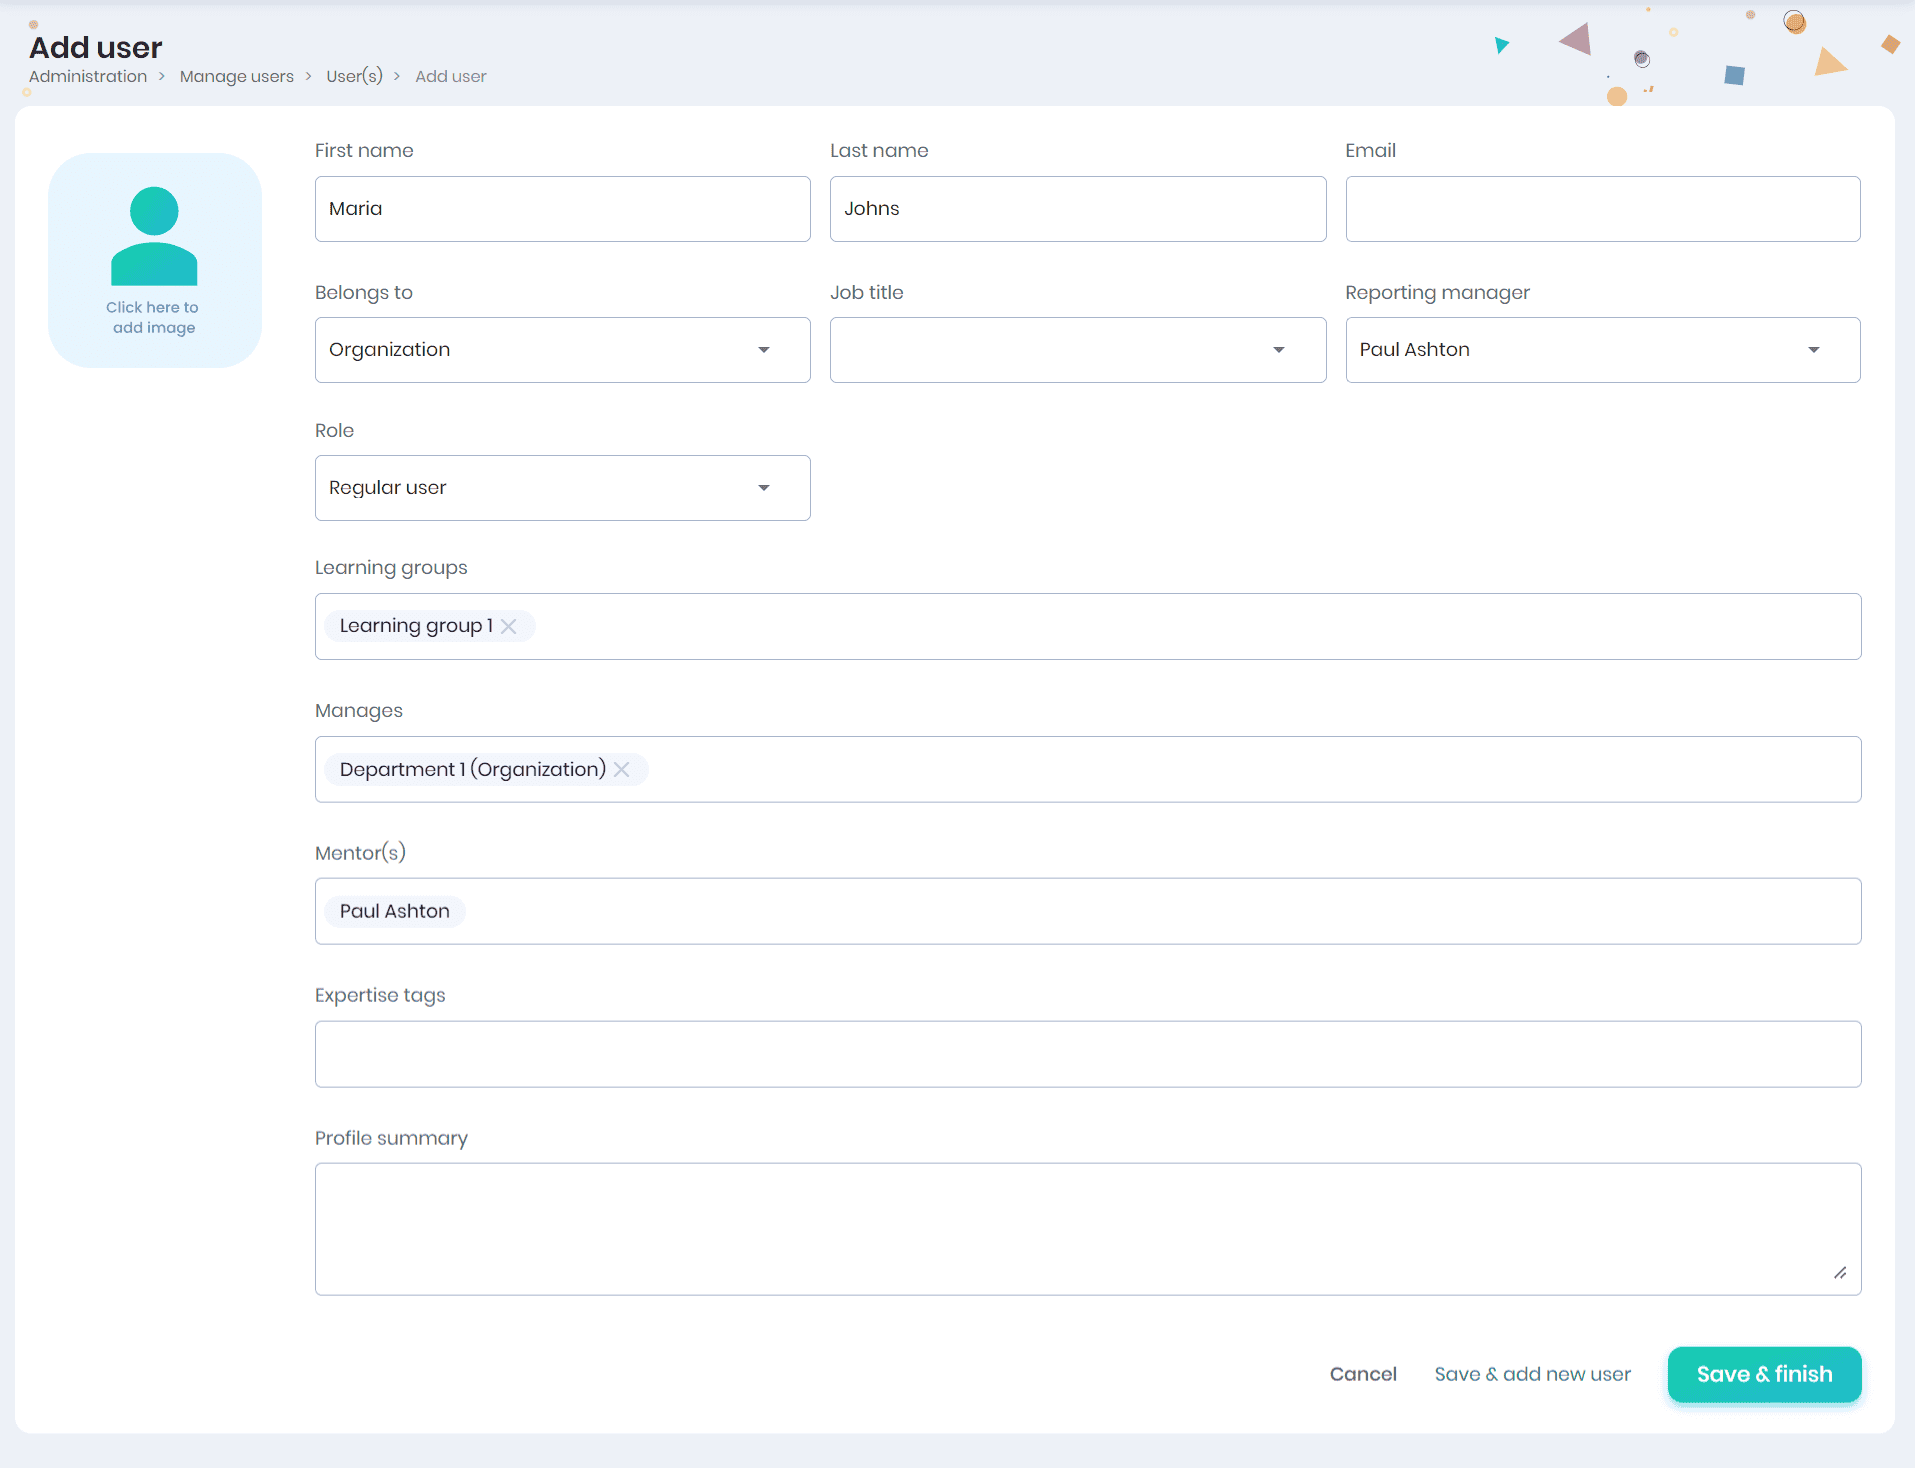
Click on the Add User button to create a new user profile. You can fill in the following details:
- First Name
- Last Name
- Email Address
- Primary Group (to which the user belongs)
- Job Title
- Job titles are available based on the groups the user belongs to
- Reporting Manager
- An admin can add only those users whom they manage, as the reporting manager of the created user.
- Role
- Date of Joining
- Learning Group
- The user will be added as a member
- Groups Managed by the User (under the Manages field)
- Mentors
- The reporting manager is assigned as the default mentor
- Expertise Tags
- Profile Summary
- Click on the Save button to create a new user.
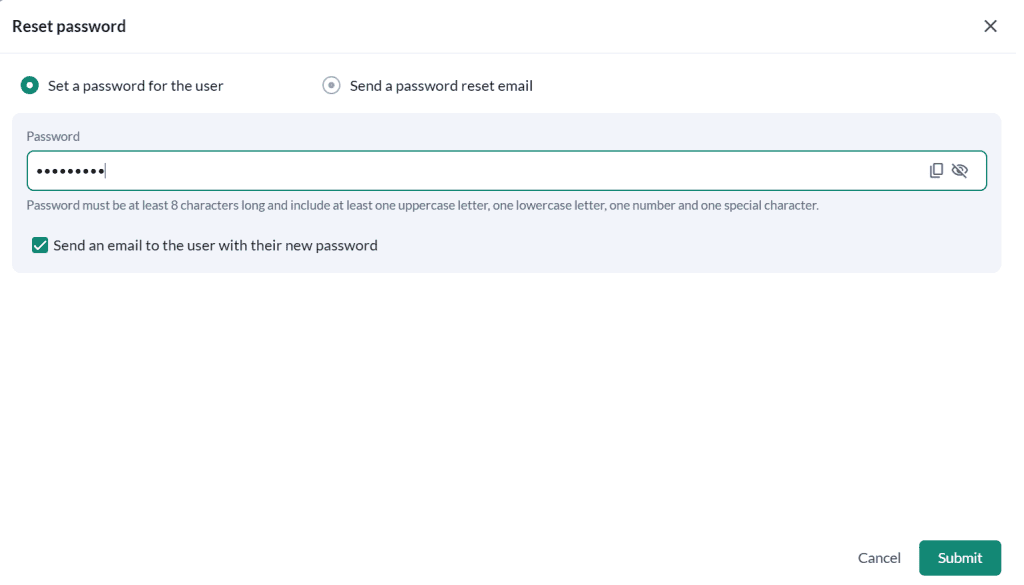
- Set a password for the user: Choose this option, if you want to set a password for the user and the users will be notified with their new password via email.
- Allow the user to set their own password: Choose this option to send an email to the user with a link to activate their account and set their password.
- Click on the Save & Add new user button to create the user and add another user.
- Click on the Save button to create a new user.
- The user profile created will be displayed in the Employees page.
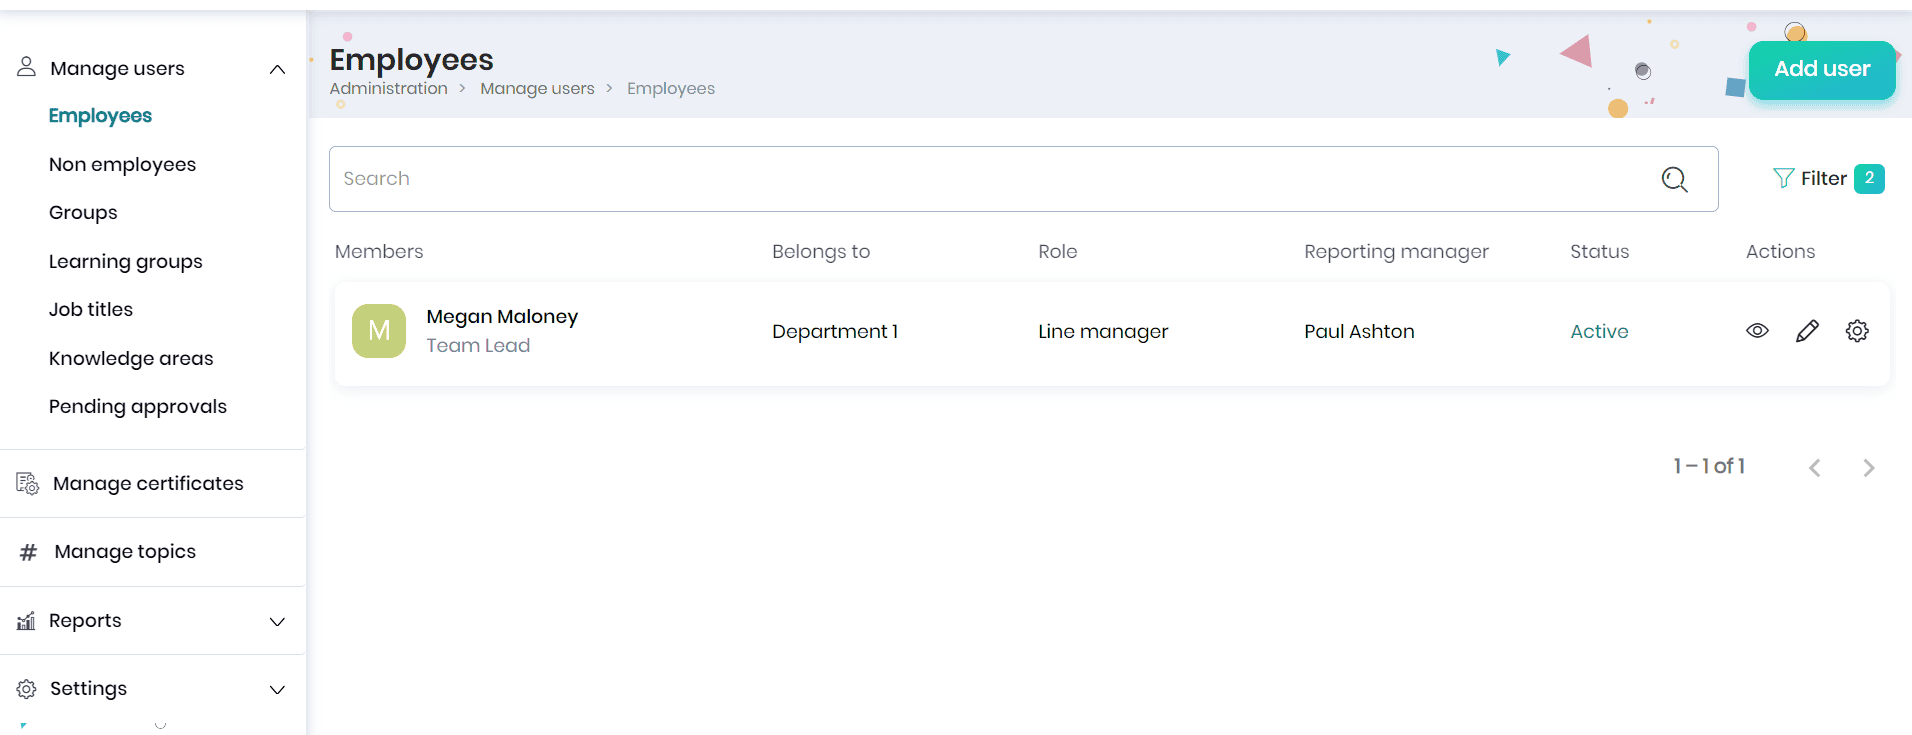
- Click on the Filter icon to filter the users based on their reporting manager, groups, expertise tags, roles, status, and click on the Apply button.

- The filtered entries will be displayed in the Employees page.
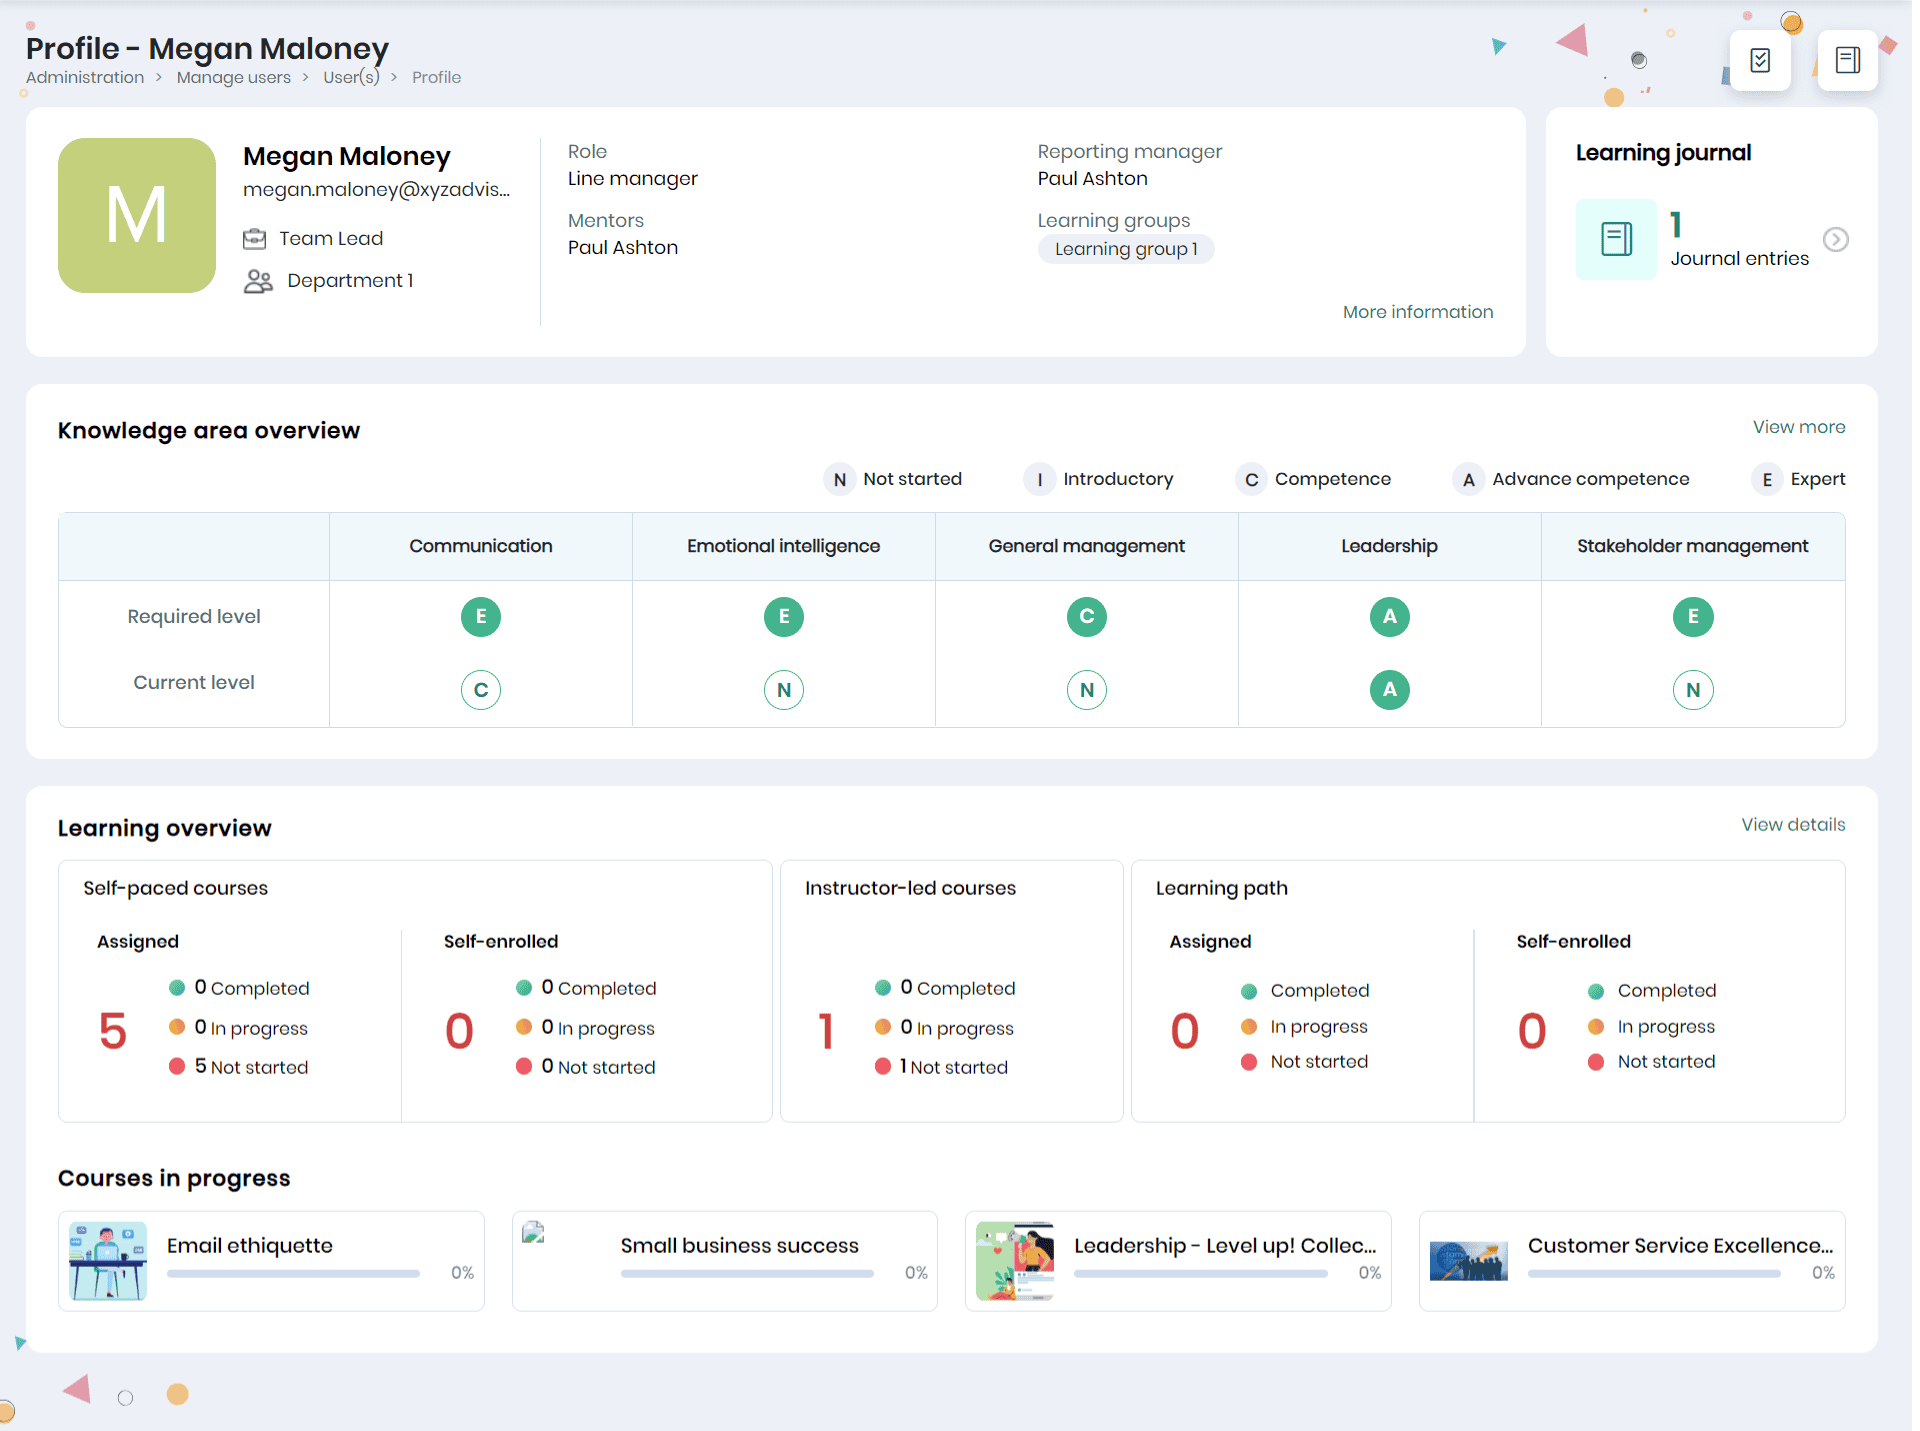
- Click on the employee name to view the profile details, learning journal, learning journey, knowledge area overview, learning overview, and recent achievements of the employee.
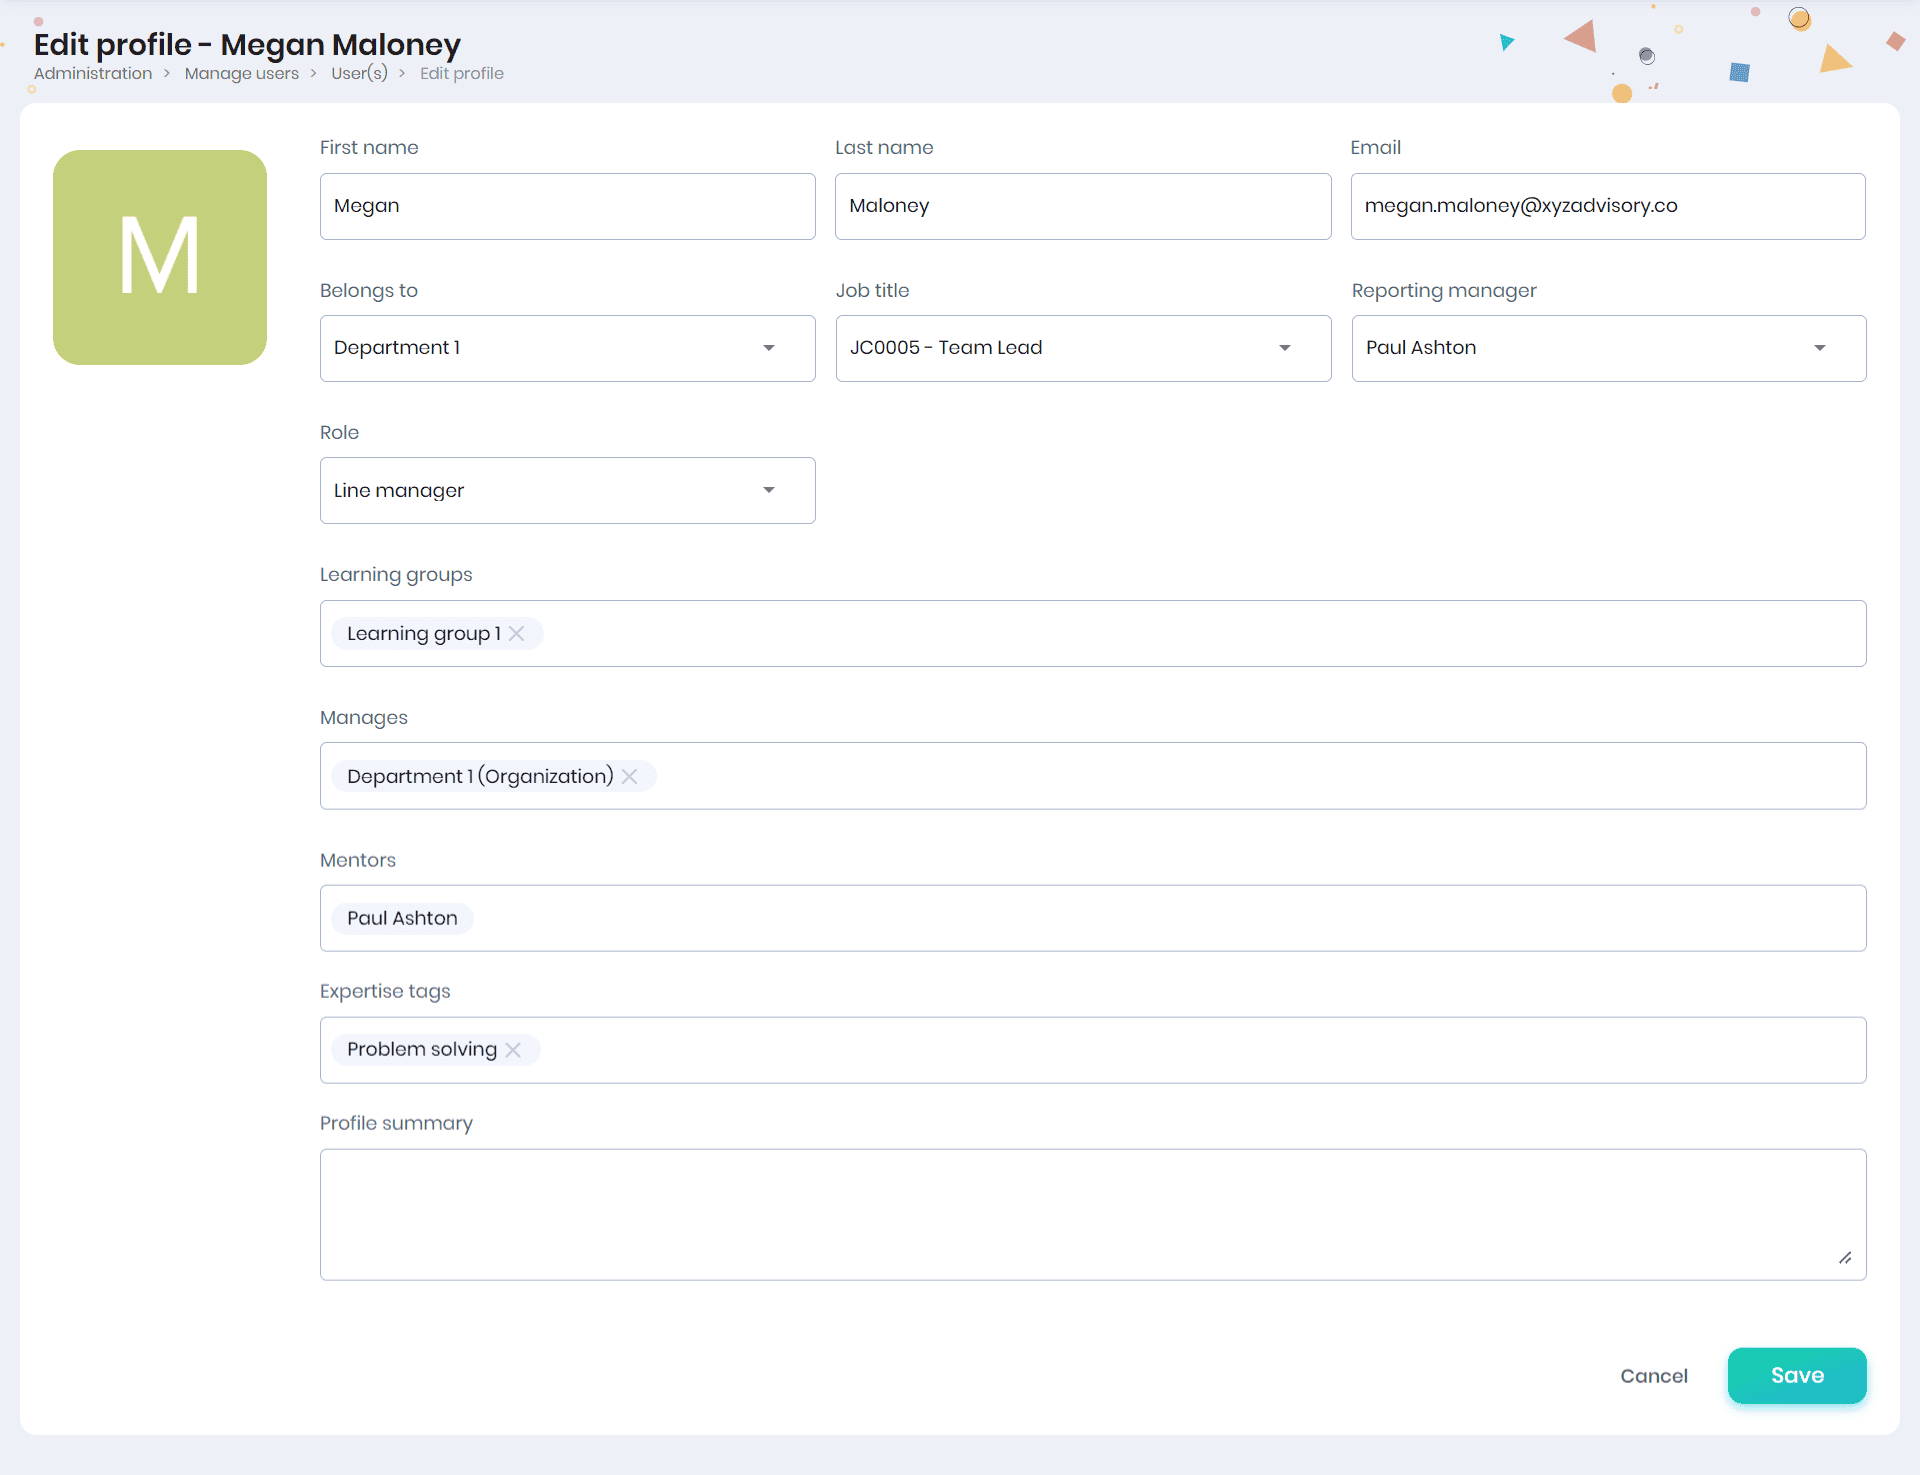
Editing employee profile
Click on the Edit icon to edit the employee profile. The first name, last name, profile picture, email address, belongs to (primary group to which the user belongs to), job title, reporting manager, role, date of joining, learning groups, manages (group/sub group the employee manages), mentors (learners which the employee mentors), expertise tags, and profile summary will be displayed. You can edit these fields and enter the job title (under the selected group), learning groups, groups managed by the user (under the “Manages” field), mentors, expertise tags, profile summary and click on the Save button.
Note:
- The group/parent group administrators (users with Administrative privileges) can edit the user’s profile information and enroll the user to courses. Admins will be able to perform these actions based on the User management permission in their Skillake Role.
- For the Skill Lake installations integrated through any 3rd party integrations, while editing the profile, ‘Belongs to’ field will be displayed from InfinCE. Based on the data synced to Skill Lake (SL), the admin will have the ability to modify profile information.
- The edits made to your profile will be displayed on the Employees page.
Reset password
You may reset the user’s password or allow the user to set their own password.
Note: After the reset email is sent, the old password will no longer work. The user must set a new password using the reset link to sign in again.
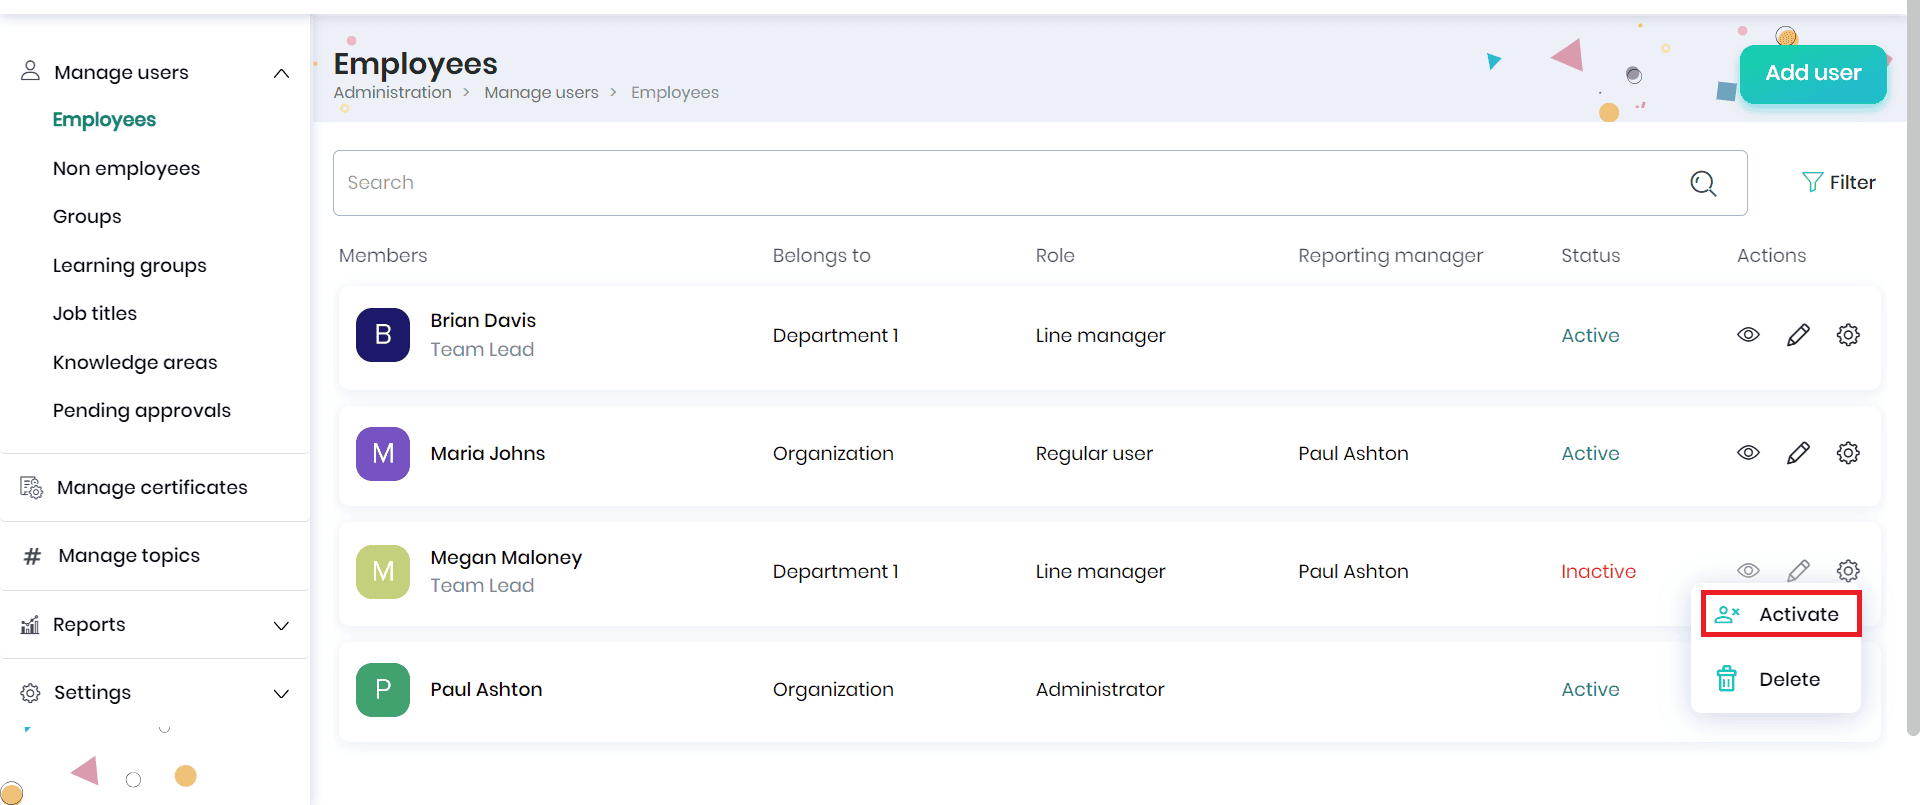
Deactivate the employee
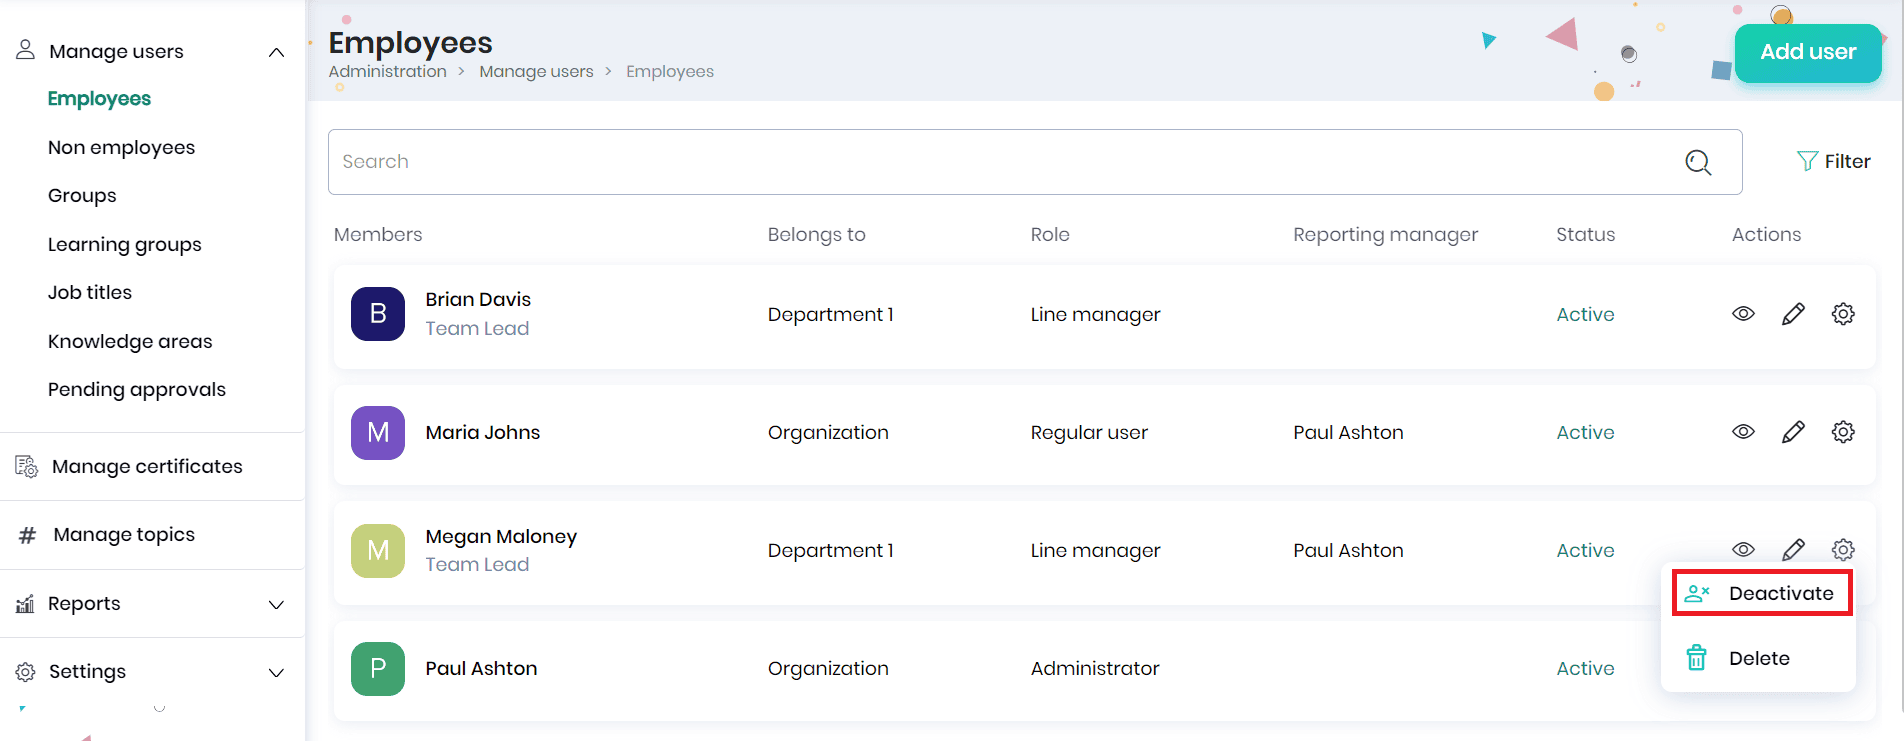
- Click on the Settings icon against the employee and Deactivate option.
- A confirmation message will appear, where you may click on the Yes button to deactivate the employee.
- Once the employee is inactive, their access to Skill Lake and the email and push notifications will be blocked.
- To activate the employee, click on the Settings icon against the employee and Activate option.
- A confirmation message will appear, where you may click on the Yes button to activate the employee. The employee’s access to Skill Lake will be restored.
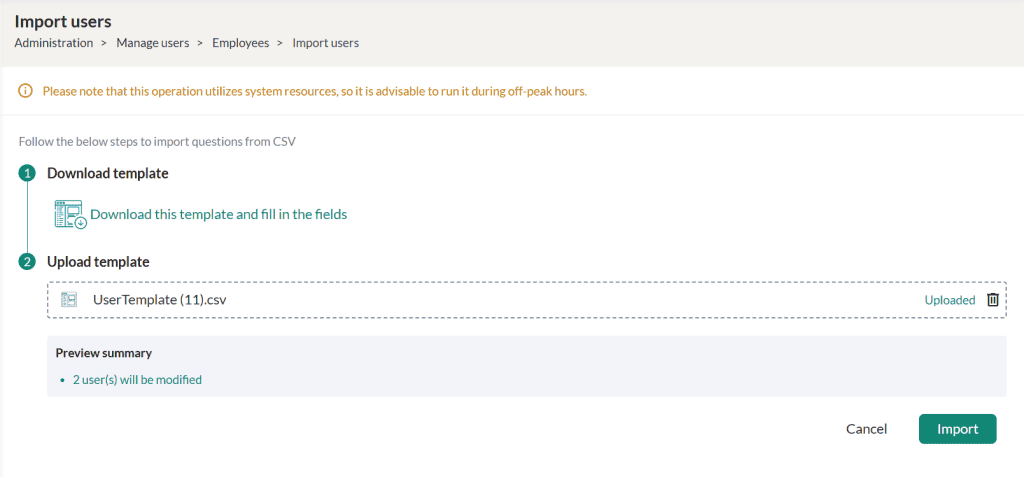
Bulk Import of users
Admins can efficiently add multiple users at once using the Bulk Import option located under Administration > Manage users > Employees List. This feature is accessible to all admins with the appropriate permission to add users.
To begin, click the Import Users button. You’ll be directed to a page where you can download a sample template. Fill in this template with the necessary user details, then upload it back into the system to start the import process. After importing the file, the system will validate it and display the number of users to be added, the number to be modified, and any errors found. This information will be shown to the admin, who will have the option to download the error report and fix any errors before re-importing the file.
The bulk import is processed as a background job, it may take some time to complete. Once completed, an email report will be sent to the admin with the status of the bulk import action.Choose Yes In the ‘Send activation email to new users upon account creation’ field, Click on the Import button.
Note:
- If there are any issues while uploading the template, you can download the error report and fix the issues and reupload the template.
- While importing the users as bulk,
- If the Admin user fills the Password field, the provided password will be set for the user and Welcome email with Password will be sent to user
- If the Password field is empty, a Welcome Email with an activation link will be sent.
Non employees
This feature helps organizations manage employees who do not fall within the organizational hierarchy. This ensures onboarding courses or courses intended exclusively for the organization can be assigned effectively. You can view the member name, belongs to, role, reporting manager, status and actions that can be performed.
The users outside Skill Lake who do not belong to any organizational group/sub group will be displayed in this page.

- Click on the user name or View icon to view the non-employee profile.
- Click on the Edit icon to edit the non-employee profile
- Click on the Settings icon and the Deactivate option to deactivate the non-employee.
- To delete the non-employee, click on the Settings icon and the Delete option.
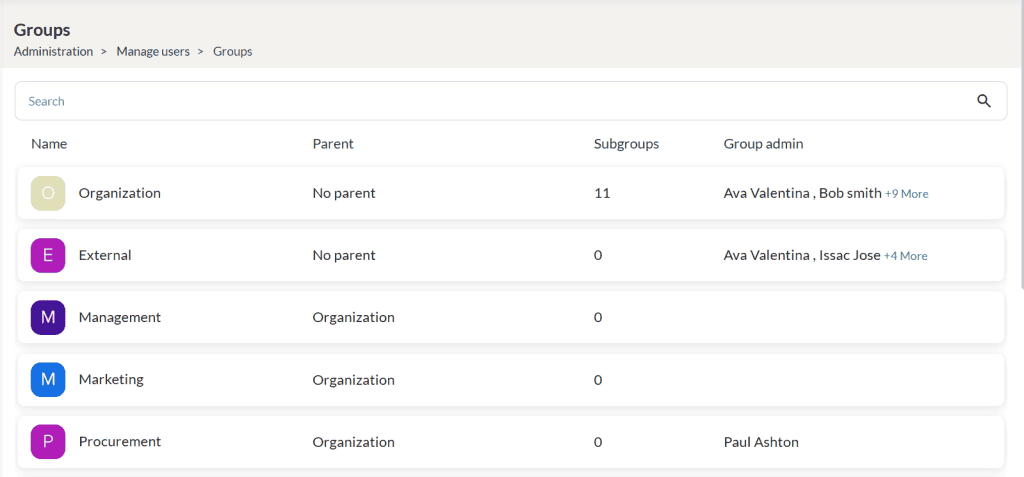
Groups
The Manage Groups section displays all the groups for which you have manage permissions. These groups can exist across various organizational levels such as Organization, Department, Sub-Department, or any other custom levels as needed.
Note:
- If a user manages an organization-level group (e.g., an organization named “XYZ”), they will see “XYZ” listed under Manage Groups. Additionally, the user will automatically be able to manage all subgroups under “XYZ,” including departments and sub-departments linked to them.
- If a user is assigned to manage a Department-Level group (e.g., “Sales Department”) and there are no subgroups under it, the user can only manage that specific department. The user’s assigned role determines permissions for managing these groups.
Note: For the Skill Lake installations integrated through a third-party service, the groups created through that service will be displayed in the Groups page.
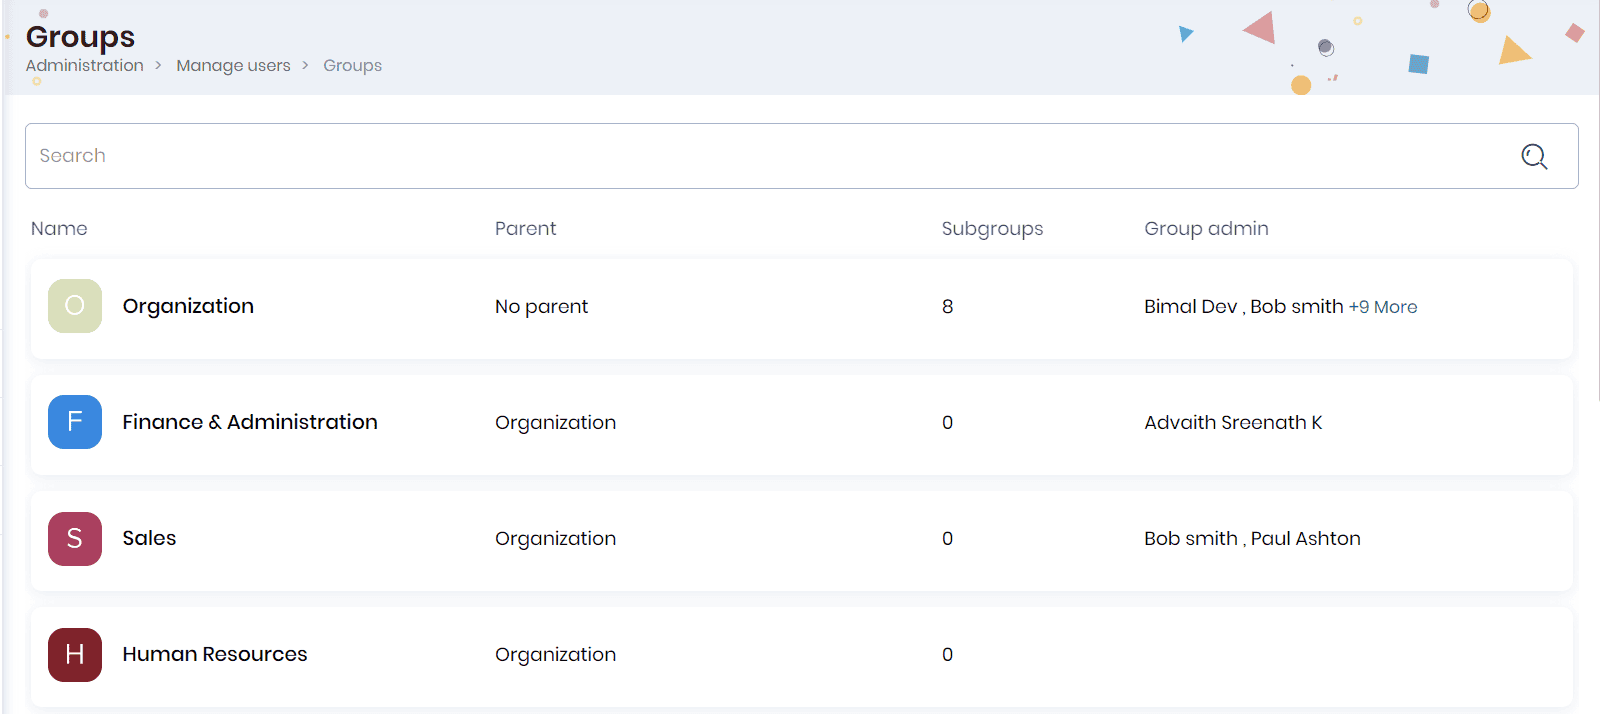
- Click on the Organization to view the departments created under it.
- You can view the profile picture, group admins, departments created under the parent organization, members of the organization, and courses in which everyone in the organization is enrolled.
Departments
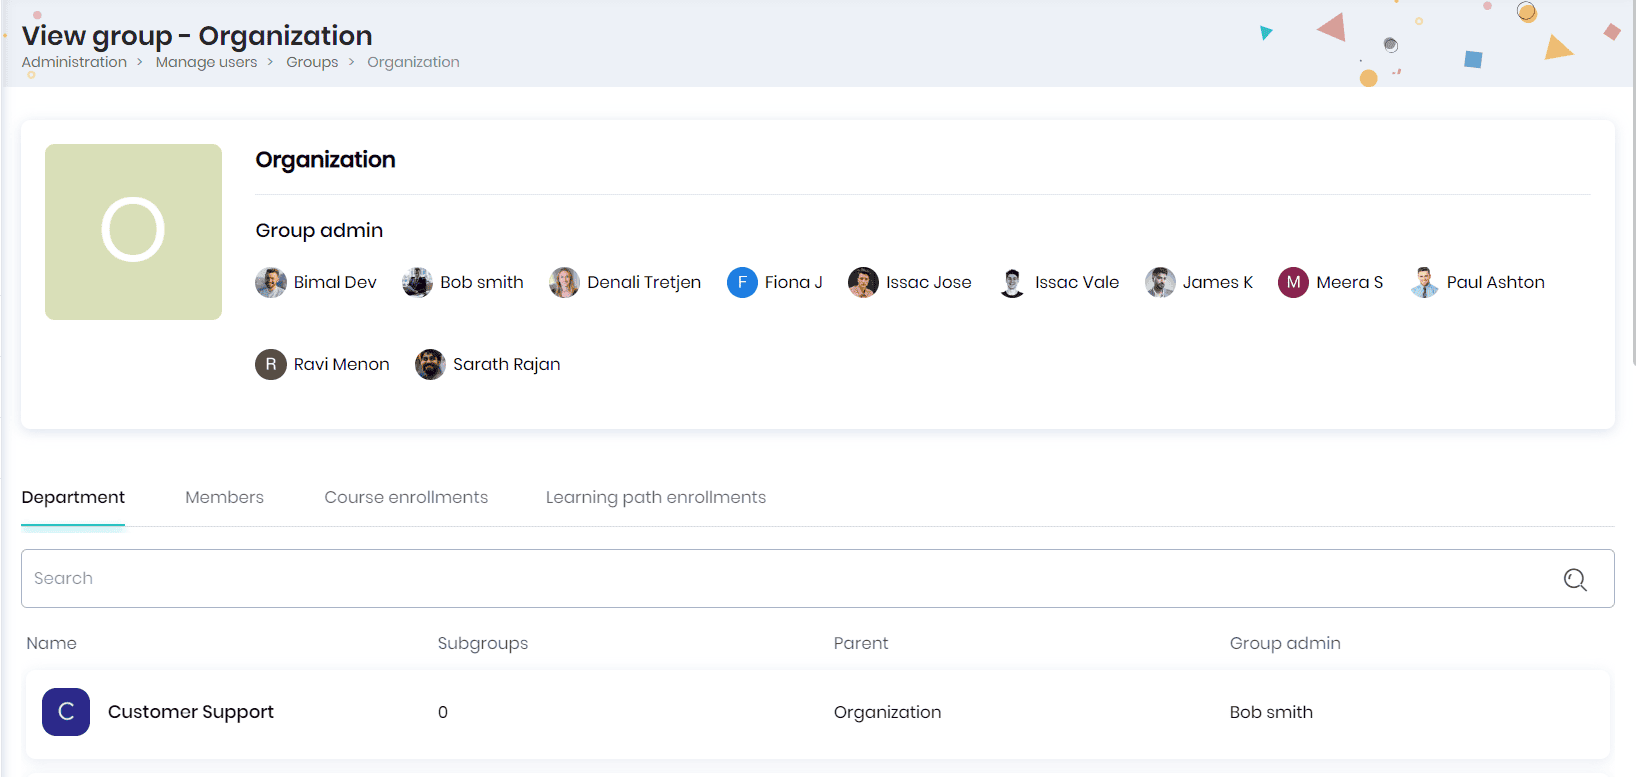
- If the organization name is XYZ, the Departments tab will display all departments under XYZ. These are groups created at the Department Level with XYZ set as their parent.
- If you click on a department, it will display all Sub-Departments under it. These are groups created at the Sub-Department Level with the selected department as their parent.

- Click on any group under the ‘Department’ tab to view the group admins, profile picture, group members, courses and learning paths enrolled to the department (and organization).
- Click on the member’s name to view his profile and on the ‘Edit’ icon to edit the user profile.
- The Course Enrollment tab allows the respective group admin to assign courses to their groups. From here, the admin can assign courses, manage course enrollment settings, and more. When a course is assigned, all members of the groups and subgroups will be automatically enrolled to the course. This is helpful when planning courses for entire organizations or groups.
- The Learning path enrollments tab allows the respective group admin to assign learning paths to their groups. The admin can assign a learning path, manage learning path assignment settings, and more. When a learning path is assigned, all members of the groups and subgroups will be automatically enrolled to the learning path. This is helpful when planning a learning path for entire organizations or groups.
Members
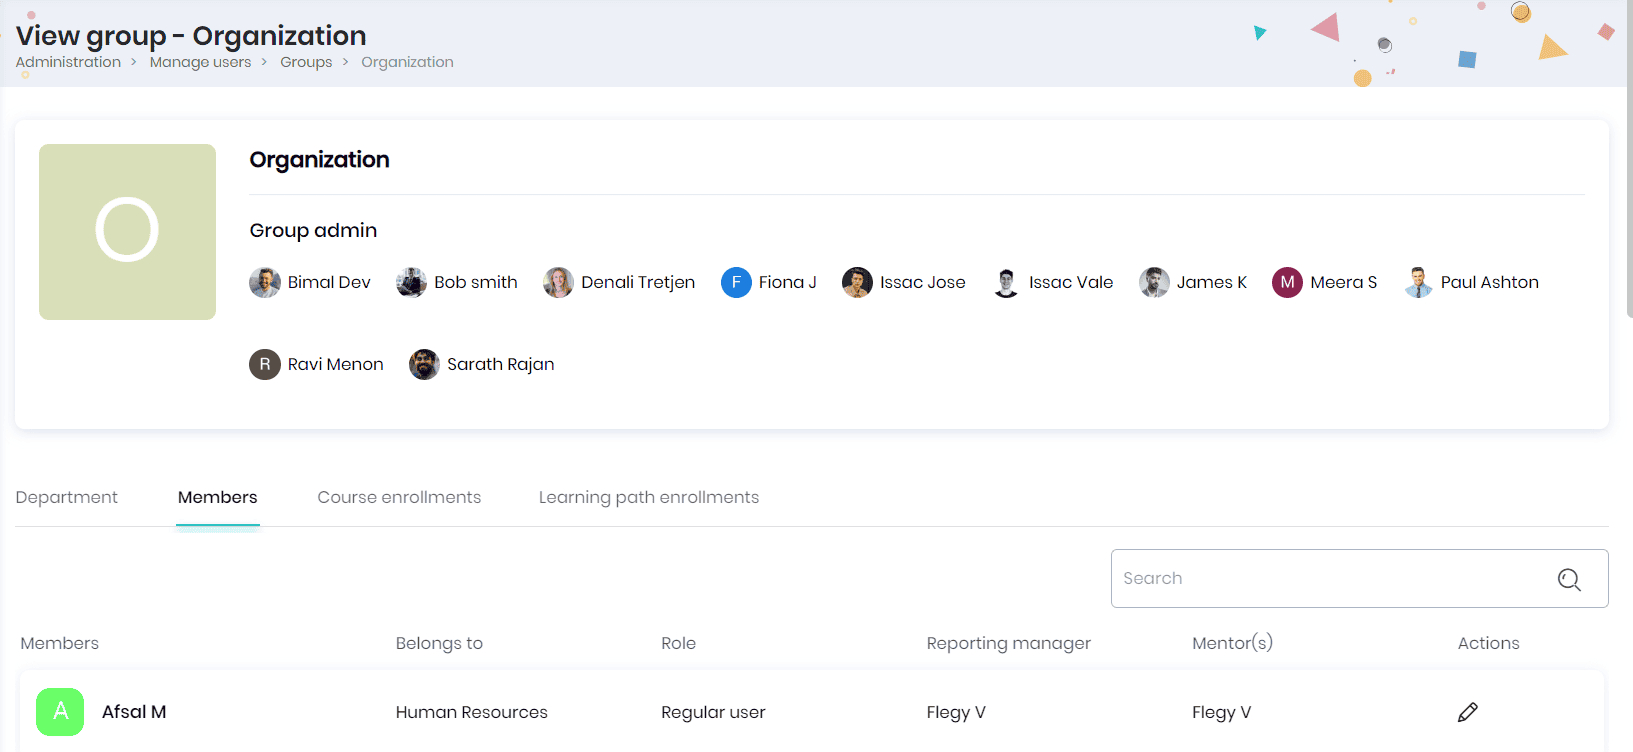
- Click on the Members tab to view the members assigned to this department.
- You can view the member details such as name, belongs to department, role, reporting manager, and mentors.
- Click on the member’s name to view his profile.
- Click on the Add user button to create a new user.
- Click on the Edit icon to edit the user profile.
- Click on the Delete icon to delete the user from the department.
Course Enrollments
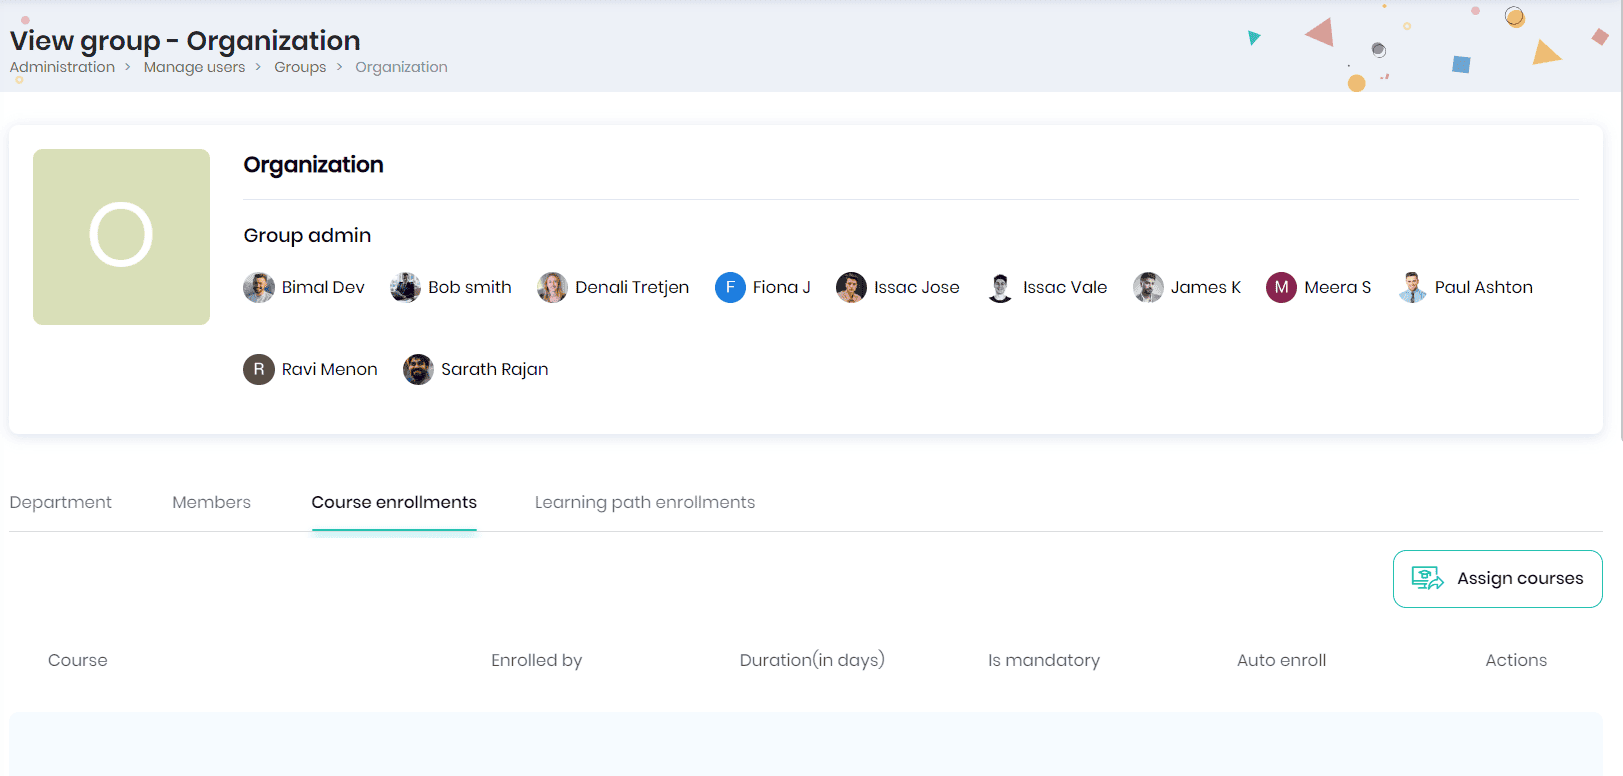
- The Course Enrollment tab allows the respective group admin to assign courses to their groups. From here, the admin can assign courses, manage course enrollment settings, and more. When a course is assigned, all members of the groups and subgroups are automatically enrolled in it. This is helpful when planning courses for entire organizations or groups.
Note: Admins cannot manage individual user enrollments from this section. To do so, they can go to Browse Courses > Group Enrollment Options under the course.
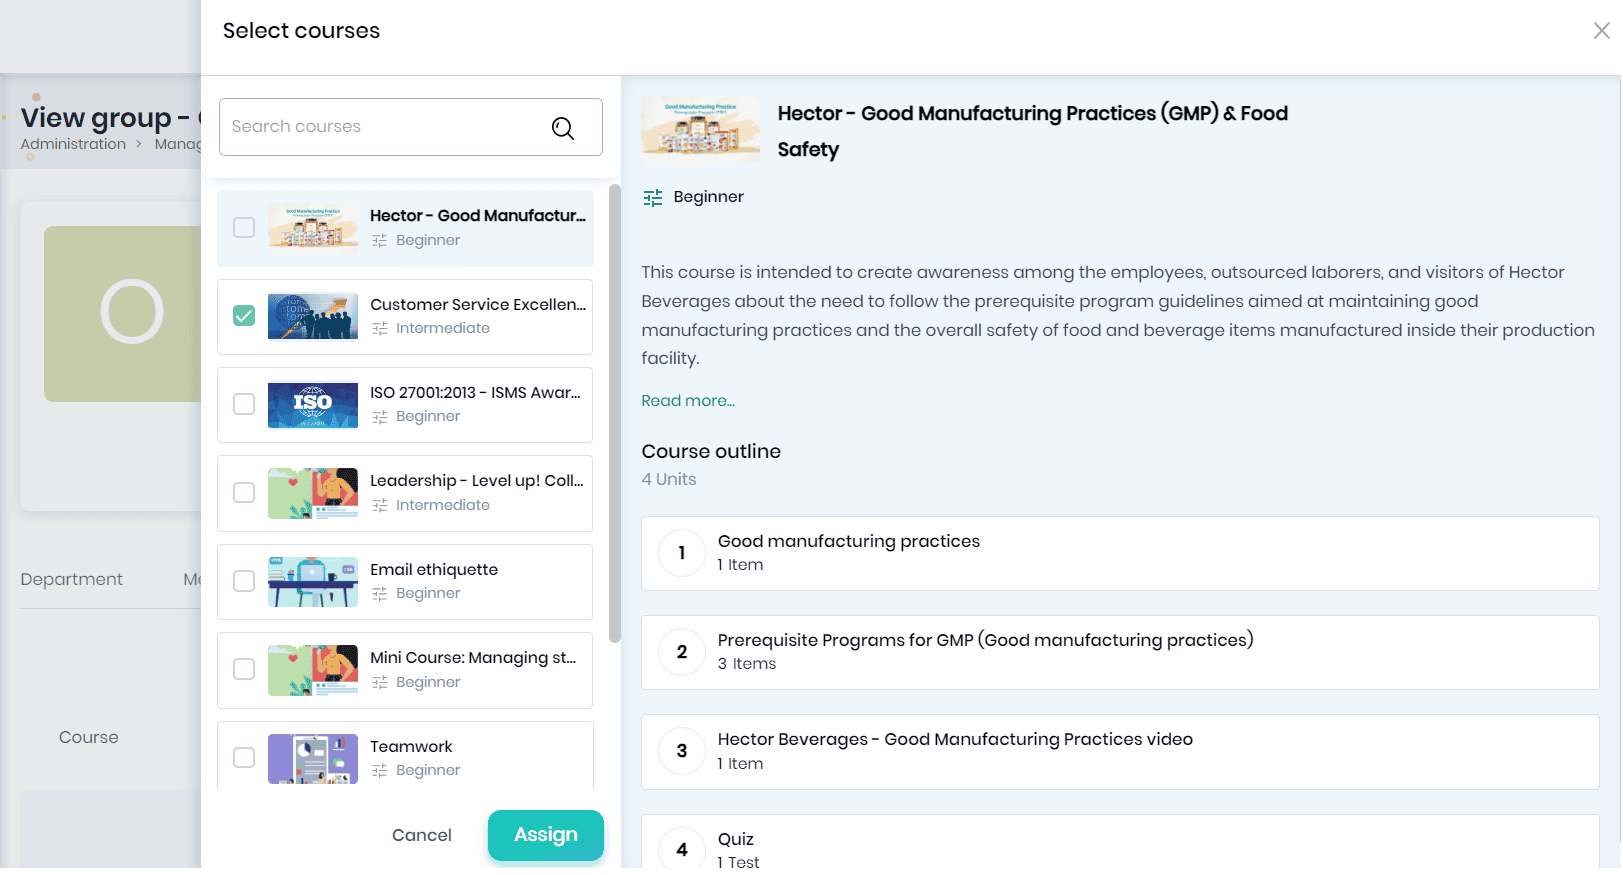
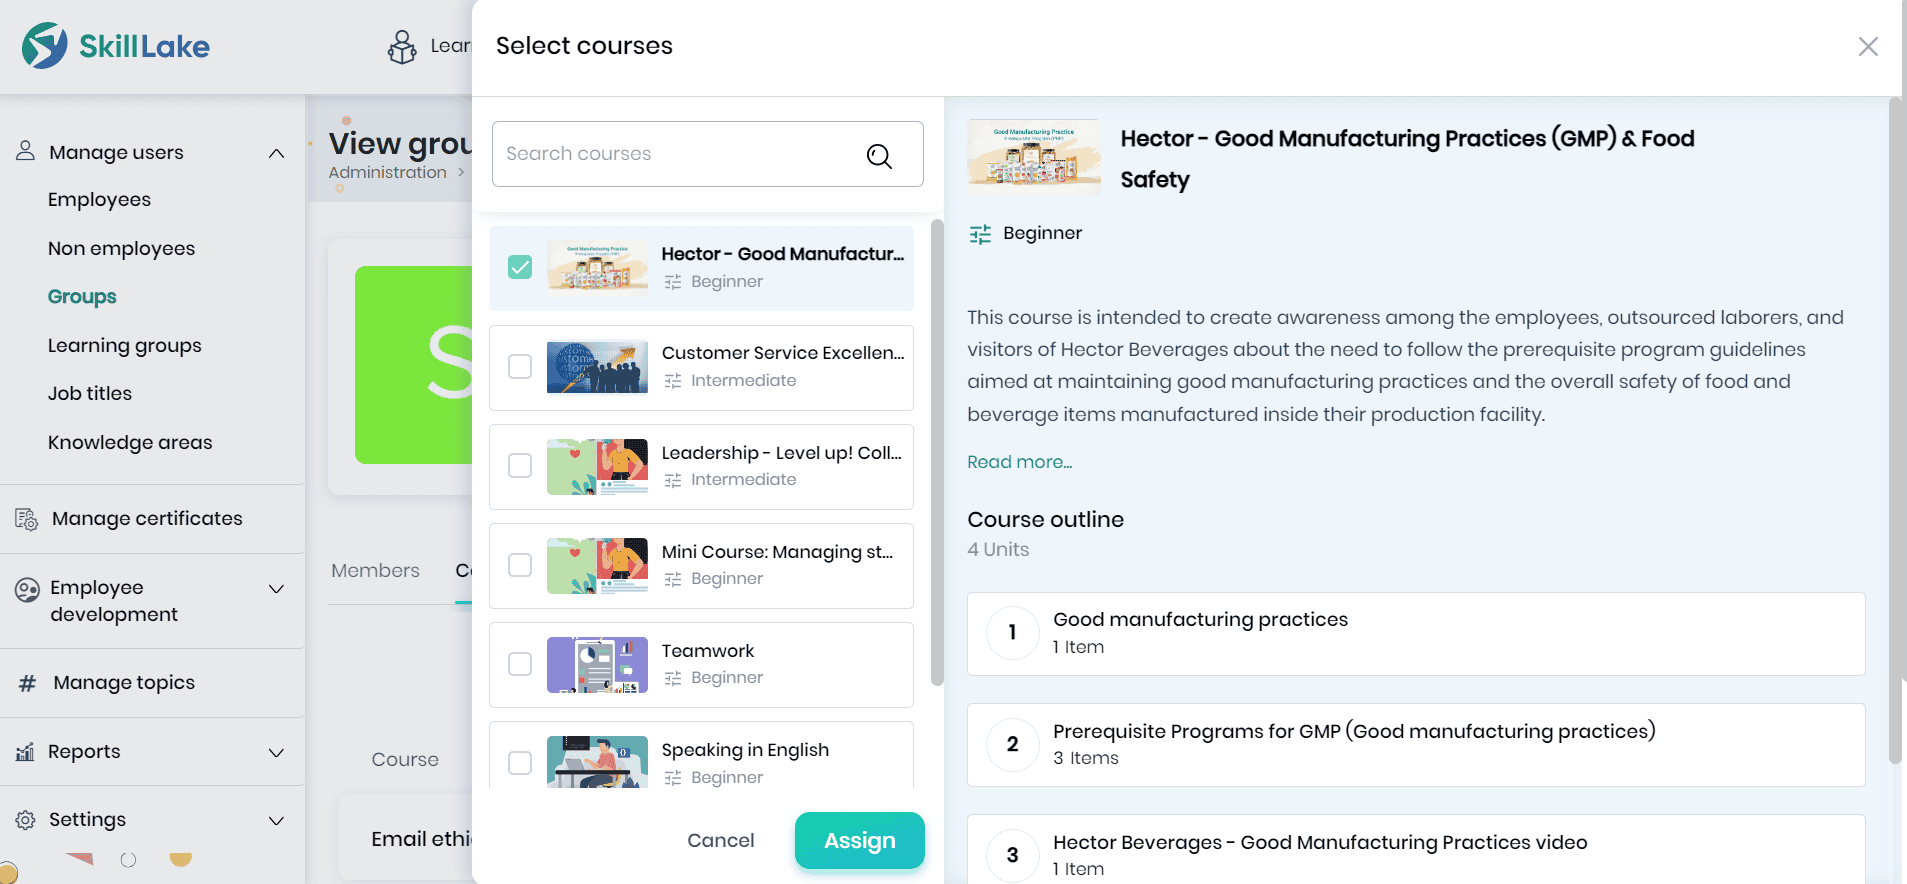
- Click on the Assign courses button to open the Select courses pop-up.
- You can select the required courses you want to assign to the group and click the Assign button.
Note: The courses for which you have selected this group in the ‘who can see this course’ (Manage courses > course > course settings) will be available for selection.
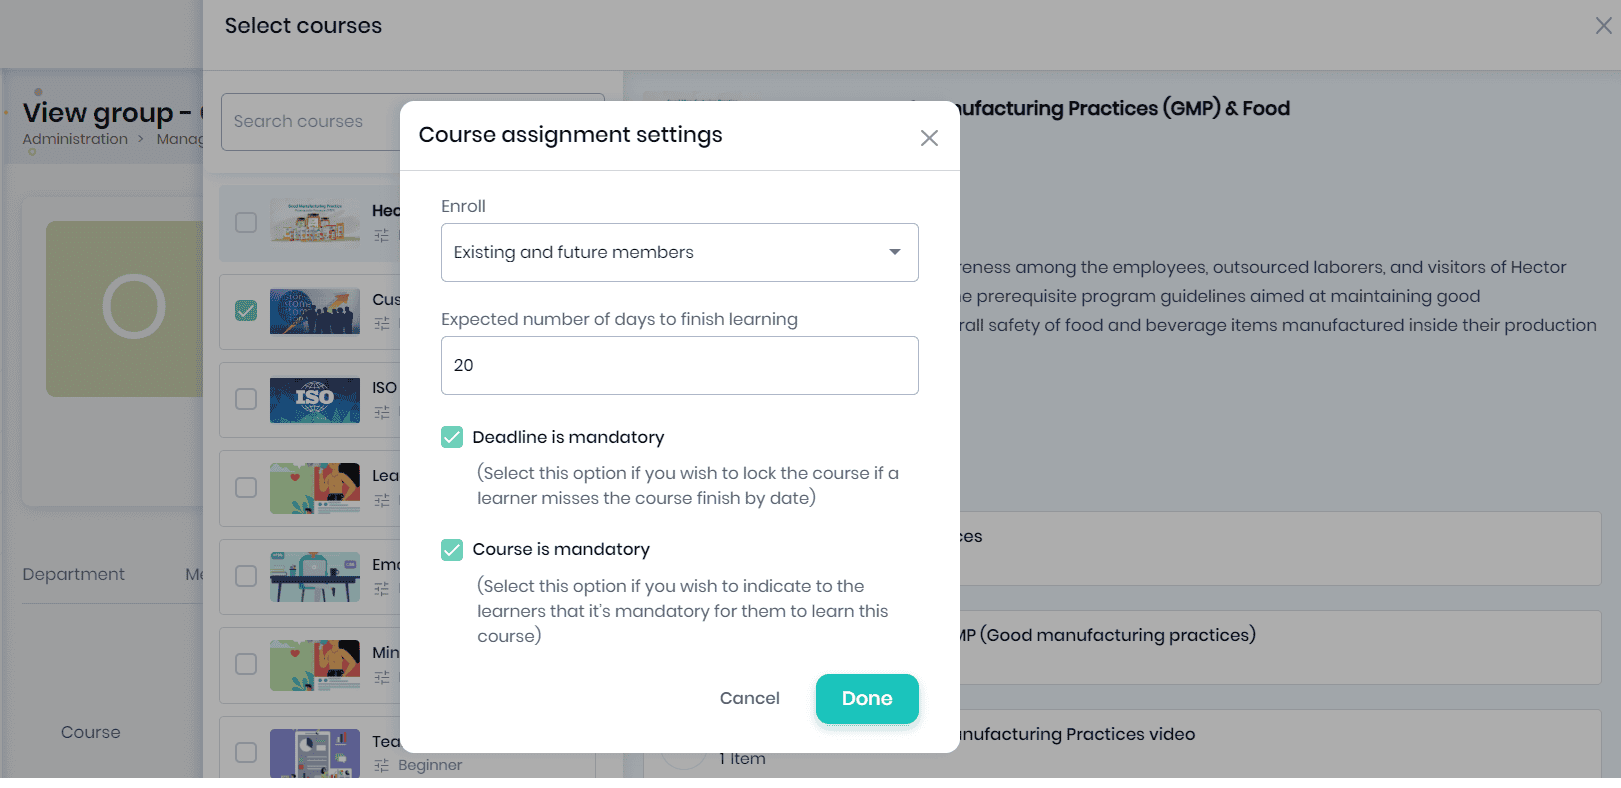
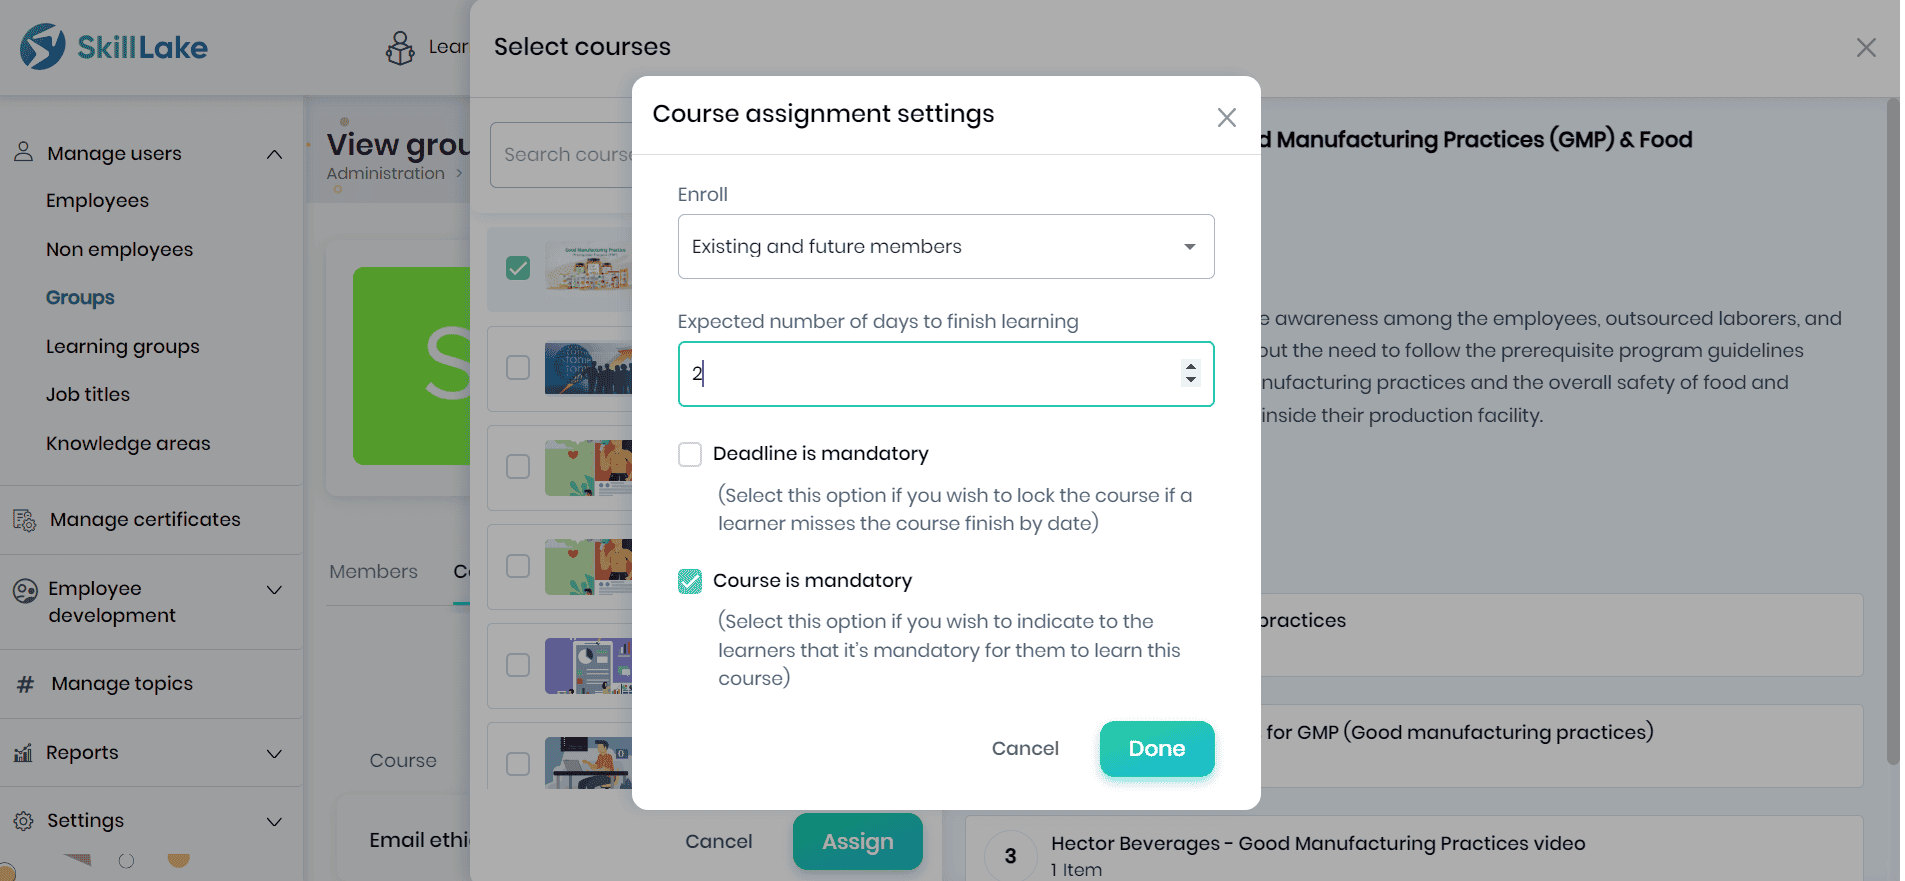
- The course assignment settings pop-up appears, where you can enroll the courses for existing members, future members and existing & future members.
- Enter the expected number of days to complete the course, and tick the mandatory deadline or course mandatory options. Marking a course as mandatory will indicate learners that they are required to complete the course. Setting a mandatory deadline will lock course access for learners if they miss the course finish by date (deadline).
- Click on the Done button to save the course assignment settings.
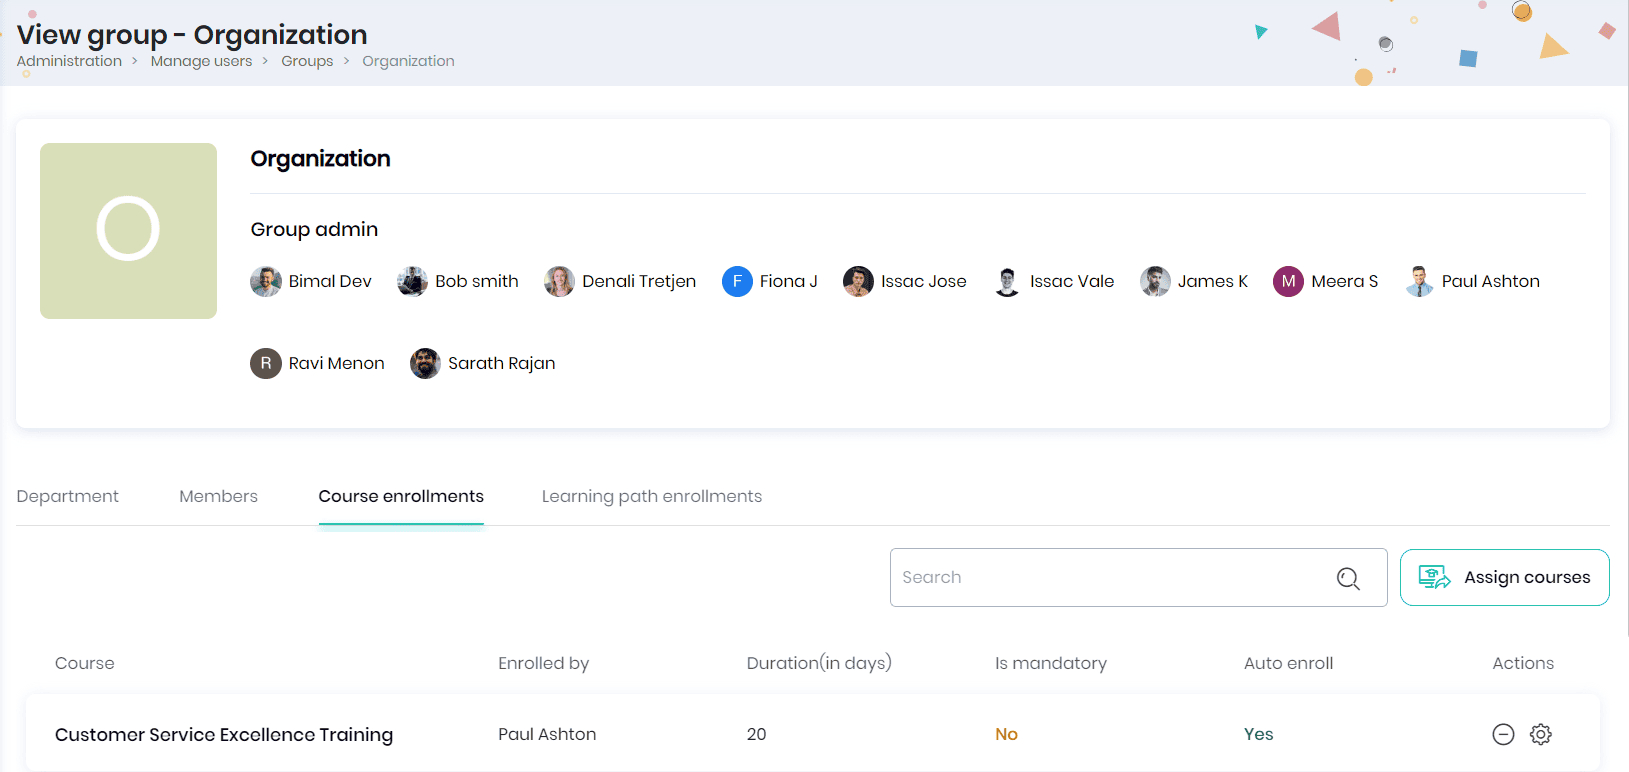
- The assigned courses will be displayed in the Course enrollments tab.
- The course name, enrolled by, duration (in days), is mandatory, auto enroll and actions.
- You may click on the Unenroll icon to unenroll the group from the course.
- Click on the Settings icon to edit the course enrollment settings.
Learning path enrollments
- The Learning path Enrollments tab allows the respective group admin to assign learning paths to their groups. From here, the admin can assign learning paths, manage learning path assignment settings, and more. When a learning path is assigned, all members of the groups and subgroups will be automatically enrolled to the learning path. This is helpful when planning learning paths for the entire organization or groups.
Note: Admins cannot manage individual user enrollments from this section. To manage individual enrollments, this can be done via Browse > Learning path > Group Enrollment Options.
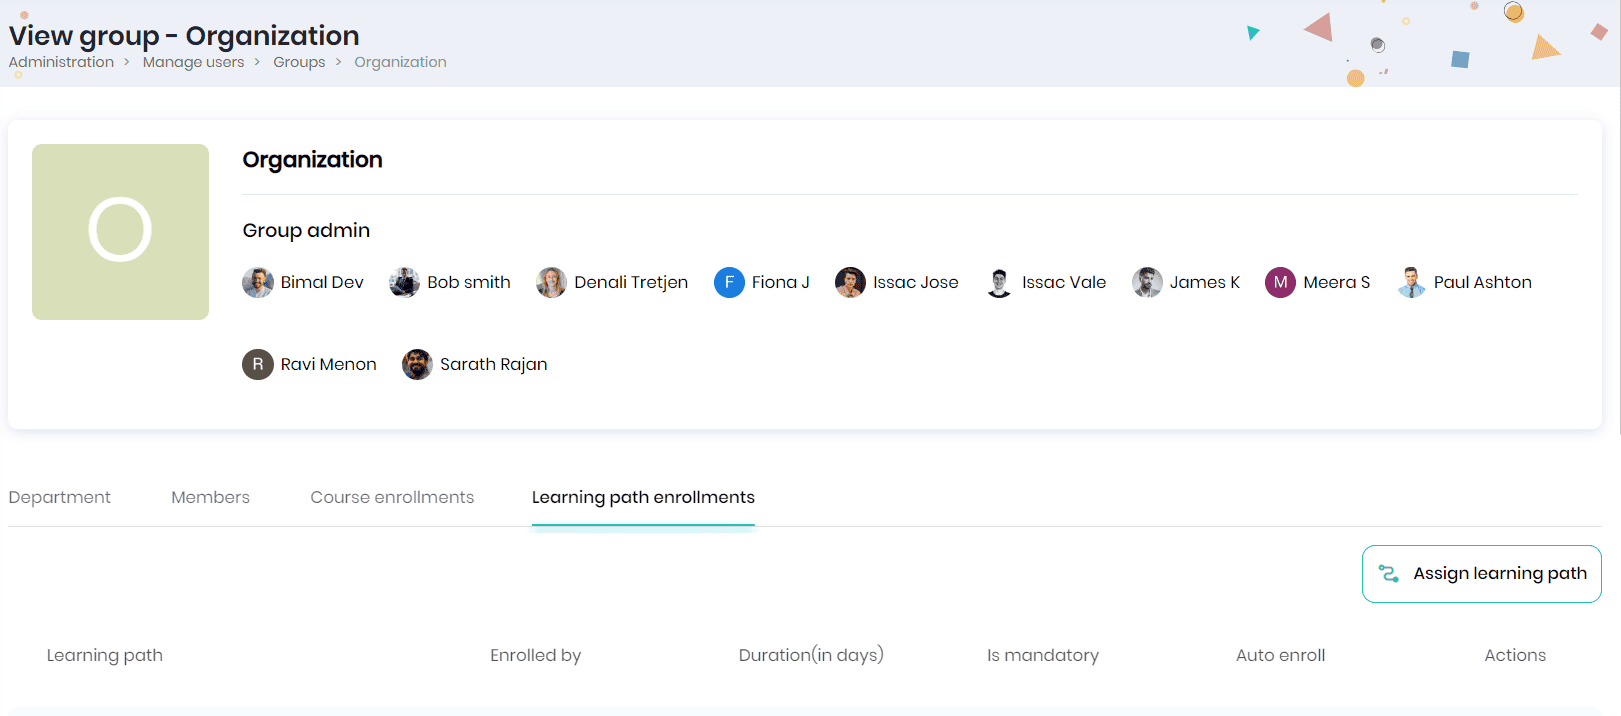
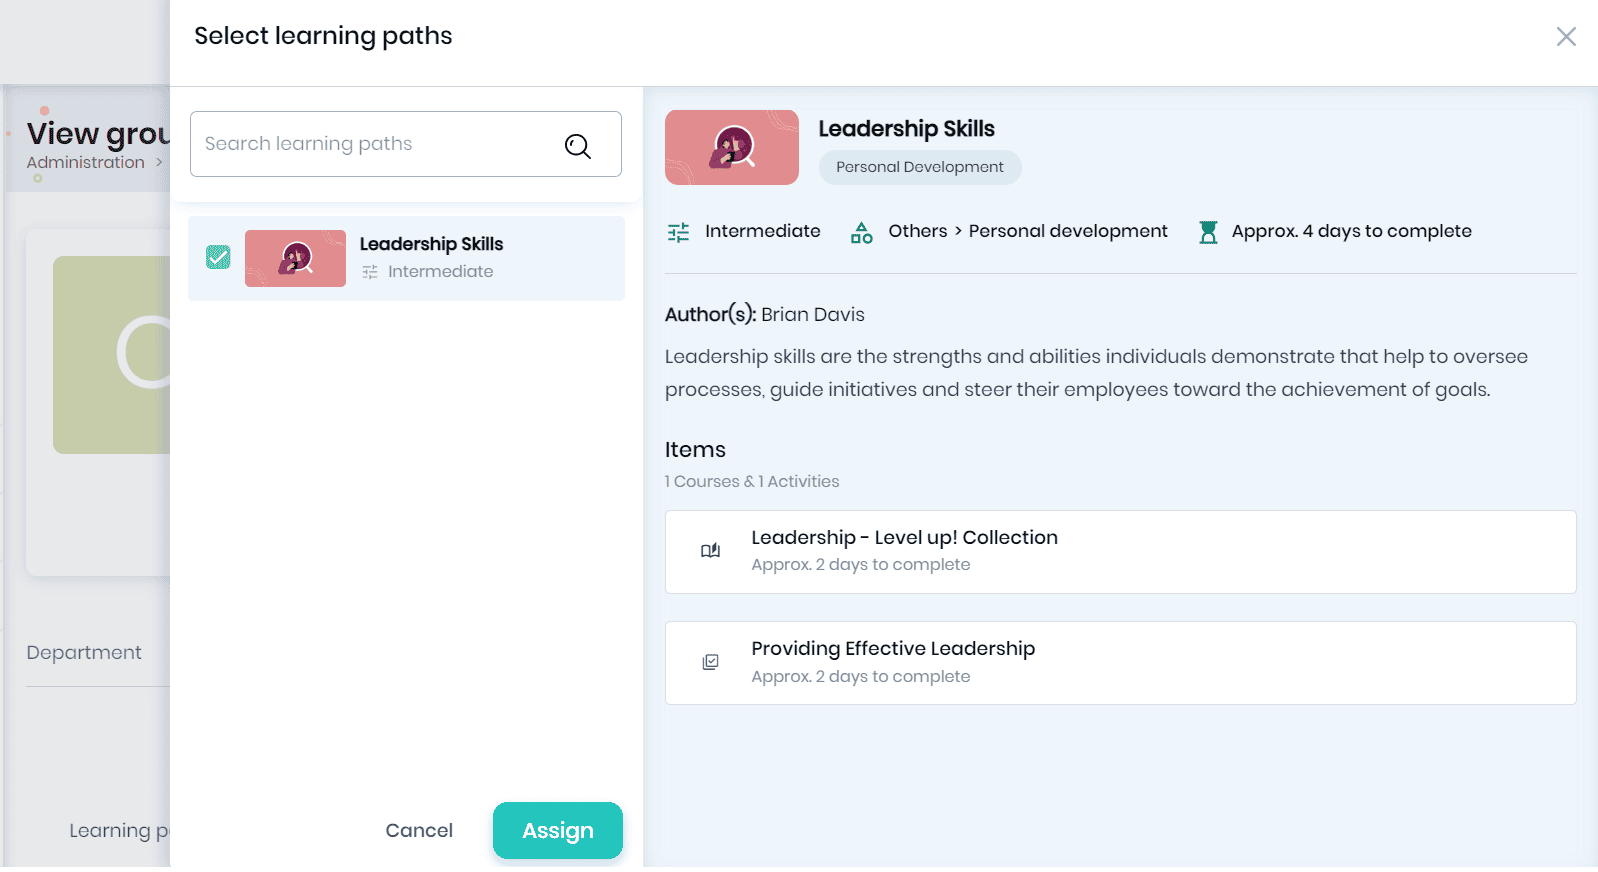
- Click on Assign Learning path button to assign a learning path to this group.
- You may select the required learning paths you want to assign to the group and click the Assign button.
Note: The learning paths for which you have selected this group in the ‘who can see this learning path’ (Manage courses > learning path > path settings) will be available for selection.
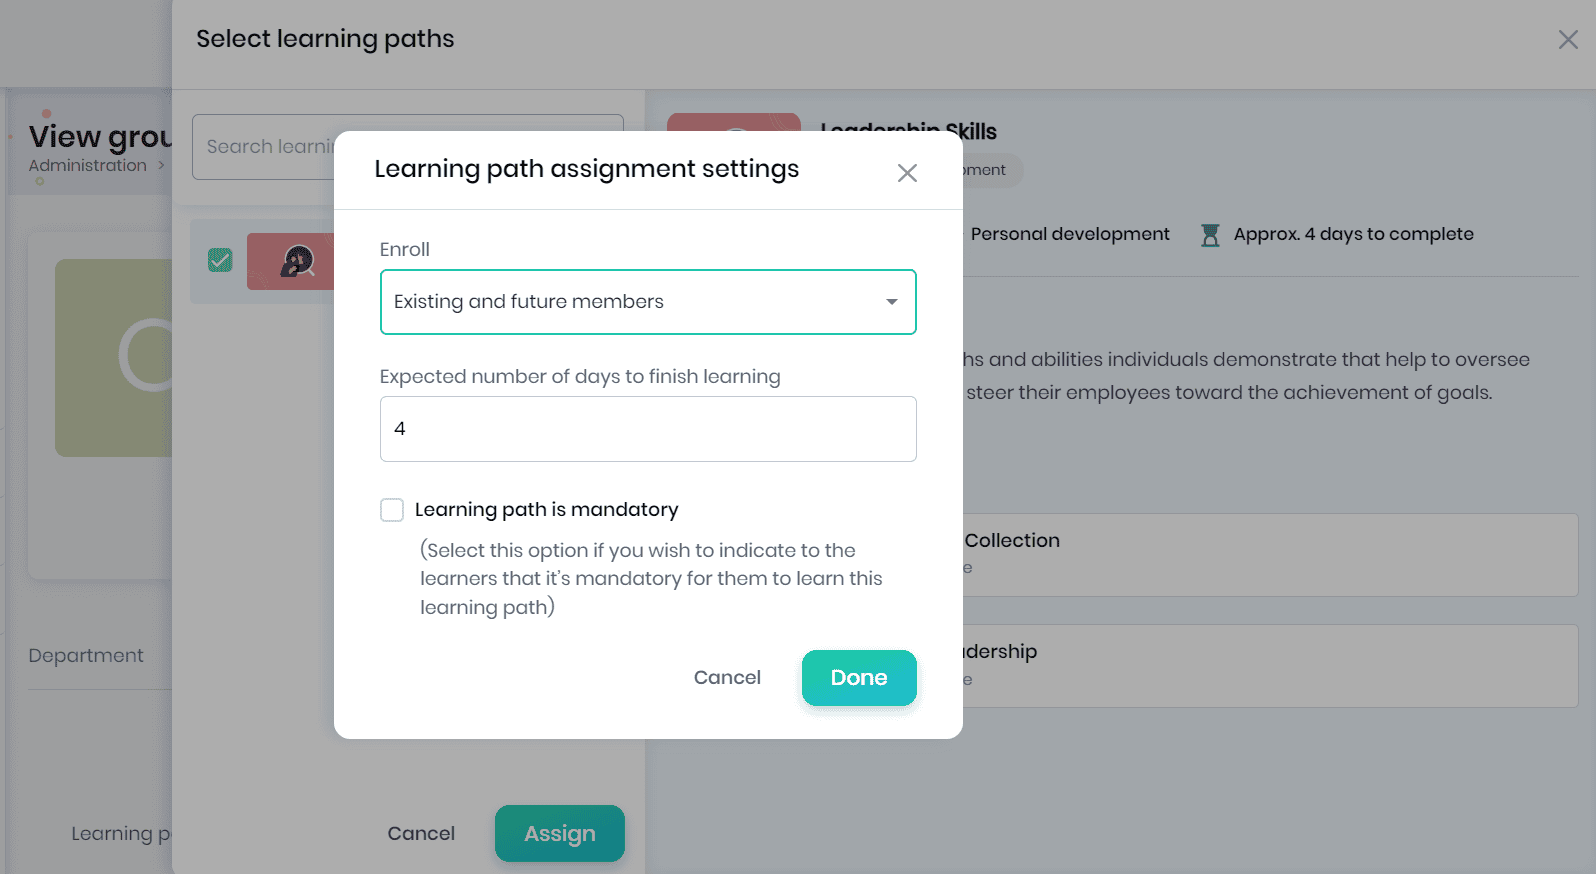
- The learning path assignment settings pop-up appears, where you can enroll the learning paths for existing members, future members and existing & future members.
- Enter the expected number of days to finish the learning, tick the learning path mandatory options.
- Click on the Done button to save the learning path assignment settings.
- The assigned learning paths will be displayed in the Learning path enrollments tab.
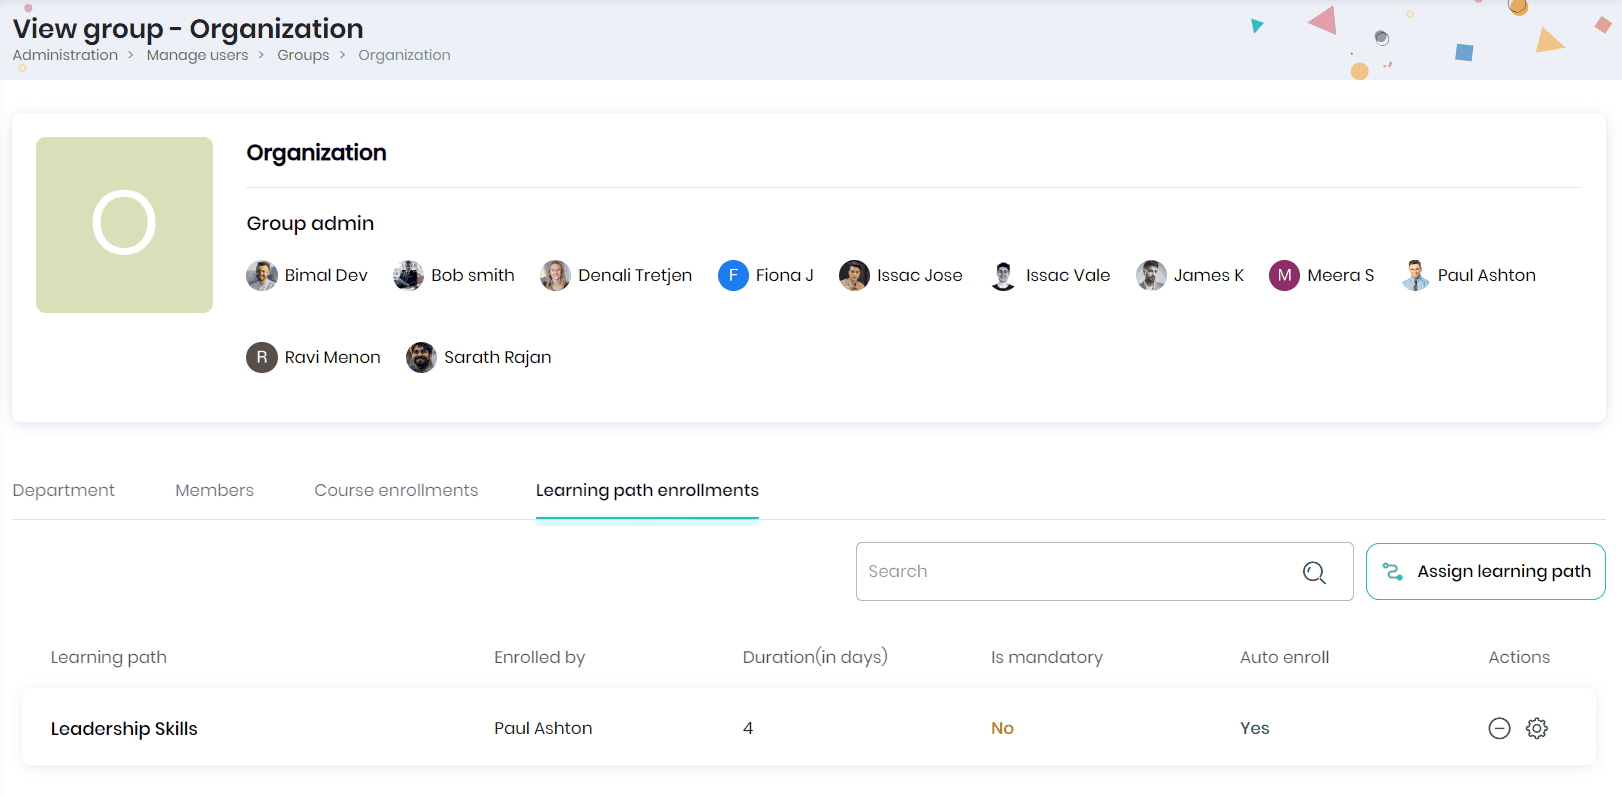
- The learning path name, enrolled by, duration (in days), is mandatory, auto enroll and actions.
- You may click on the Unenroll icon to unenroll the group from the learning path.
- Click on the Settings icon to edit the learning path enrollment settings.

Learning Groups
A Learning Group is to create independent teams that enable Admins to deliver targeted learning.
Example: If a training program is planned at the manager-level users across different groups, then Admin can create a Learning Group, add these managers to the group, and assign specific courses and training materials. This approach helps to manage periodic training for managers, ensuring that the training materials are relevant only to them and not to other employees.
Adding a Learning Group
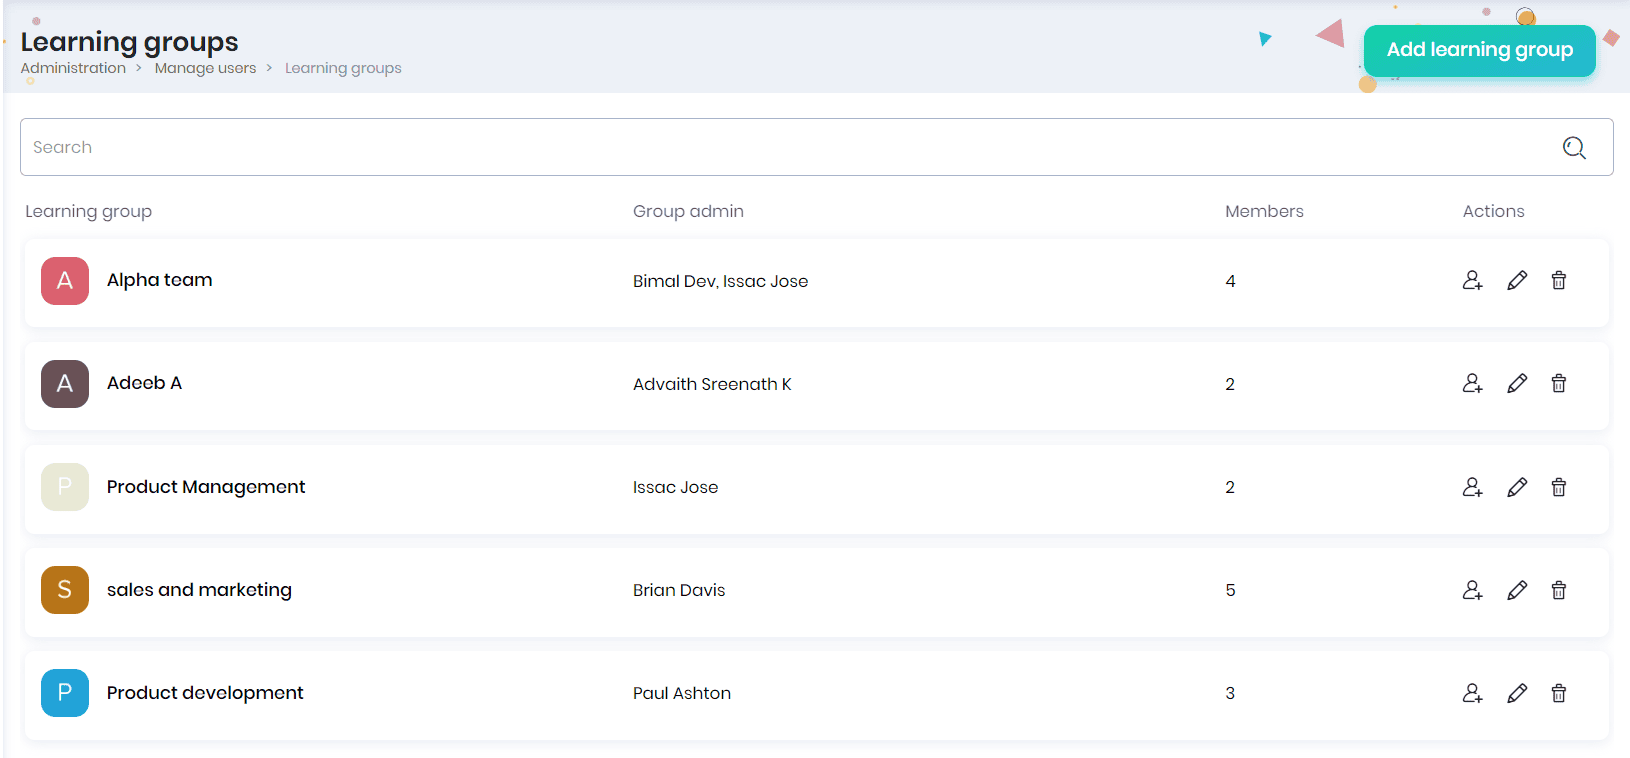
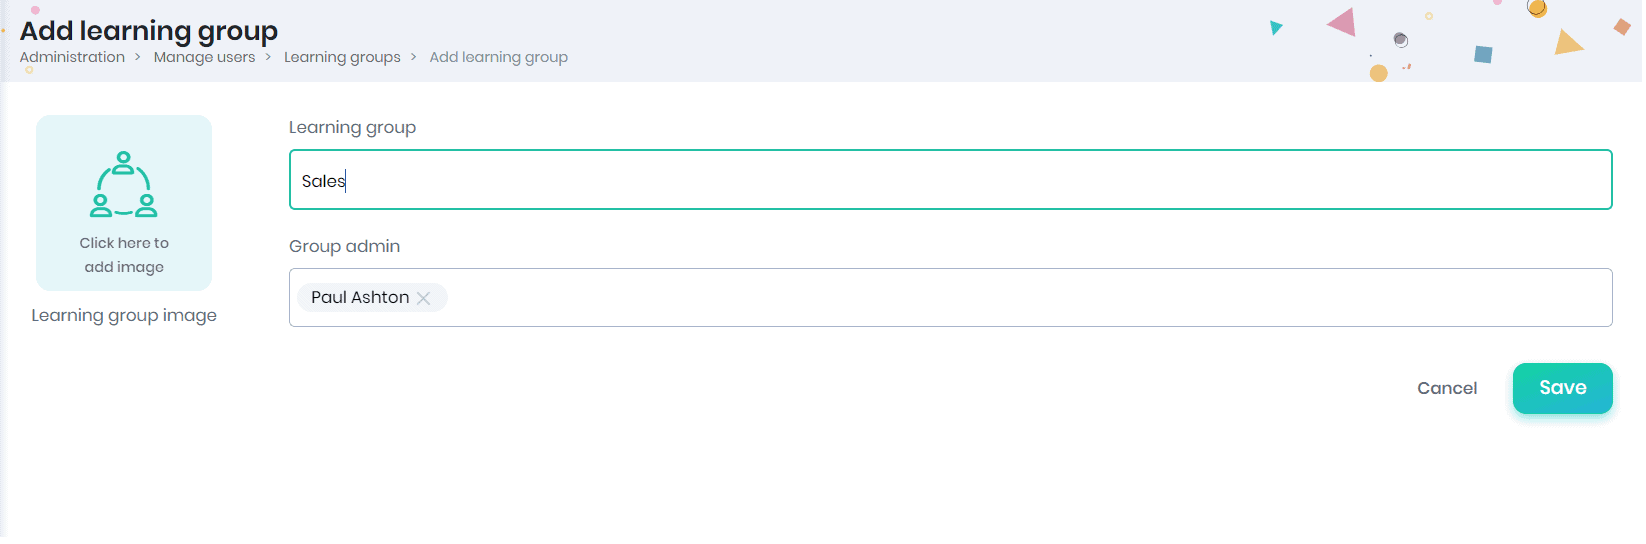
- Click on the Add Learning Group button to create a new learning group.
- Enter the learning group name, learning group admin, image of the learning group and click on the Save button.
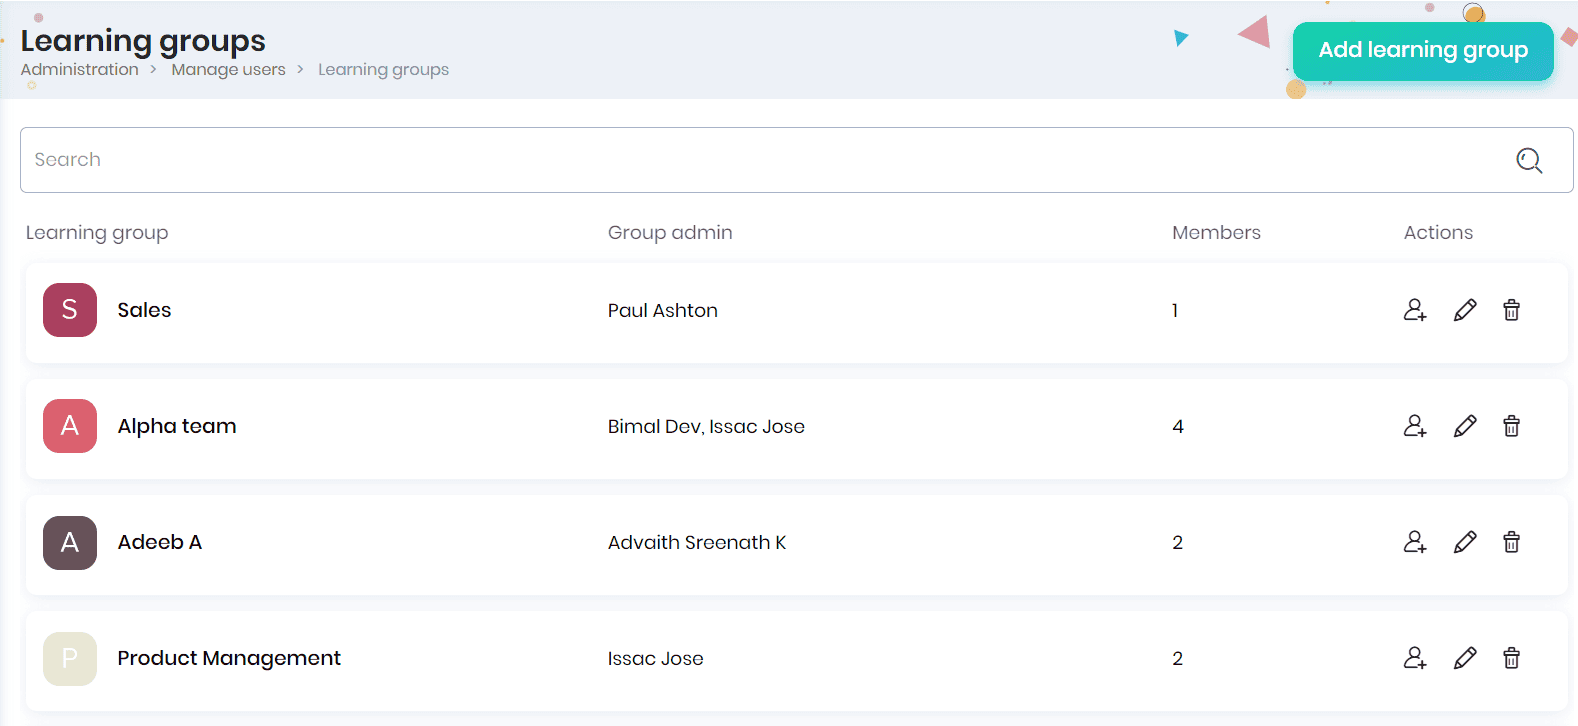
- The learning groups created will be listed in the Learning groups page.
- You can view the learning group details such as name, learning group head, number of members in the learning group, and actions.
- You can search the learning groups with their name using the Search option.
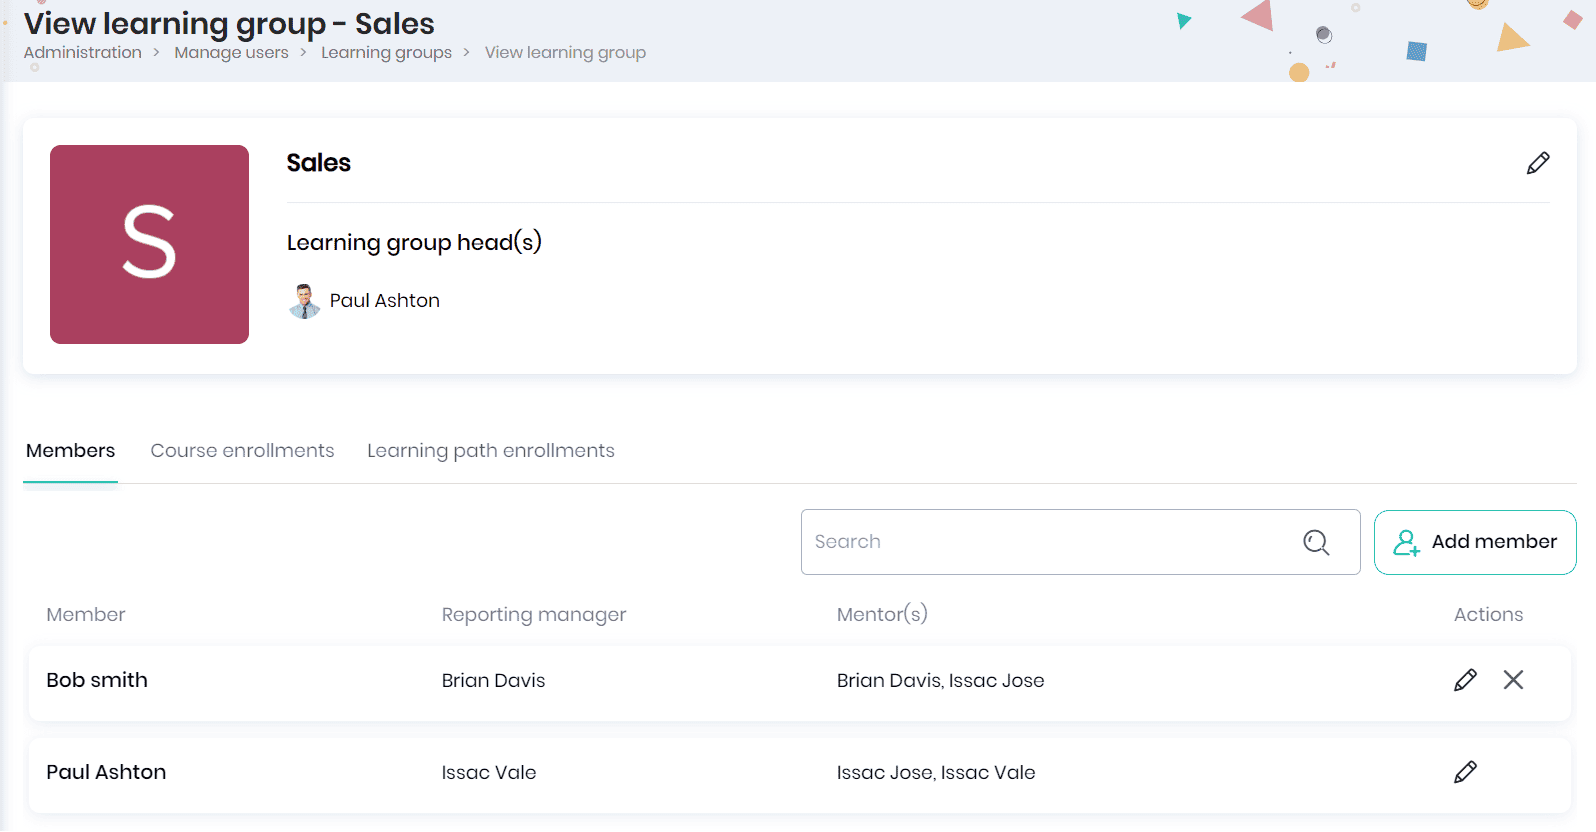
- Click on the learning group name to view the members, course enrollments and learning path enrollments.
Adding members to the learning group
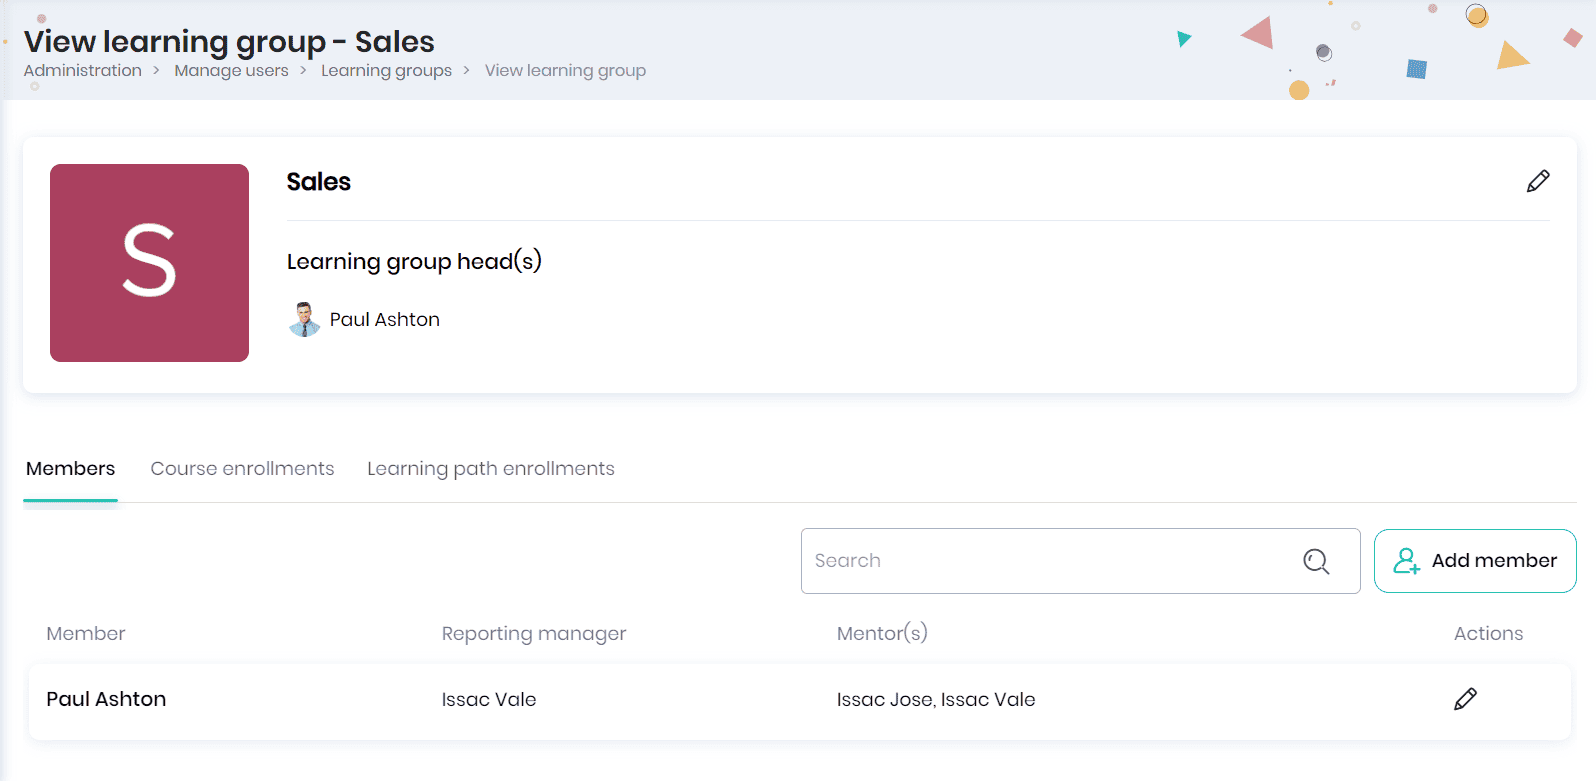
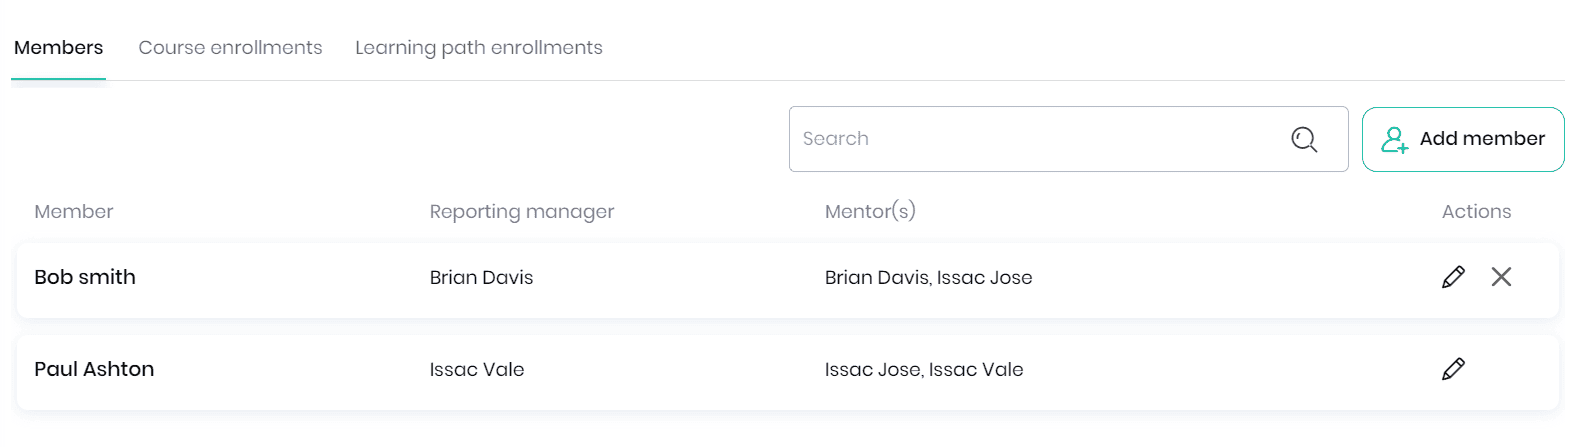
- In the Members tab, you can add members to the learning group. You can view the member name, reporting manager, mentors and actions that can be performed.
Note: You may add the members from the groups and subgroups you manage.
- Click on the Add member button to add new members to the learning group. Select the users and click on the Add to learning group button.
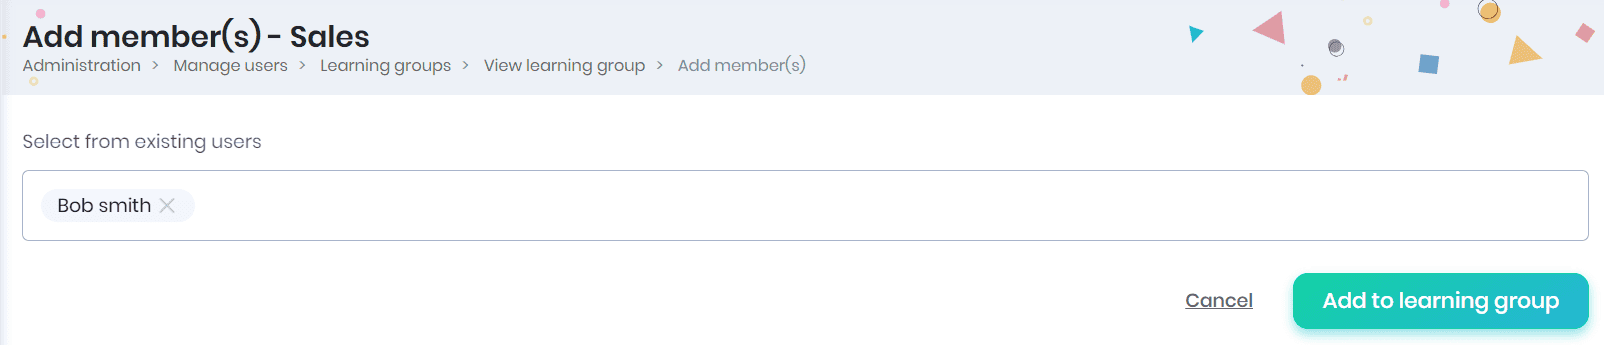
- The members added will be displayed in the ‘Members’ tab.
Editing learning group
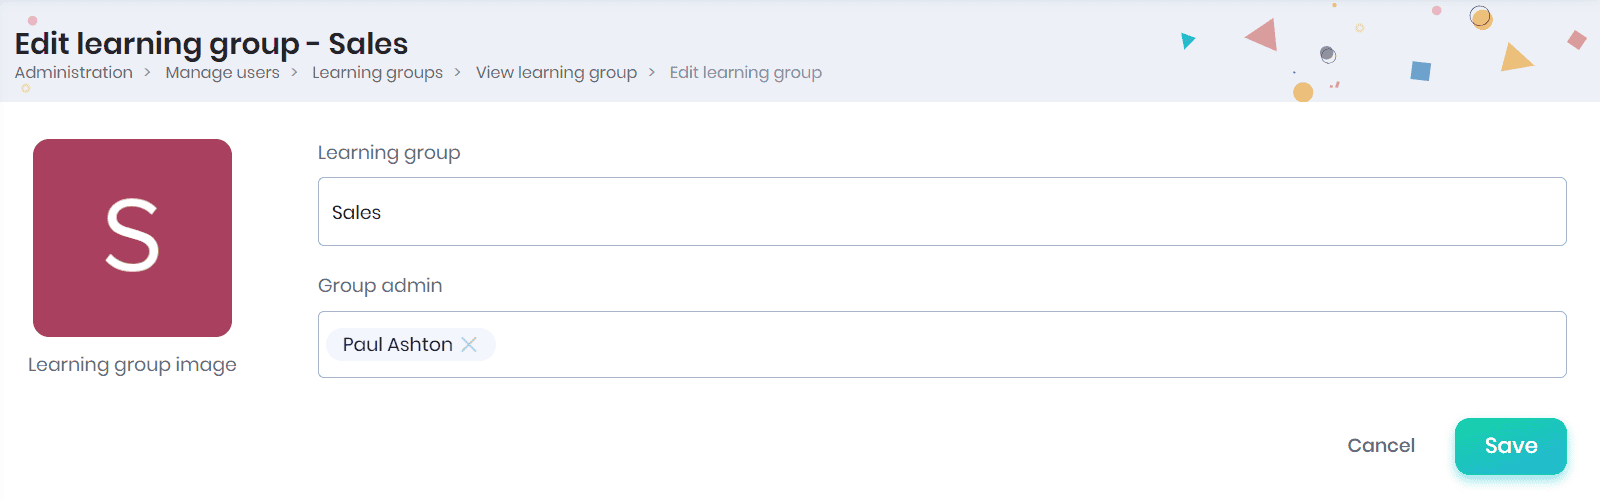
- Click on the Edit icon to edit the learning group details. You can edit the learning group name, learning group admin, learning group image and click on the Save button.
Editing member profile details
- You can click on the Edit icon to edit the member profile details. Click on the member to view the profile. Click on the Remove icon to remove the member from the learning group
Assigning courses to the learning group
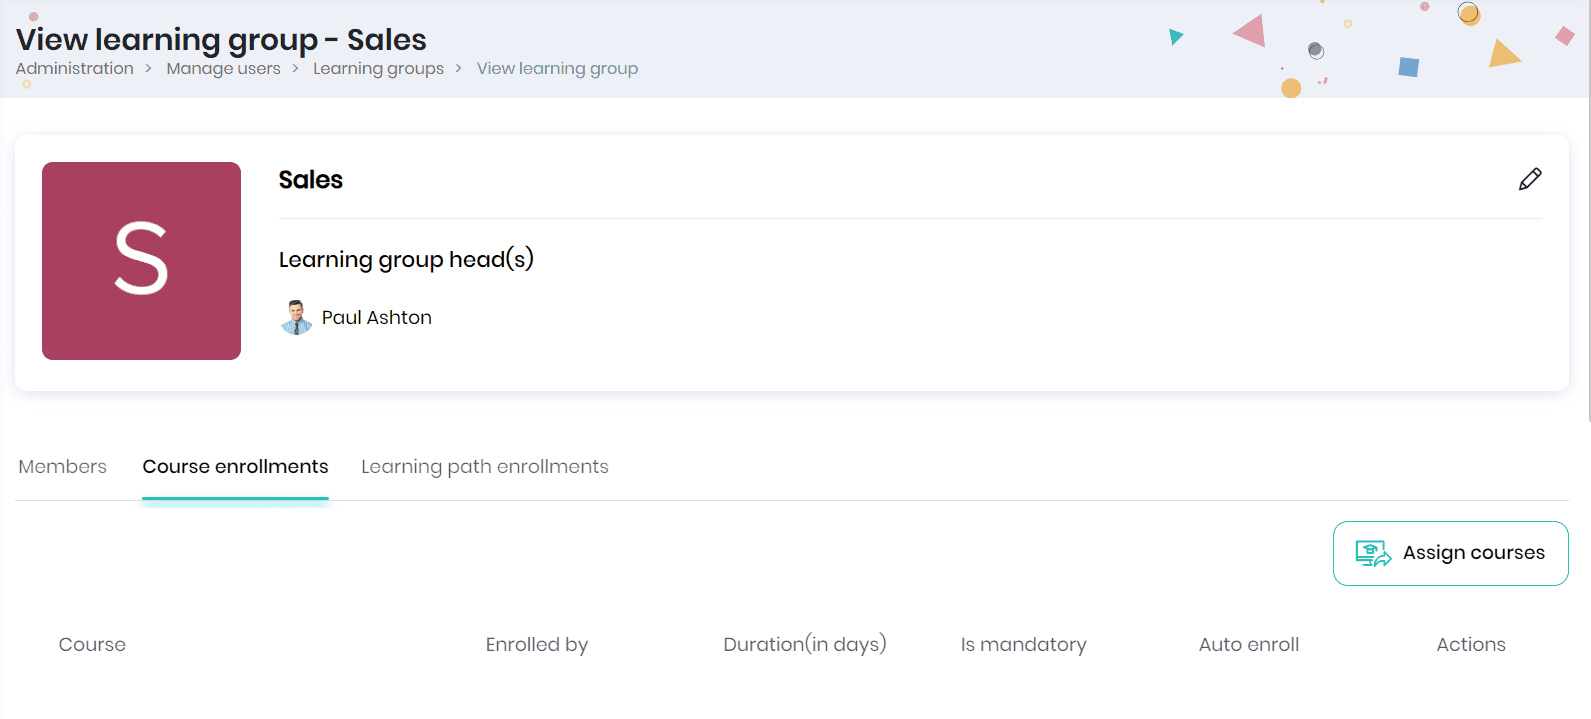
- Click on the Course Enrollments tab to view the courses assigned to the learning group.
- Click on the Assign courses button to assign courses to the learning group.
- After selecting the required courses, click on the Assign button to assign the selected course to the learning group. The Course assignment settings pop-up appears where you can configure the course assignment settings for the courses assigned to the group.
Job titles
A job title is a label that conveys a person’s role, responsibilities, and level within an organization. It provides a quick overview of the position and helps define an individual’s professional identity within a workplace. Job titles are essential for organizational structure, clarity in communication, and understanding of roles and hierarchies.
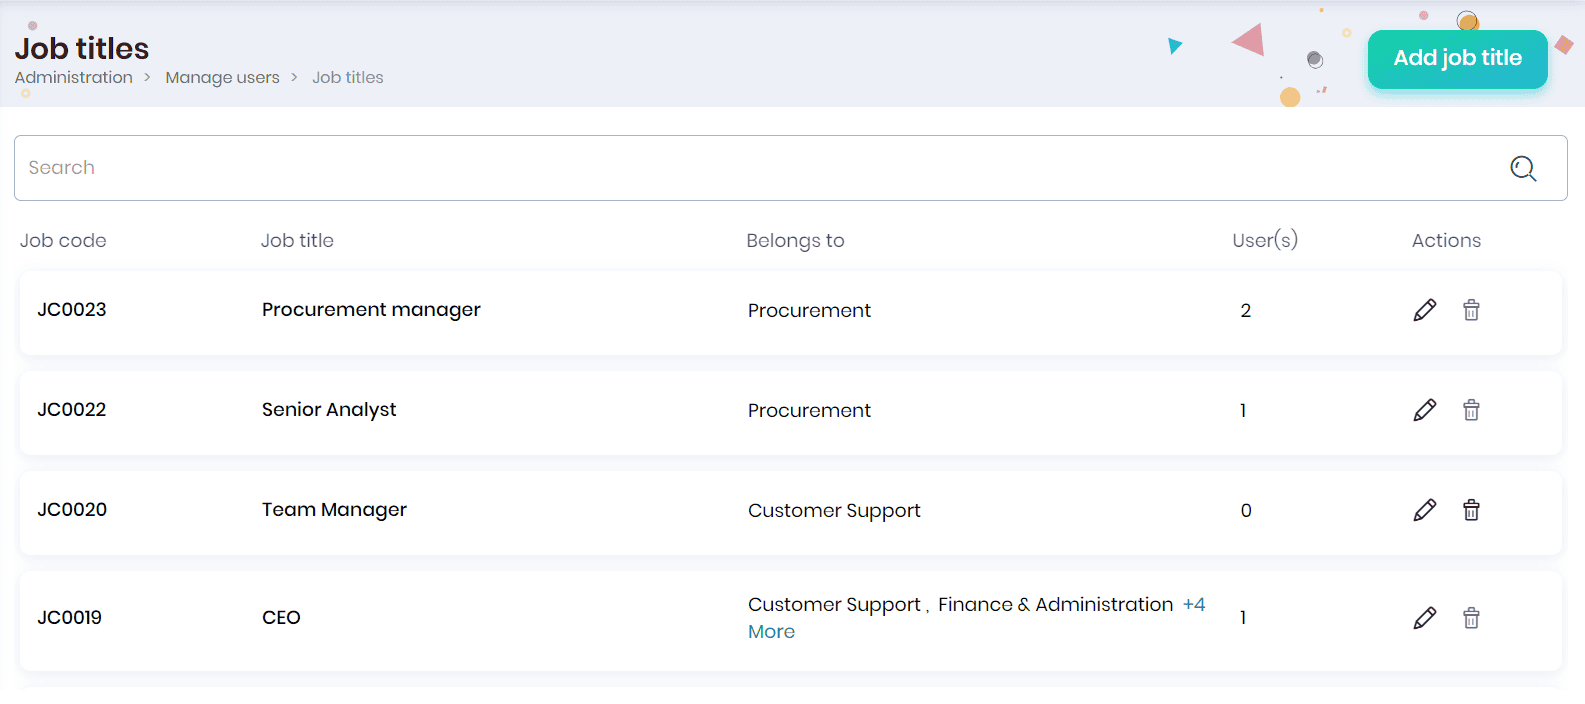
Click on the Job titles option to add/edit the job titles for the organization. The Job titles page displays the job code, job title, belongs to department, count of users in this job title and actions that can be performed.
Adding a job title
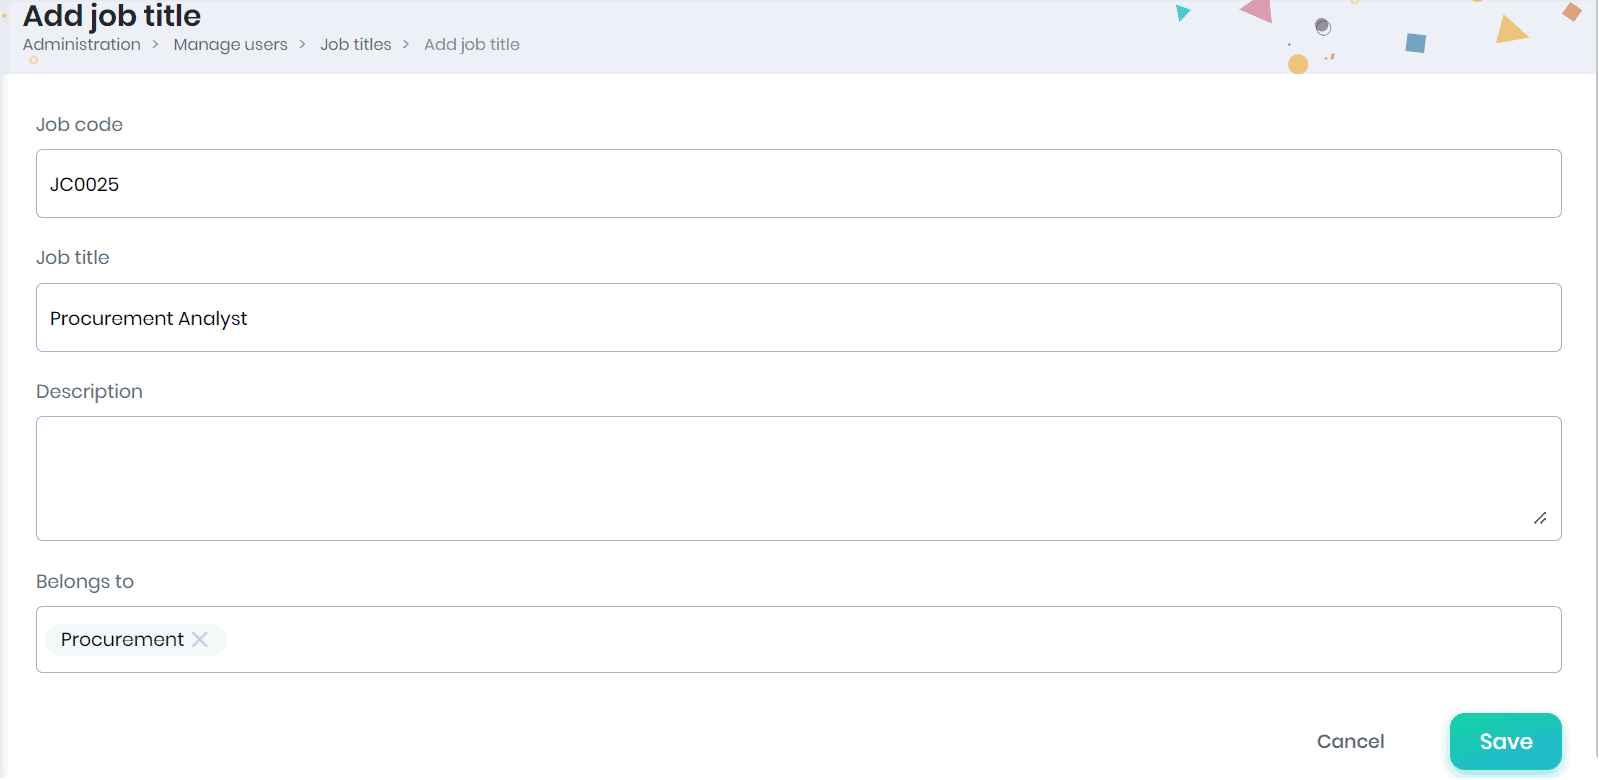
- Click on the Add job title button to add the new job titles in your organization.
- Enter the job title, description, select the departments and click on the Save button.
Note: System-generated job title code will be displayed by default.
Assigning knowledge areas to the job title
Administrators (users with Administrative privileges) can assign knowledge areas to job titles and set the required level.
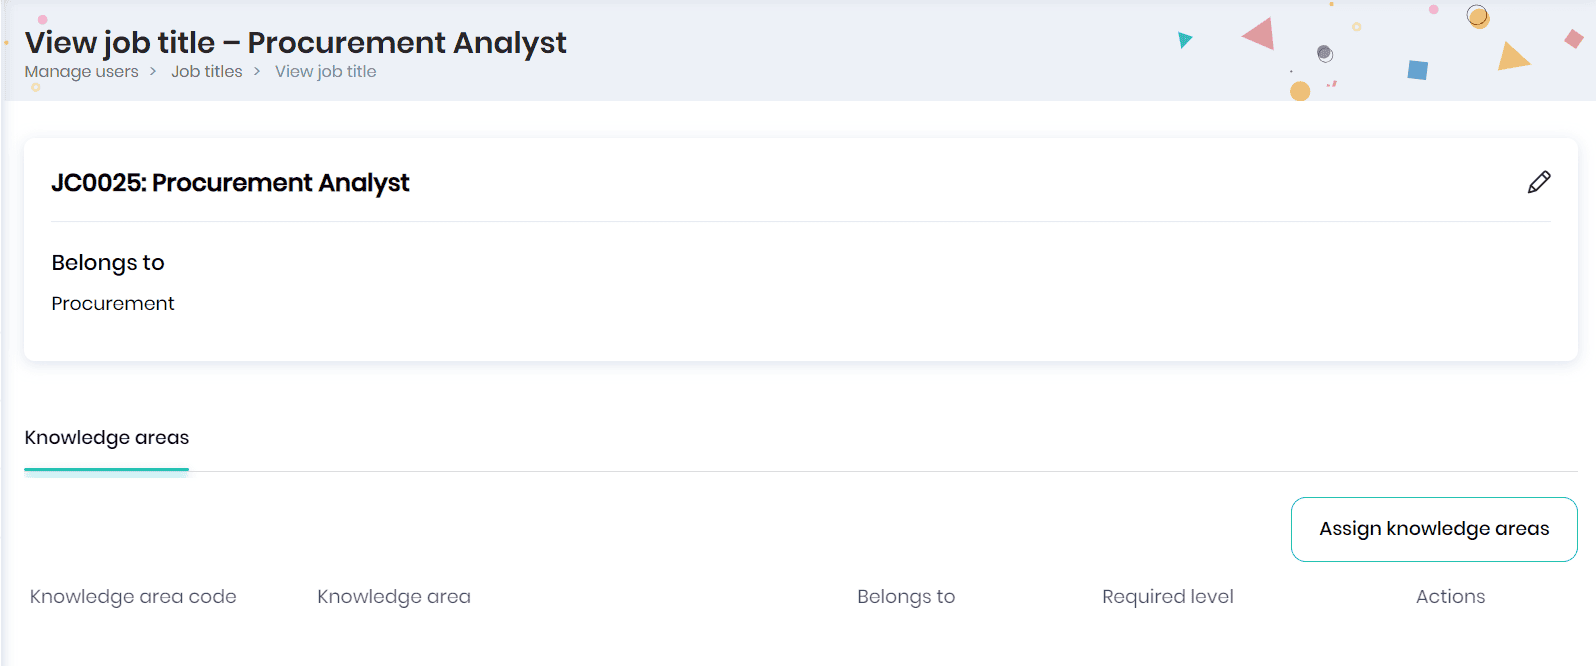
- Click on the Assign knowledge areas button to assign knowledge areas and the required levels for this job title.
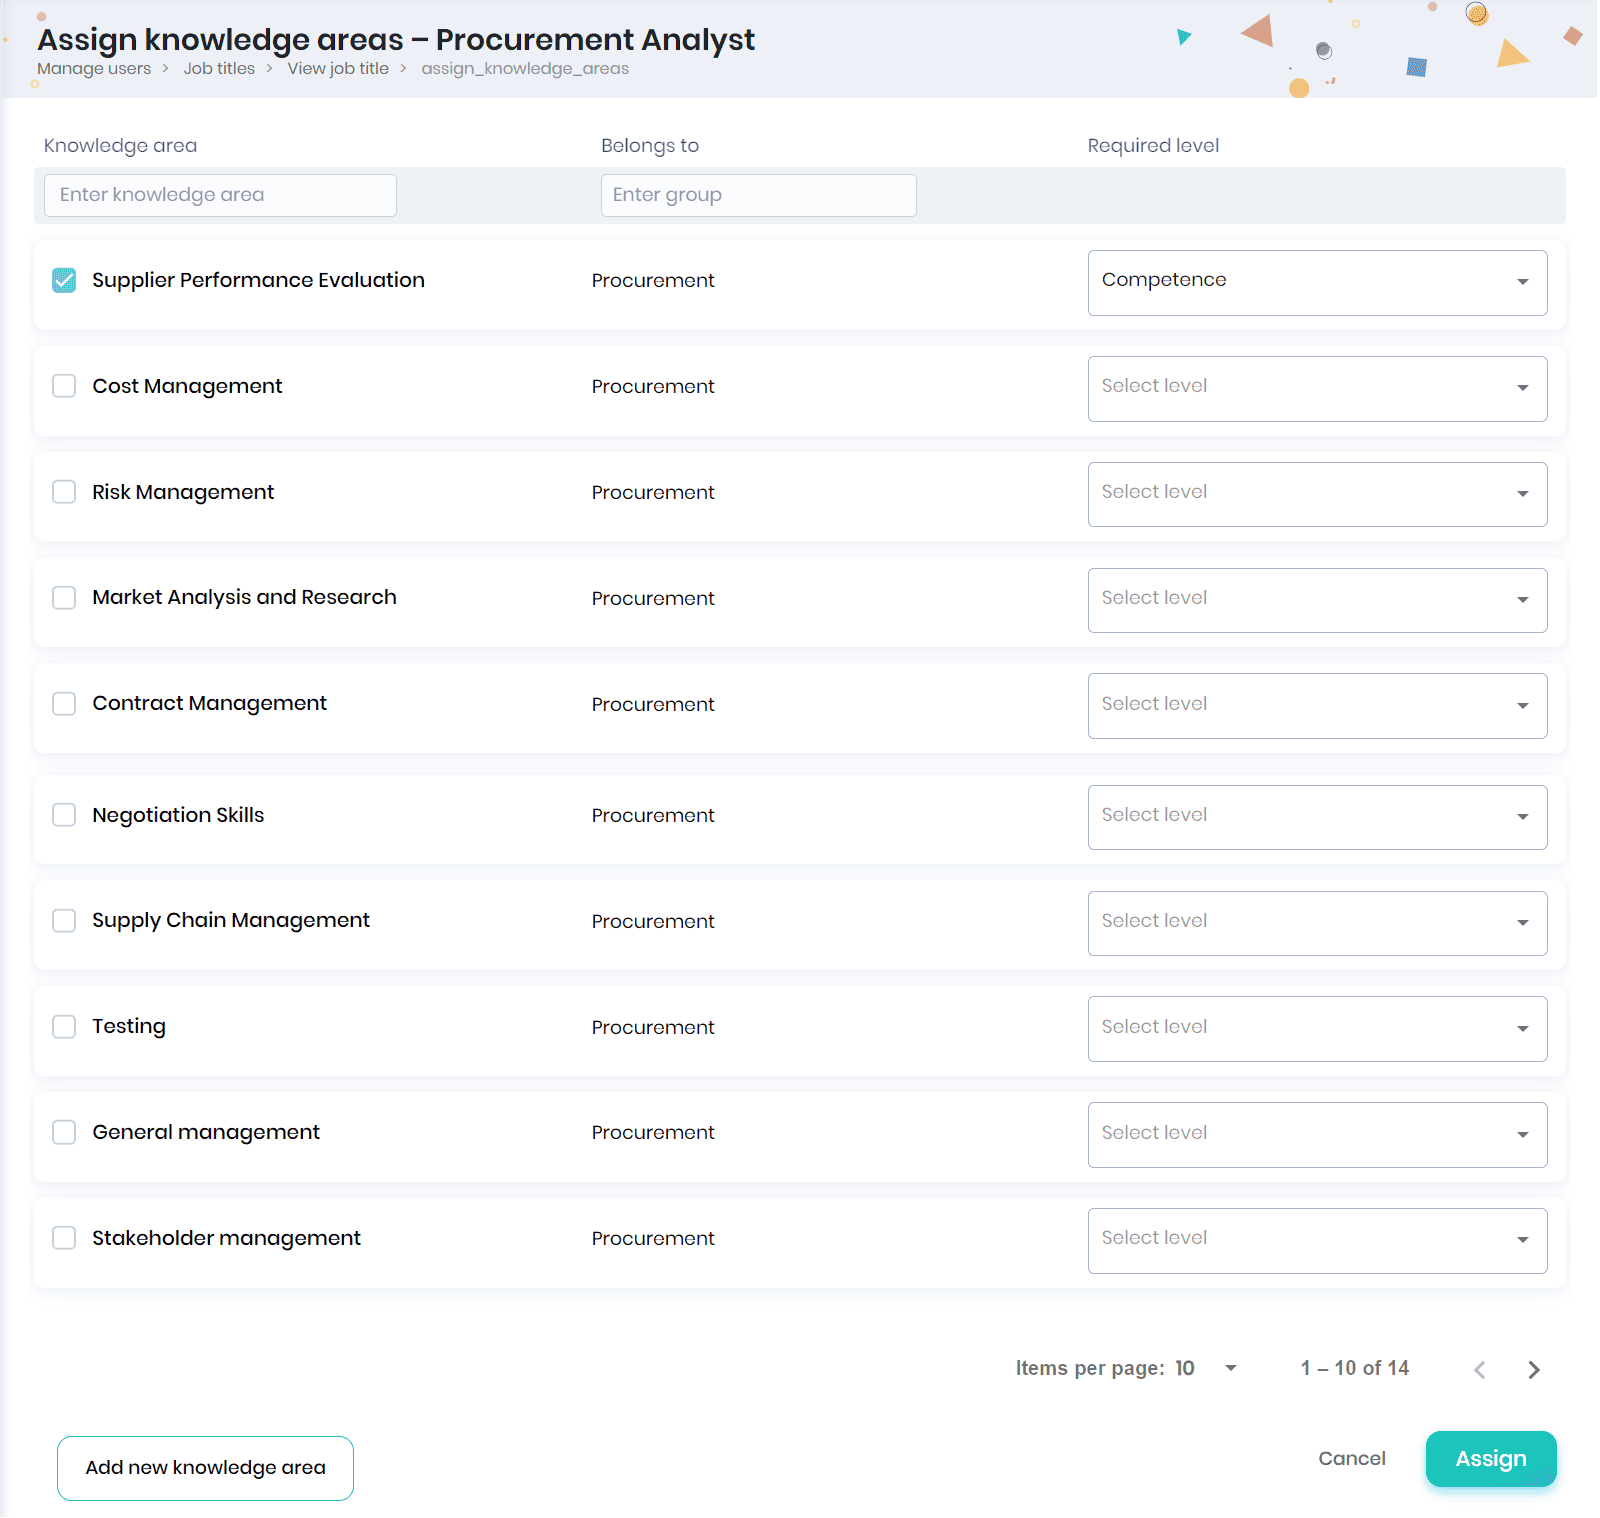
- The knowledge areas created for the job title’s group will be listed. Tick the required knowledge areas, select the required level, and click the Assign button.
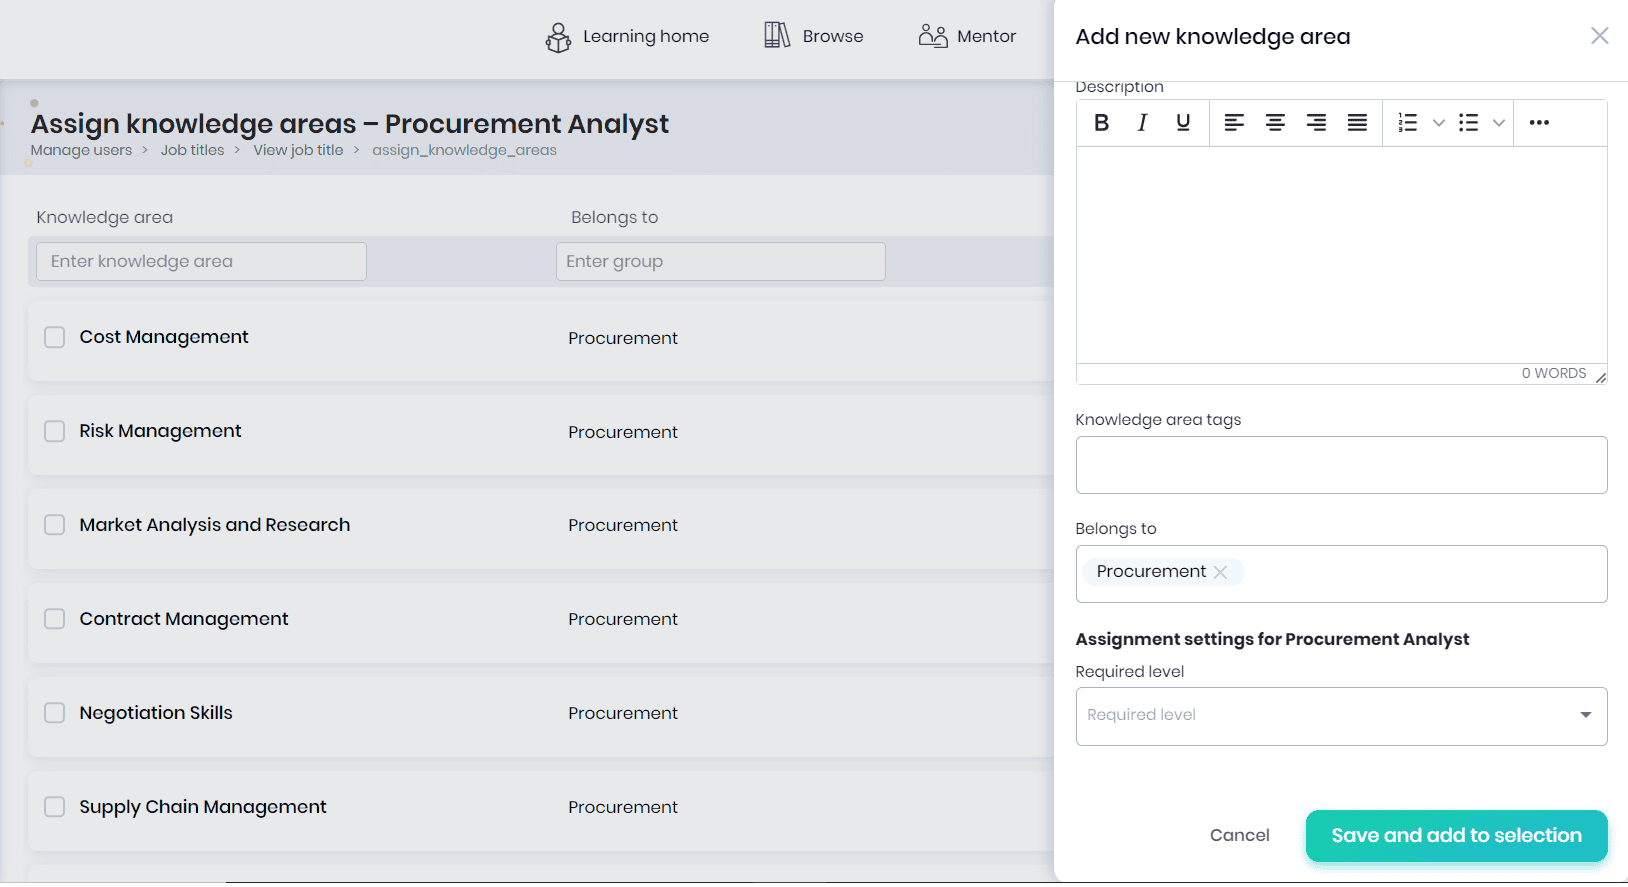
- In case you do not have the required knowledge area that has to be tagged to the job title, you can create a knowledge area from the Job Title page and set the required level.
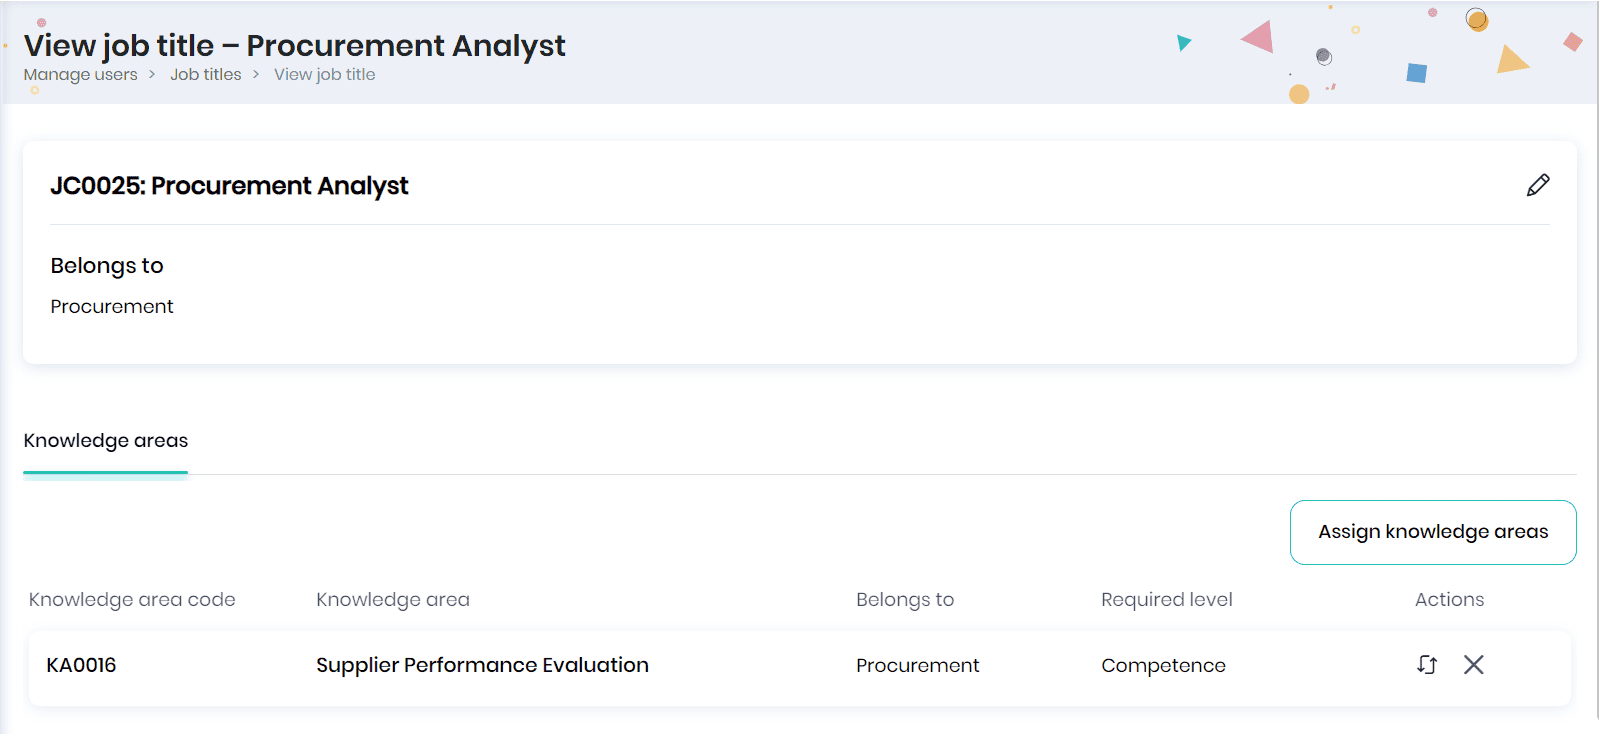
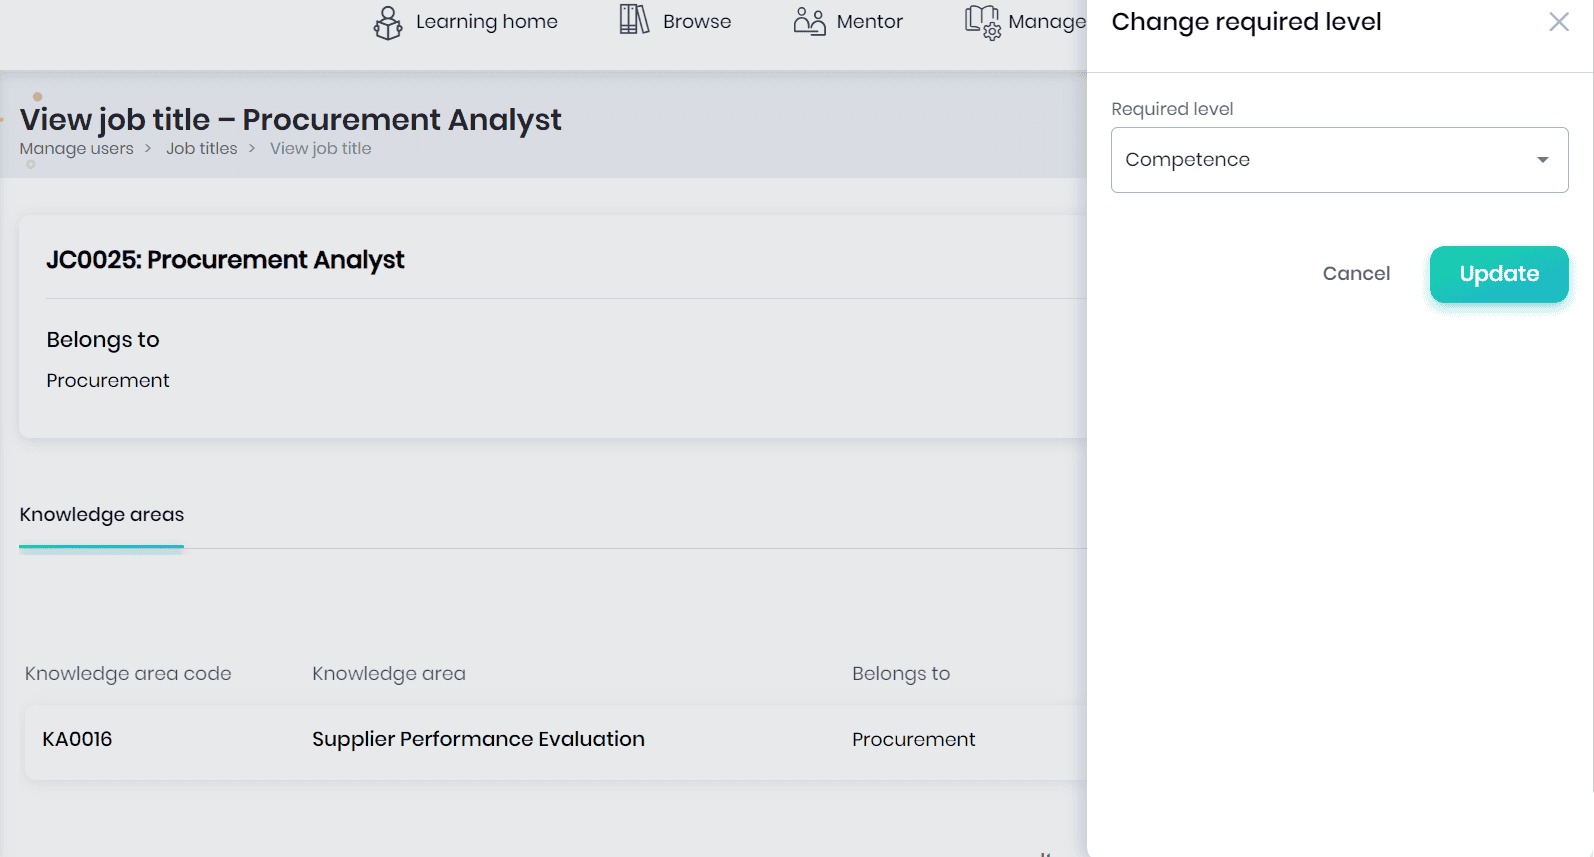
- Click on the Change required level icon to update the level of competence for this job title.
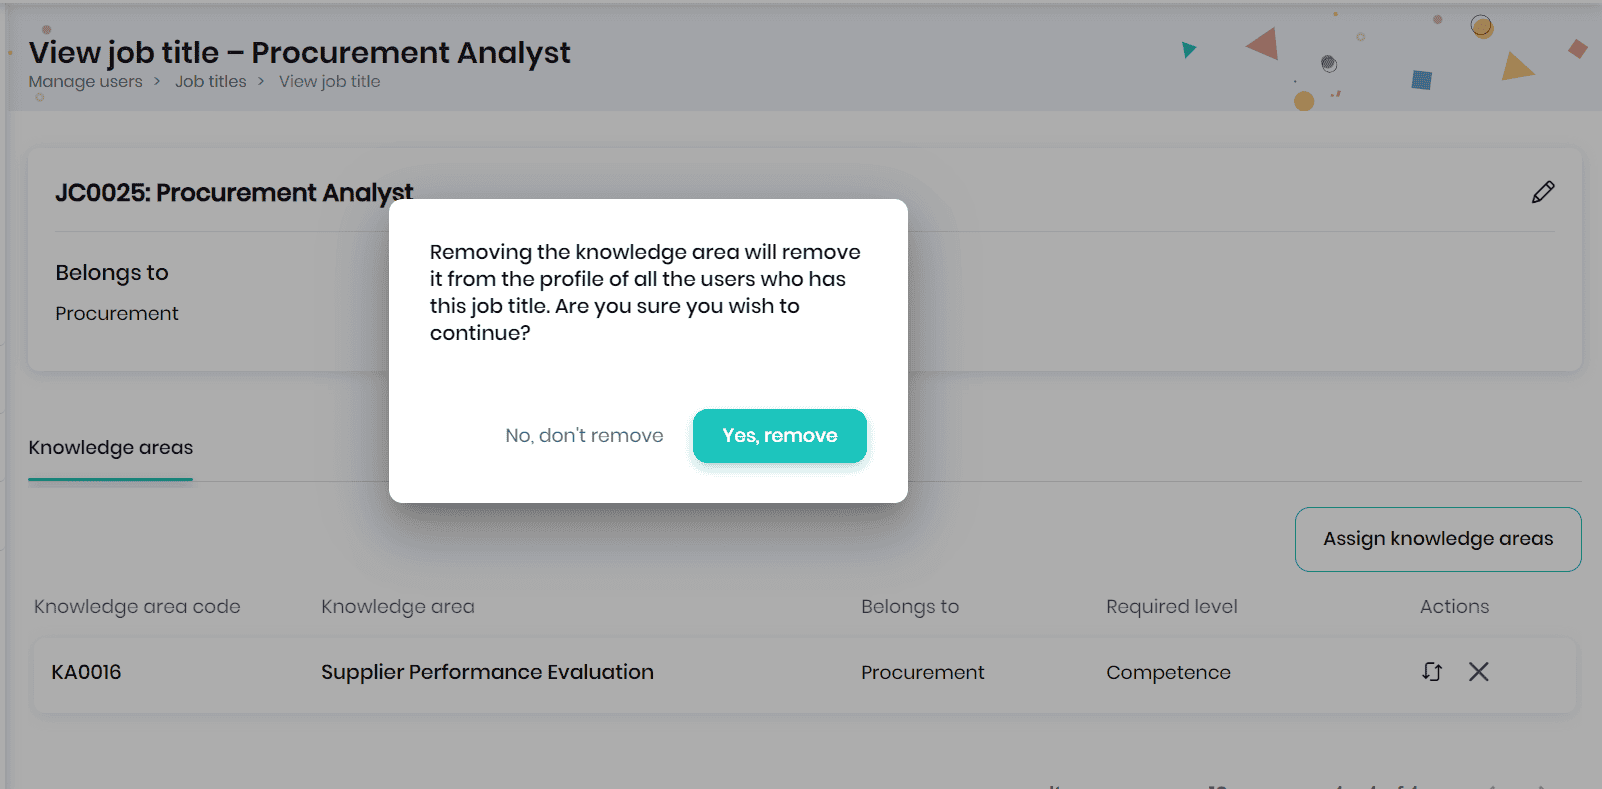
- Click on the Remove icon to remove the knowledge area from the job title.
- A confirmation message will appear, where you may click on the Yes, remove button to remove the knowledge area from the job title.
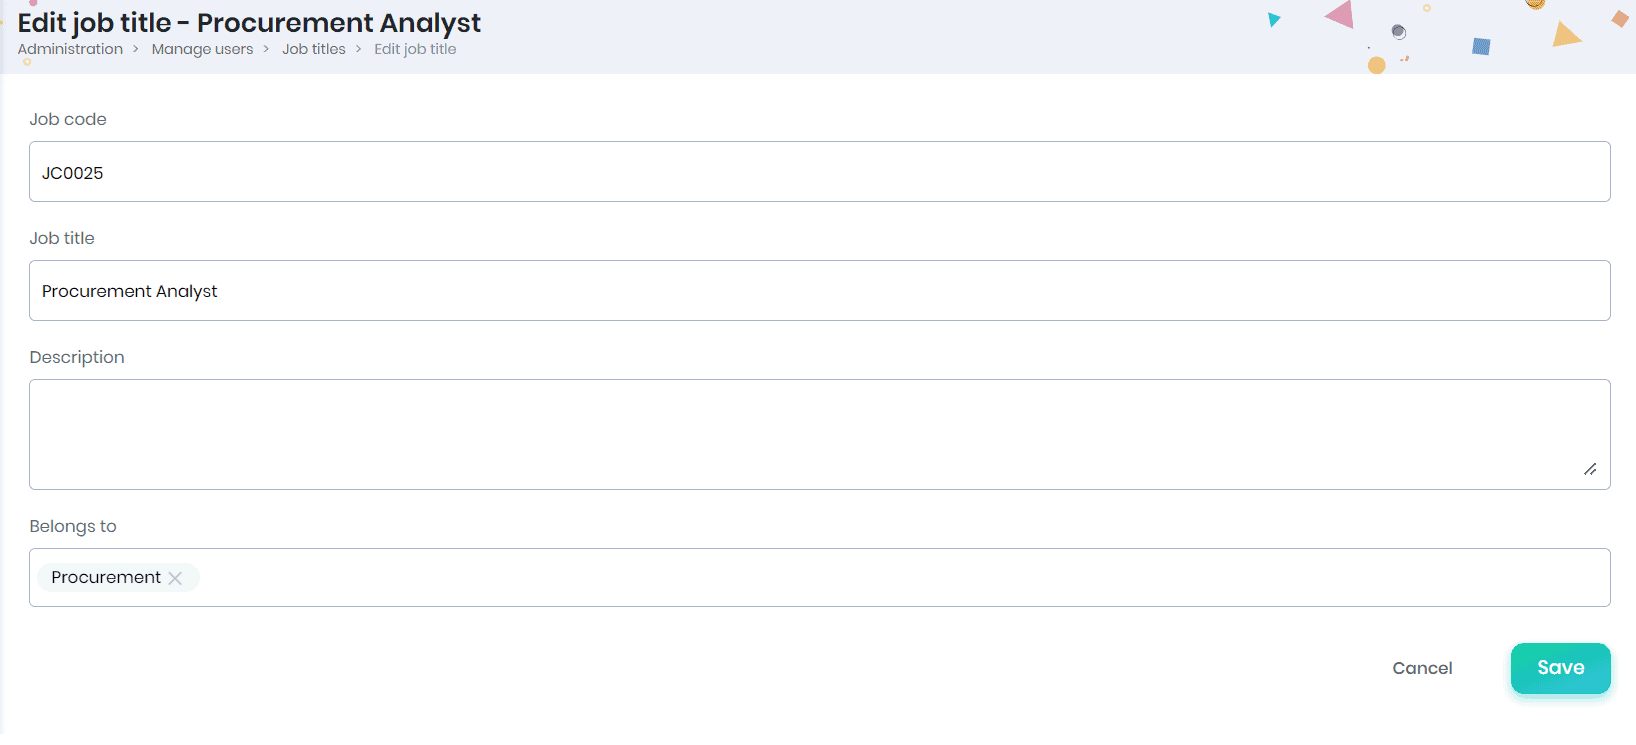
- Click on the Edit icon to edit the job title details and click Save.
- The edited job title details will be displayed in the Job titles page.
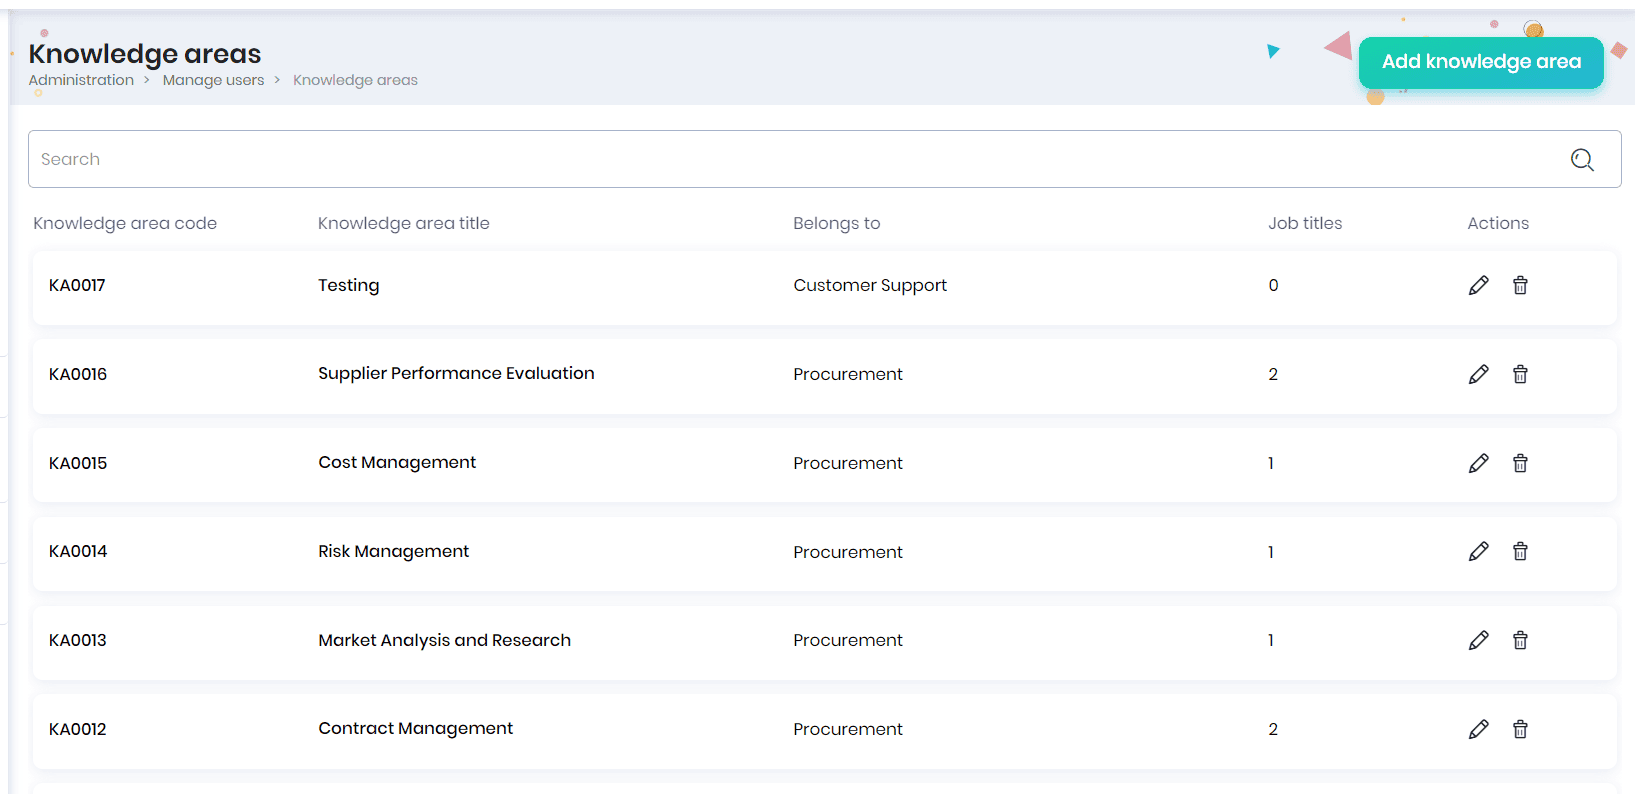
Knowledge Areas
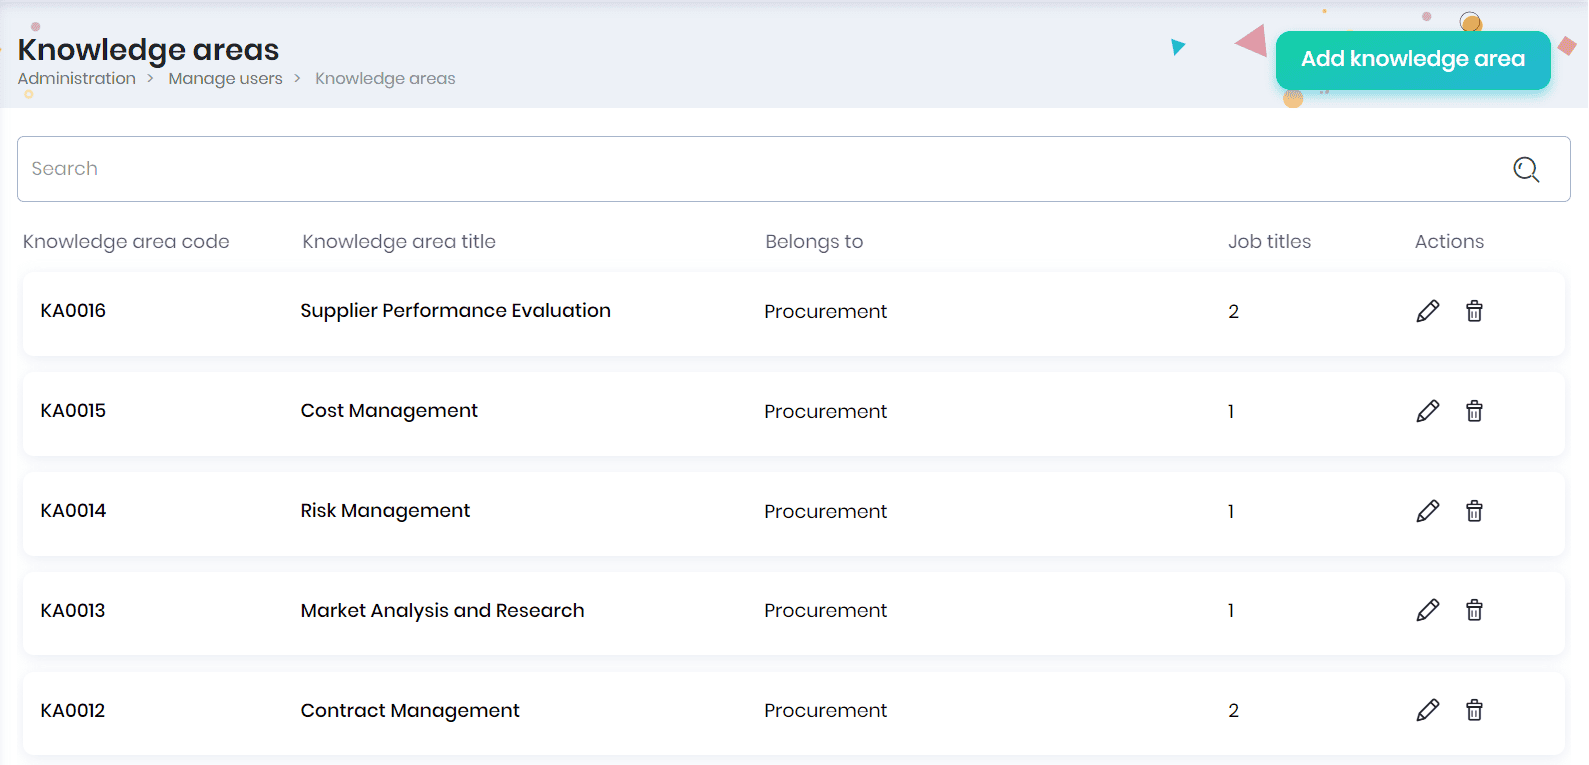
A knowledge area refers to a field of expertise that encompasses related information, skills, and understanding. It represents a focused area of knowledge within a broader subject or discipline, helping to organize and categorize information for effective learning, problem-solving, or professional specialization. Click on the Knowledge Areas menu to manage the knowledge areas defined for various job titles.
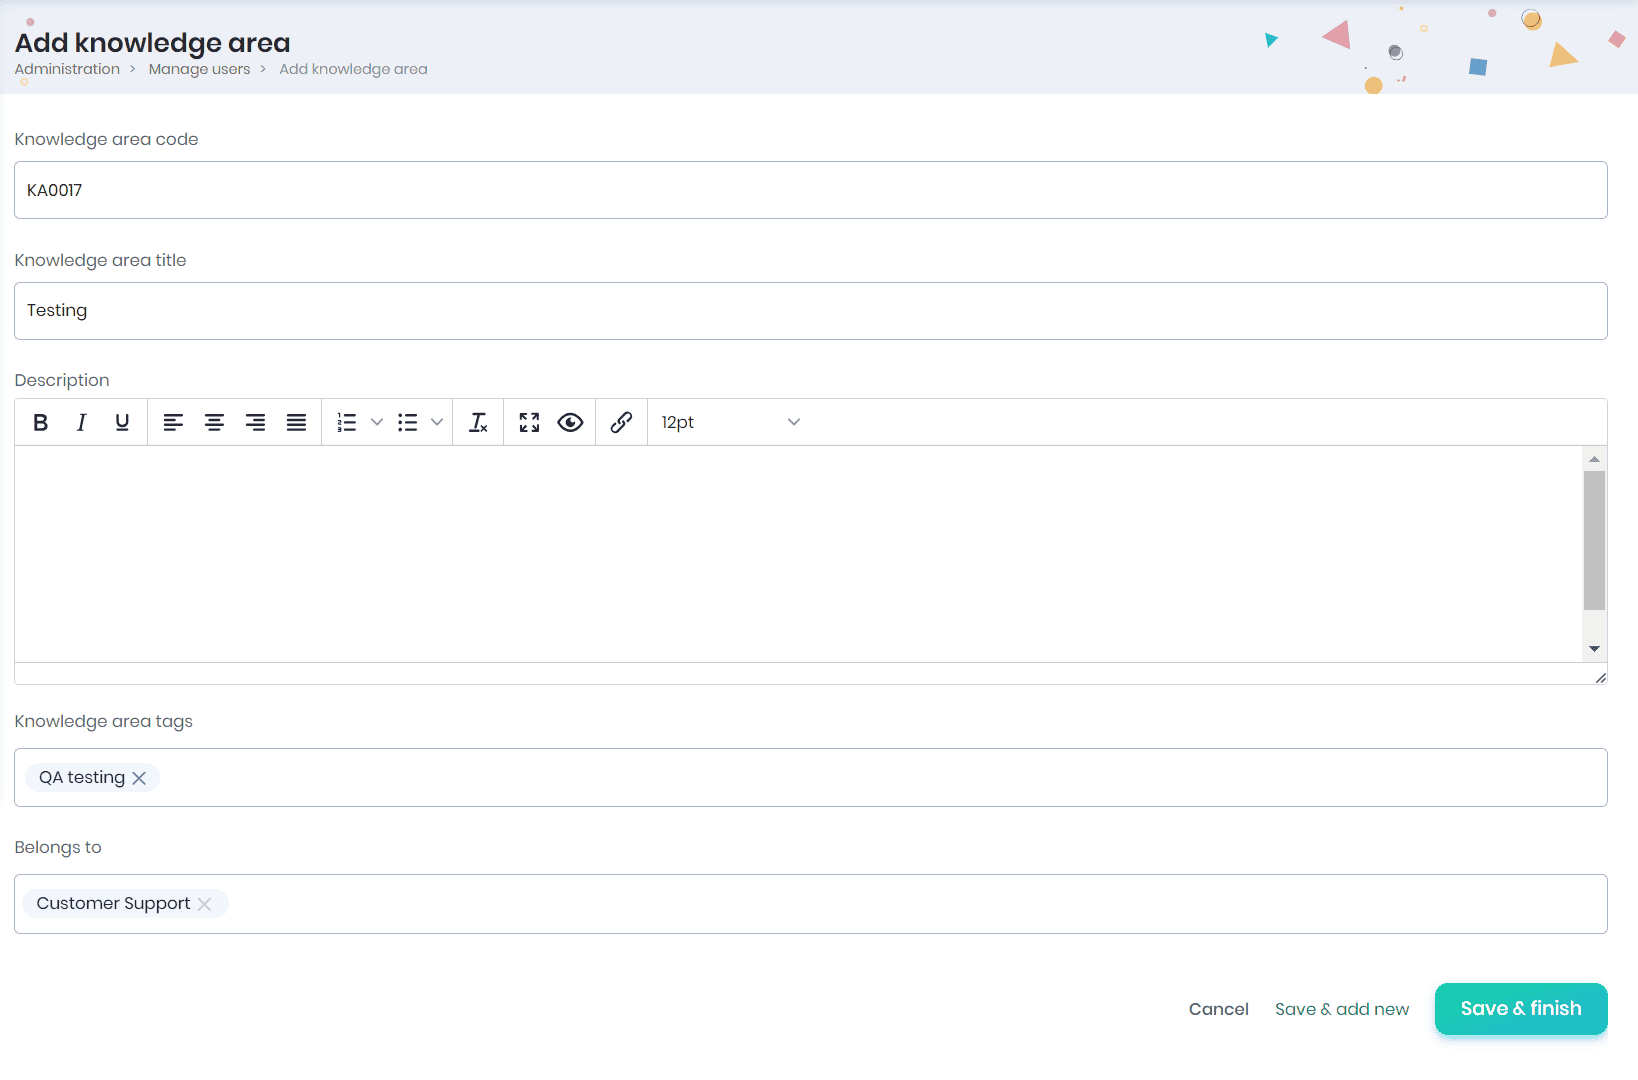
Adding Knowledge area
- Click on the Add knowledge area button to add a new knowledge area.
- Enter the knowledge area title, knowledge area tags (helpful for identifying the required skills), select the groups that require this knowledge area and click on the Save & finish button.
- Click on the Save & add new button to add another knowledge area.
Note: System-generated knowledge area code will be displayed by default.
- The knowledge areas created will be displayed in the Knowledge areas page.
Editing the knowledge area
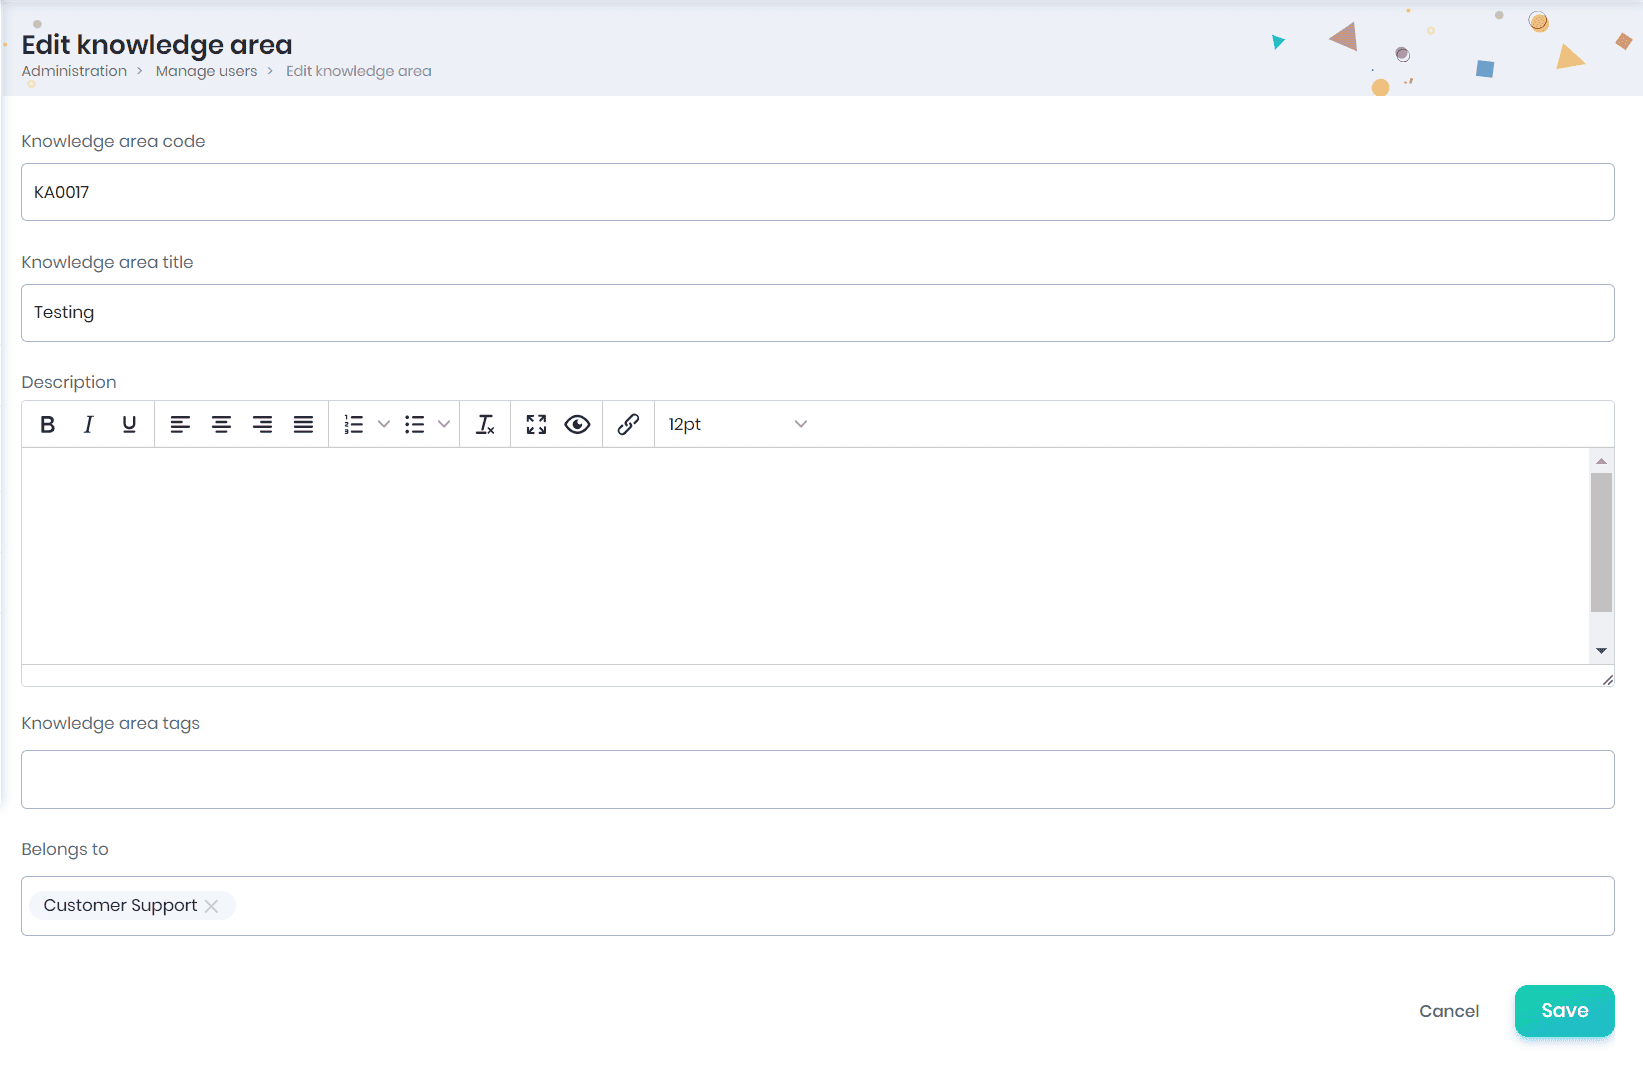
- Click on the Edit button to edit the knowledge area details.
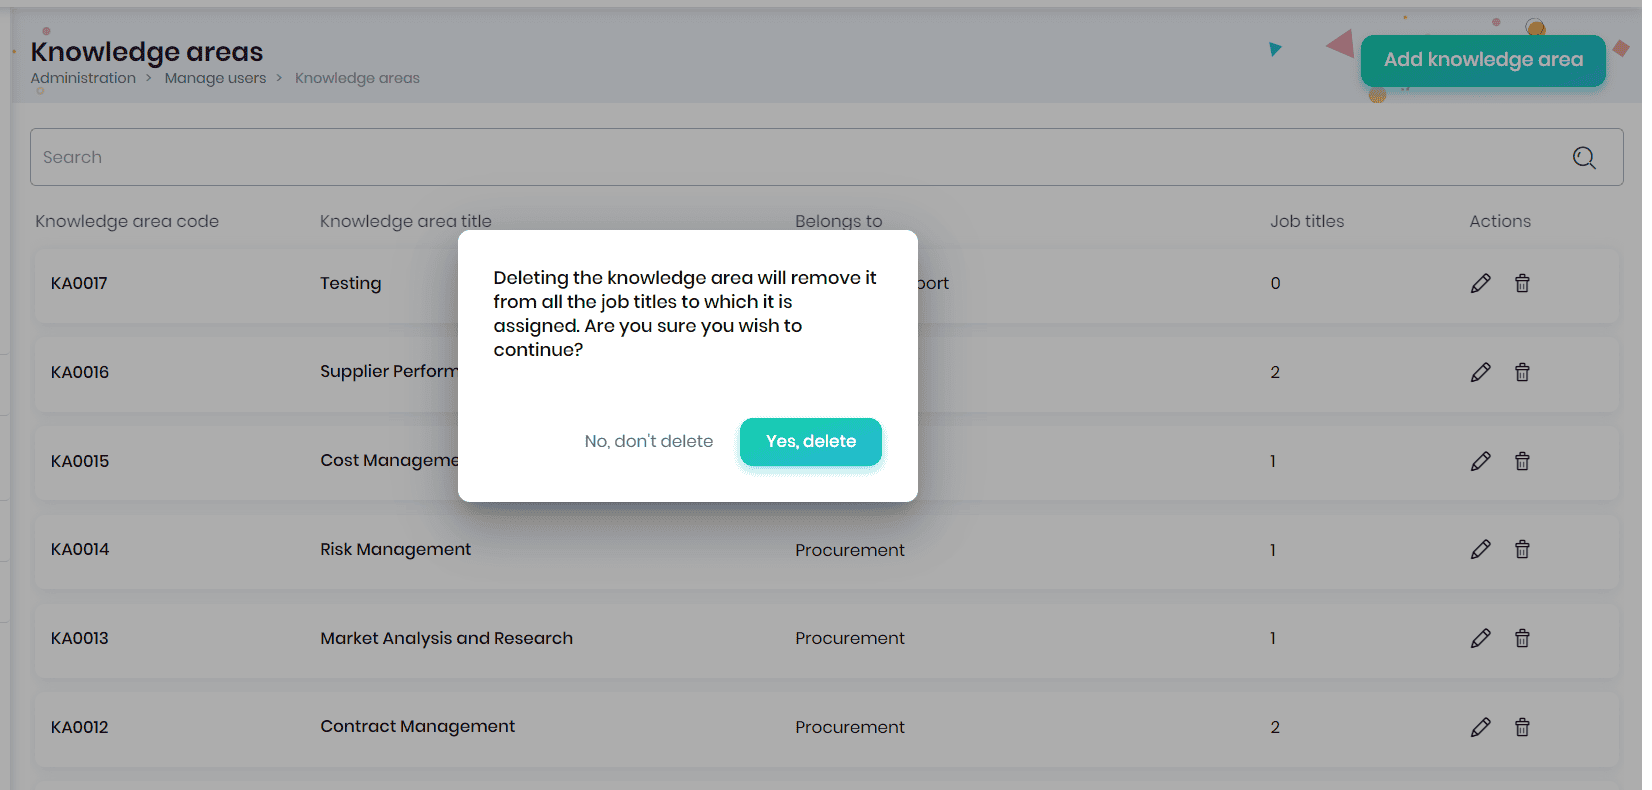
Deleting the knowledge area
Click on the Delete icon to delete the knowledge area. On clicking, a confirmation message appears, where you may click on the Yes, delete button to remove the knowledge area.
Pending Approvals
The Administrator can view the approval requests when an external user signs up to Skill Lake. After the Admin’s approval, the external user can login to his account and continue their learning journey.

- The name, email id, belongs to group, role, course, status and actions that can be performed will be displayed.
- You may edit the group and role of the user.
- Click on the tick option to approve the request.
- A confirmation message appears, where you may click on the Approve button.
- Once the Administrator approves the request, the external user gets an email to set his password and login to Skill Lake. Once the external user logs to Skill Lake, his course request will be approved and can learn the course.